WSO2 Identity Server is an open-source Identity and Access Management (IAM) product based on APIs that is designed to help you create effective IAM (CIAM) solutions for your customers. It is based on open standards such as SAML, OAuth and OIDC with options for on-premise, cloud and hybrid implementation. It supports complex IAM requirements due to its high degree of extensibility. In this article, we will explain in detail the capabilities and functionalities of the new version of WSO2 Identity Server 7.0.0 (WSOIS 7).
To do so, we’ll explore the following points:
|
1. Introduction to WSO2 Identity Server 7.0.0
In the latest release of WSO2 Identity Server 7.0.0 Beta6, we find a completely revamped administration interface, moving away from the traditional Carbon Console found in all products of previous versions.
This interface comes with new functionalities that help and streamline the administration of the entire product, such as SSO, identity federation, authentication, either multifactor authentication or adaptive authentication, login portal customisation, mail templates and more features that we will be addressing throughout this review.
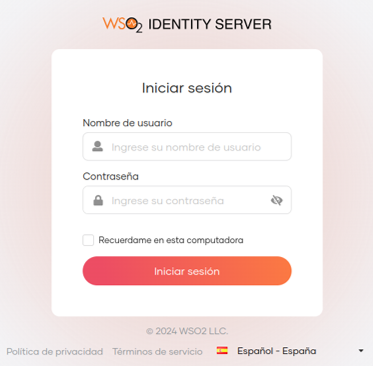
2. Login and Administration Console Page
To begin with, let’s take a look at the new administration interface.
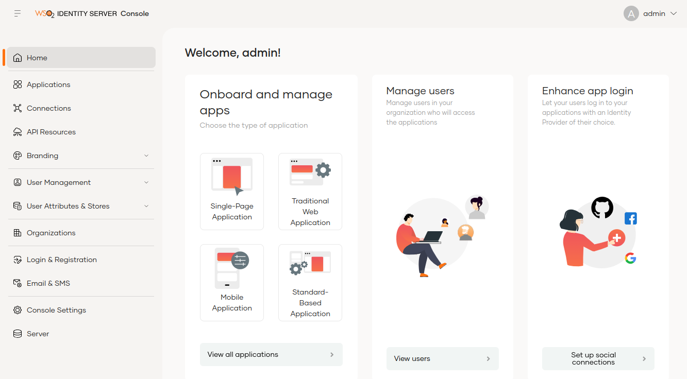
In the new administration console, the menu options have been redistributed and simplified, with the functionalities menu on the left side and a dashboard with quick access to the most frequently used operations.
Some of the most notable new features include the following:
- The Services Providers concept is changed to Applications.
- The IdPs can be found in the Connections section.
- The administration of users and roles is divided into two options which can be accessed directly by the administrators.
- Claims management is made easier with the tool’s new approach through the User Attributes & Stores section.
- Access and user registration settings are now available in Login & Registration, with options to enable and configure access policies, passwords, authentication factors, self-registration and more.
3. Capabilities of the new version of WSO2 Identity Server 7.0.0 (WSOIS 7)
In this section, we will review each of the key capabilities offered by the new version of WSOIS 7.
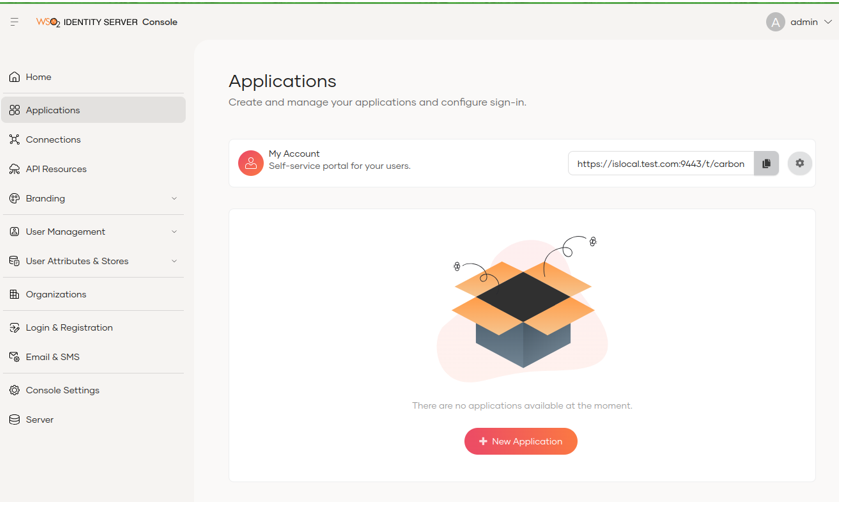
3.1 Applications
It allows us to define different types of service providers to manage access to web applications, mobile applications or M2M applications.
By default, the application that allows us to access the My Account portal is defined, which is where users can access their data.
It is easy to create a new application through the new graphical interface by selecting the type of application to be created and then filling in the necessary information.

For example, if we select the traditional web application, we can see that the information to be loaded is simplified, allowing us to choose between the OIDC or SAML protocol simply by selecting the required option.
Once the basic information of the application has been defined, we are presented with a screen divided into tabs where we can define the general information, protocols, user attributes, login methods and roles, among others.
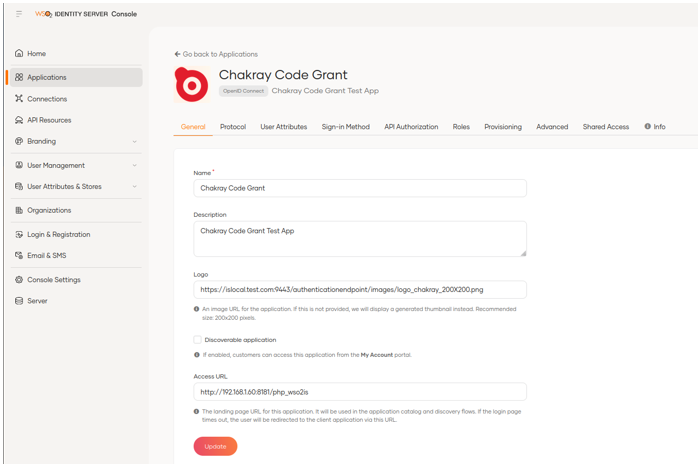
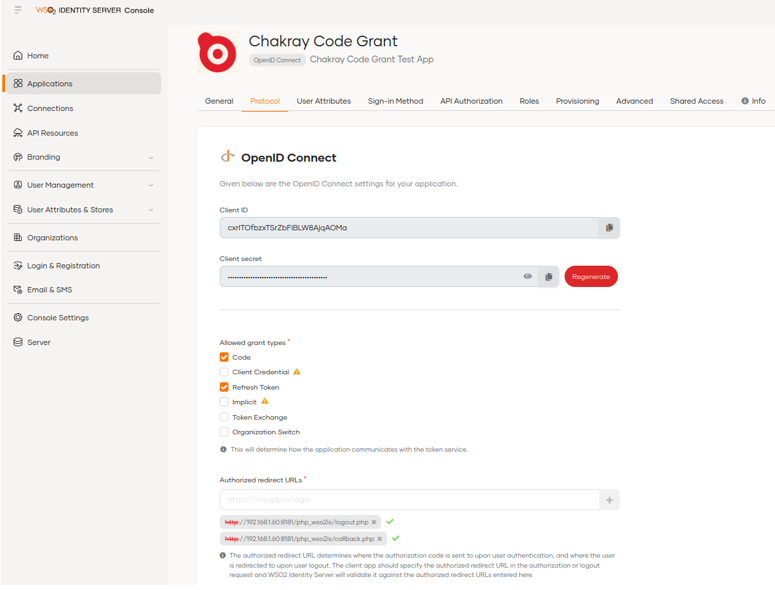
Another new feature is the way in which authorised URLs are added by simply adding them in theProtocol tab in theAuthorized Redirect URLs field and clicking the button.
We can see the application security information such as client id and client secret.
On the other hand, in this same interface we can define the domains that we will allow to avoid CORS errors without the need to modify the deployment.toml configuration file as was done previously.
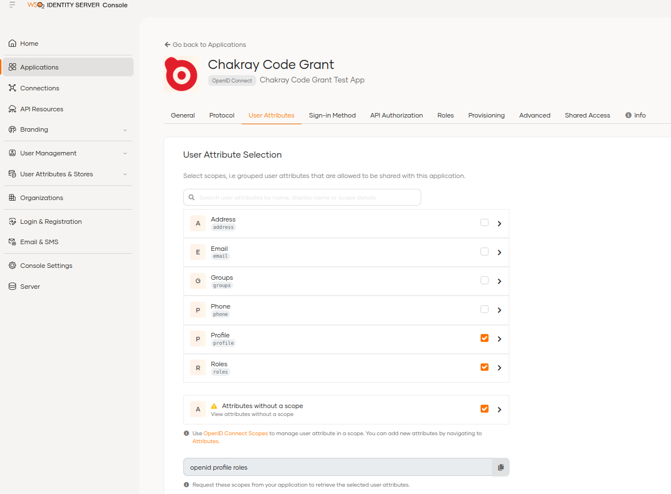
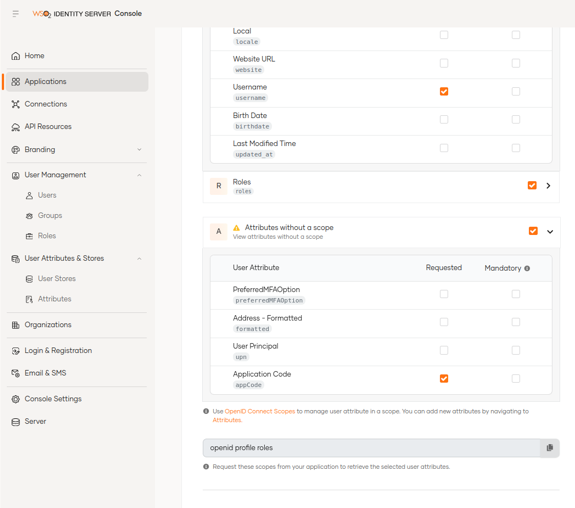
We can select the customer attributes (Claims) in the User Attribute tab more quickly.
Let’s take a look at the Sign-in Method tab, where we can define how a user will be authenticated through a user-friendly interface and can quickly configure one or more authentication methods (MFA). Let’s start by adding the basic authentication (User + Password).
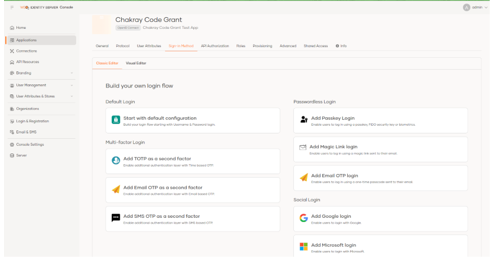
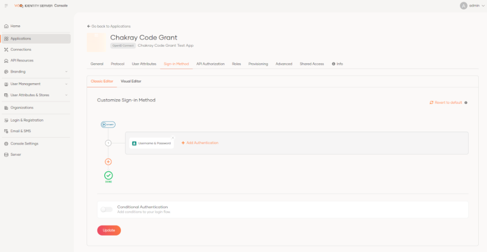
At this point, we will be able to access our web application using the basic identity server authentication with a valid username and password.
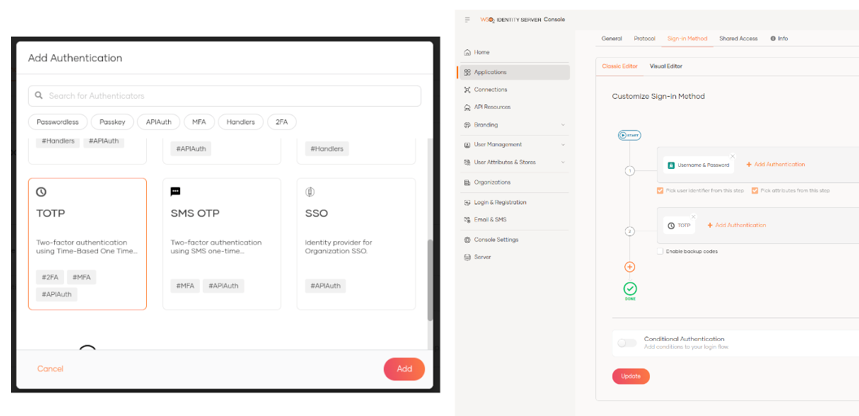
If we want to increase the security level with a second authentication factor, all we have to do is click on the + button and choose another method; as an example we will use the TOTP factor, which in this version of IS is very easy to implement.
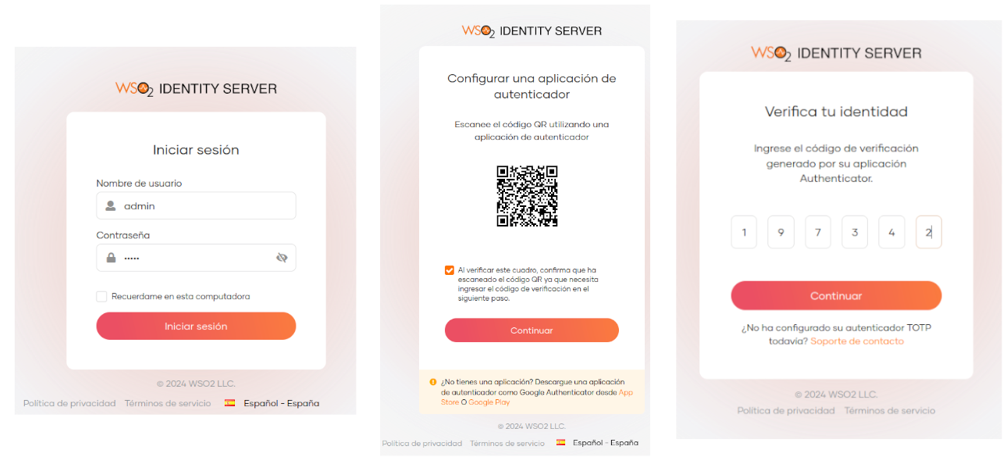
Once this configuration is applied, when trying to access our application, the identity server will ask us to scan a QR code from any TOTP mobile application to link it with the user that is logging in; I used the Google Authenticator application. Once linked, the temporary code provided by the application is requested and if it is valid it will allow access.
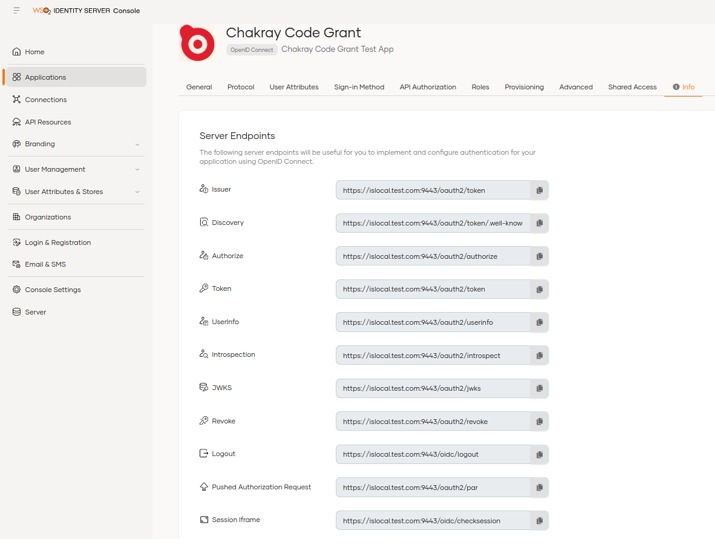
We can see the endpoints of the application in the Info option. Previously we had to go to the Identity Providers Resident option to see them.
3.2 Connections
In this section, we can configure the expiration time and length of the SMS/Email OTP options.
In addition, the TOTP, Magic Link, Passkey and SSO configuration will be available and will direct us to the application where we want to use these options.
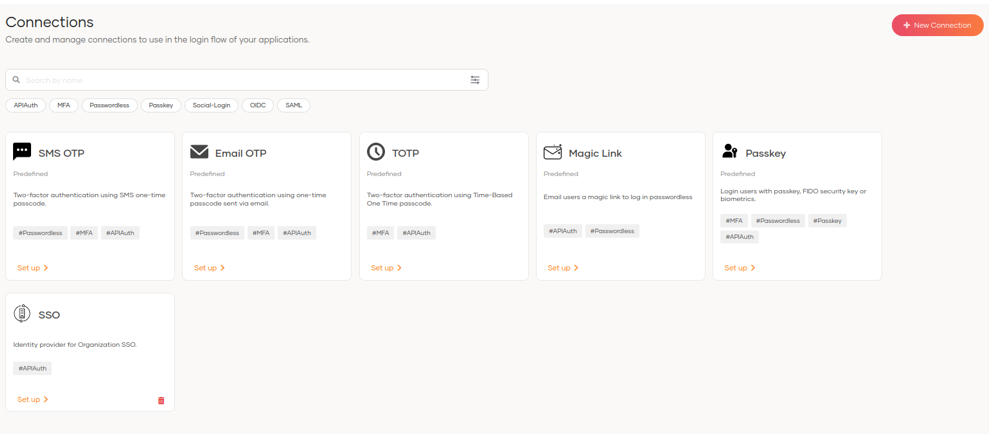
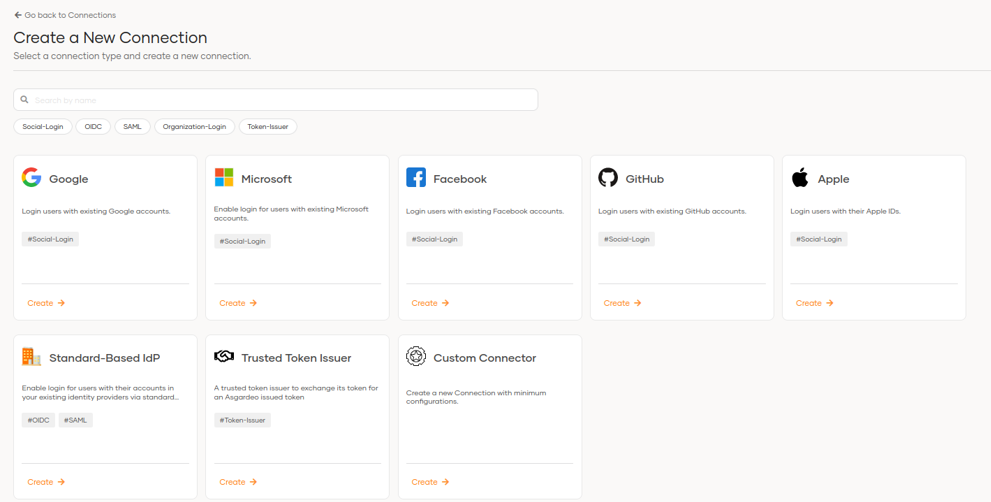
We will also be able to create new connections to federate and authenticate through social networks such as Google, Microsoft, Facebook, Github and Apple.
We have the traditional options to connect to IdPs or establish custom connections.
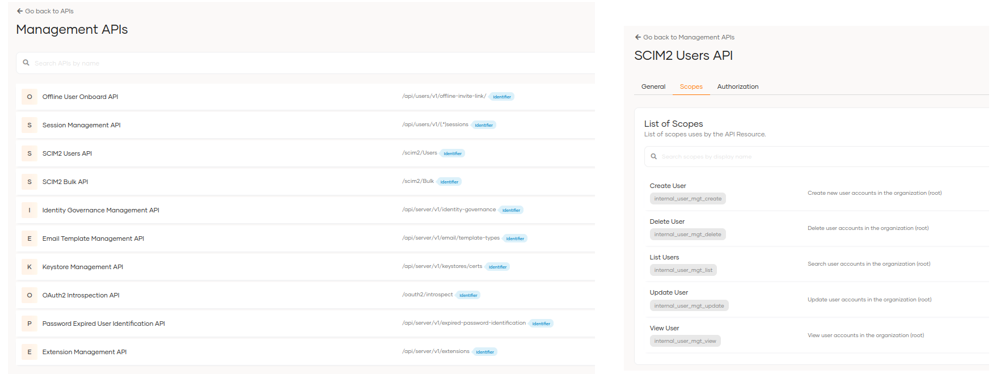
3.3 API Resources
In this section, we can create and manage the APIs used to define the scopes and permissions that our applications can adopt.
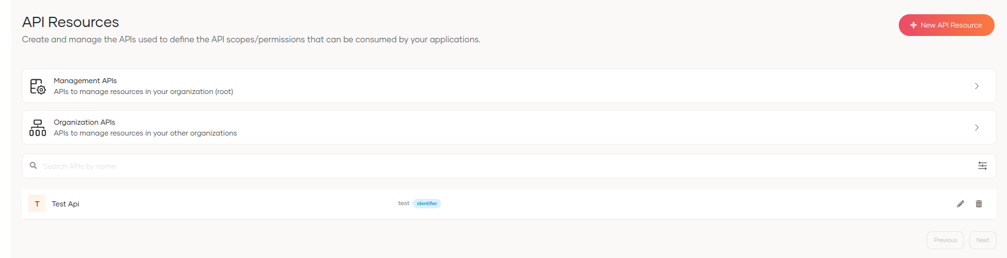
By clicking on management APIs, we can see the available APIs and update them if necessary.
3.4 Branding
This section is divided into 2: Styles & Text and Email Templates.
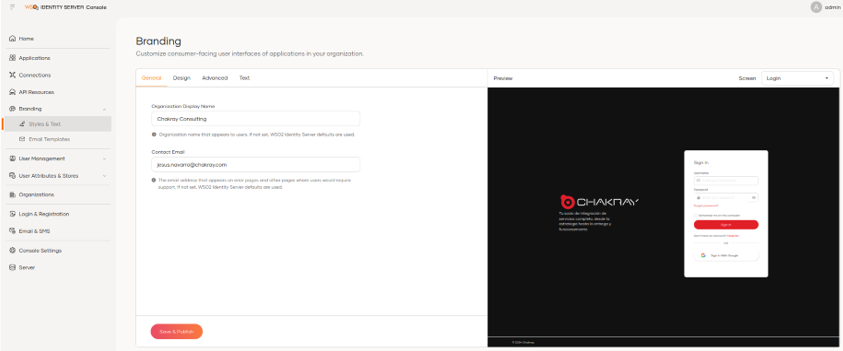
3.4.1 Styles & Text
This is a great new feature in this version as it allows you to completely change the colour palette, texts, logos and styles from the administration console with an intuitive and very detailed interface. It has the following notable features:
- Option to modify interface designs without the need to edit and add the extension folder with the styles.
- Ability to select the interface position.
- Button, lettering and background colours.
- Option to change the interface language without changing the properties file.
Ability to add text without modifying configuration files.
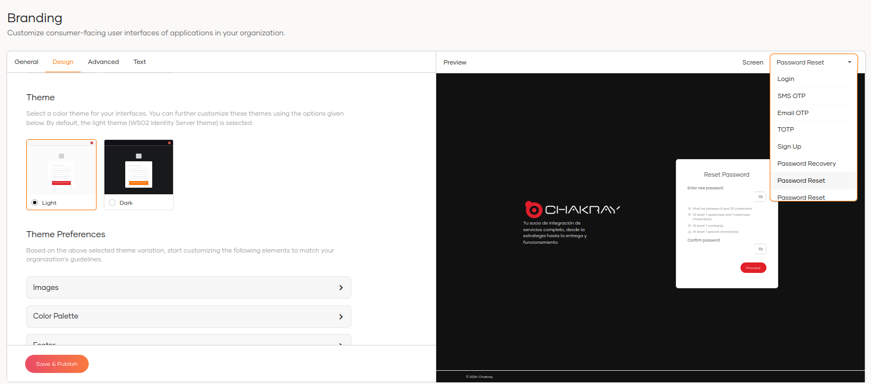
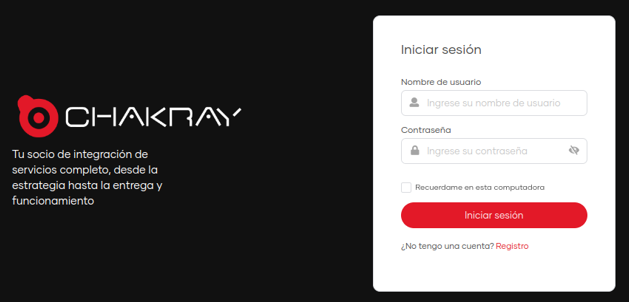
The modification of the styles will apply for the following interfaces.
- Login
- SMS OTP
- EMAIL OTP
- TOTP
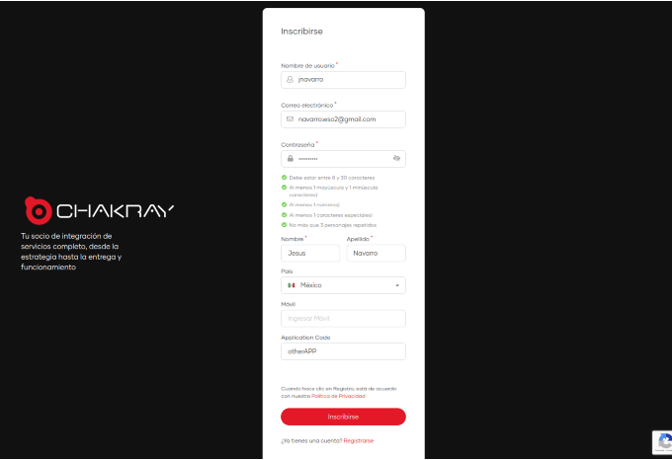
- SIGN UP
- Password recovery
- Password reset
- Password reset success
- Portal My ACCOUNT
We can see the preview of each interface by selecting it in the Screen option, for example if we want to see what the Password Reset interface would look like.
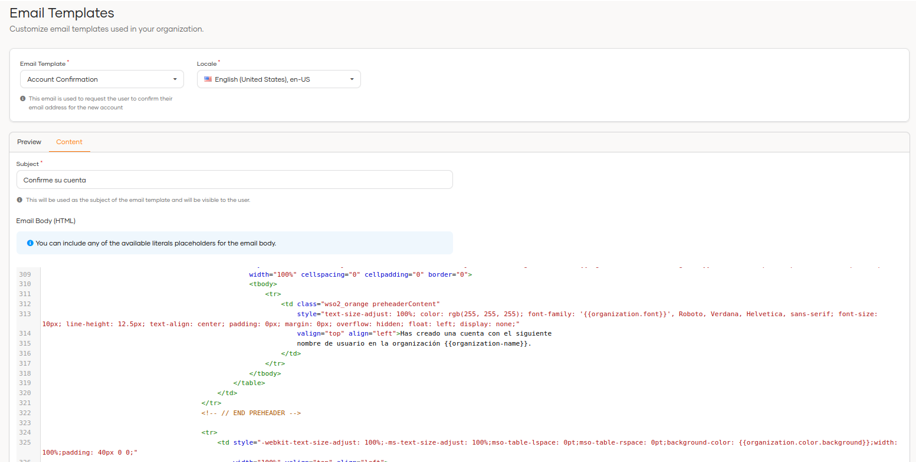
3.4.2 Email Templates
In this section, we can modify the email templates directly from the new administration interface without having to leave the Content option, and we can observe the changes that are being made from the Preview view.

5. User Management
User administration is redefined in this version of identity server and allows the management of users, groups and roles to be more dynamic, simple and efficient.
The User Management section is divided into user, groups and roles.
5.1 User
Now we can access the user management directly with fewer clicks in the options menu; from this section we can perform the following actions:
- Create users
- See users
- Edit users
- Delete users
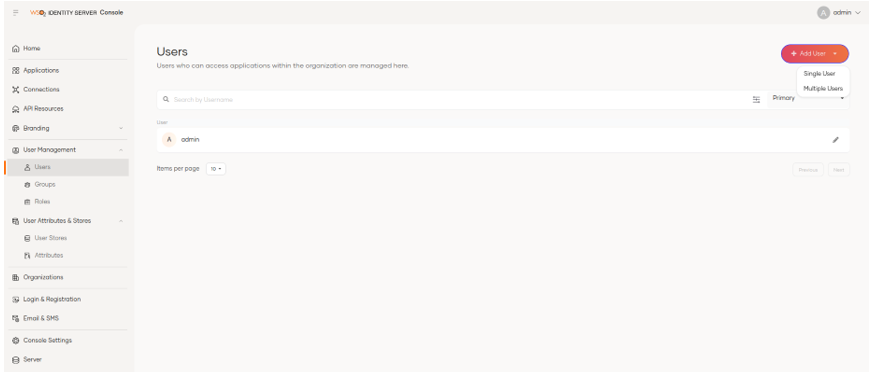
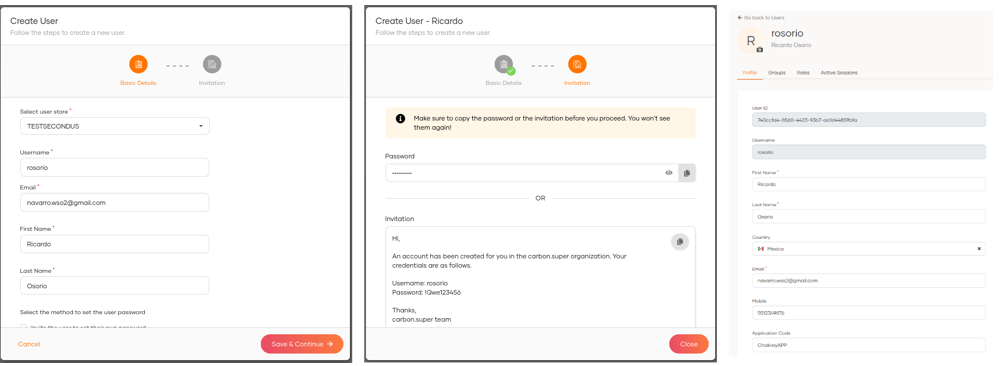
By selecting the + Add User option, the user creation process starts, where the Basic Information, Groups and Notification options of the creation will be requested.
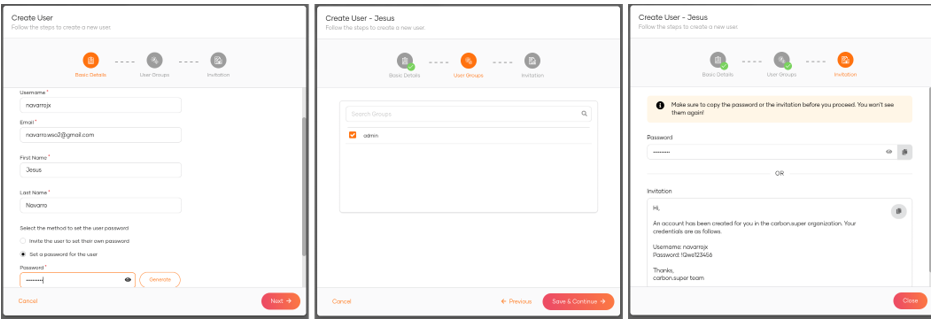
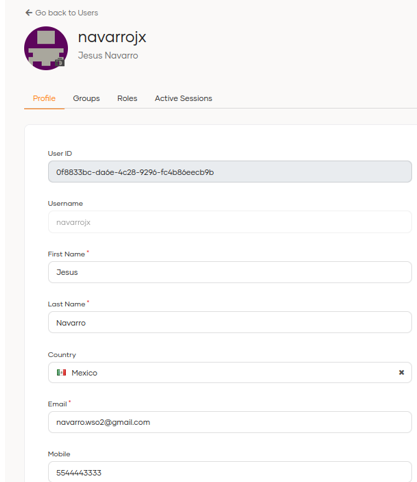
Once the user is created, we can update the rest of its attributes (Claims).
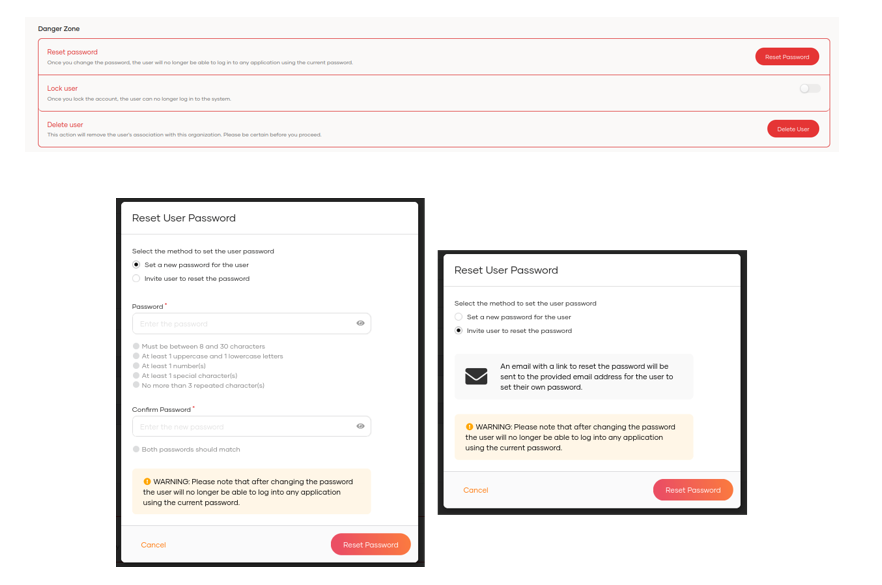
We can also change the password, force the password change with an email notification, lock and delete the user.
5.2 Groups
In this section, we can see the available groups and create new ones.

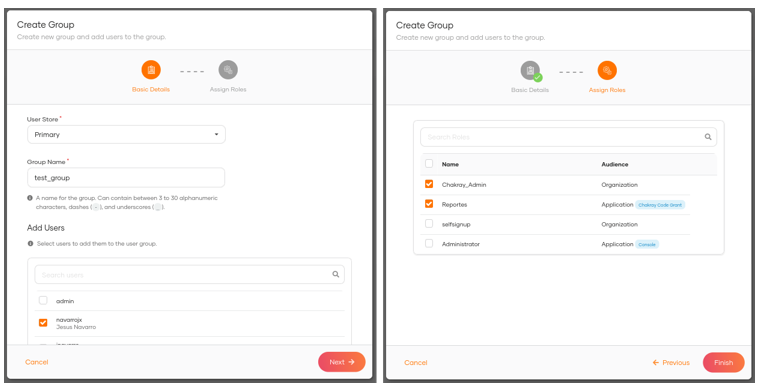
When we click on + Add Group, the user and group name are requested and we can select the users associated to this group. We can also assign roles to the new group.
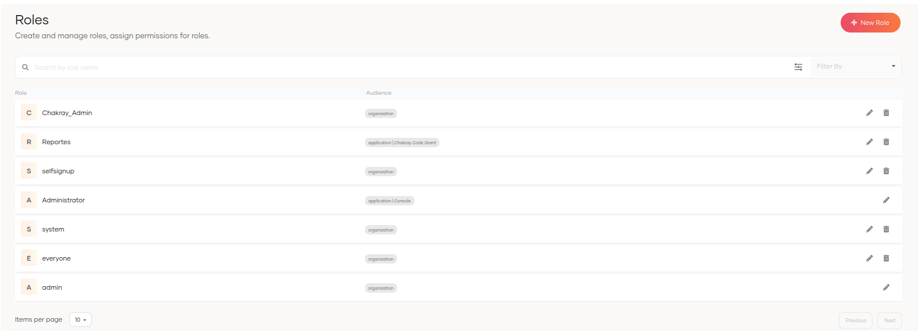
5.3 Roles
In this section, we can view and create roles.
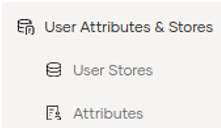
5.4 User Attributes & Stores
As part of the redistribution of the menu options, we now find the User Stores and Attributes options in this section.
5.5 User Stores
Adding new user stores is easier in the new version as we can now graphically select the type of user store to be created.
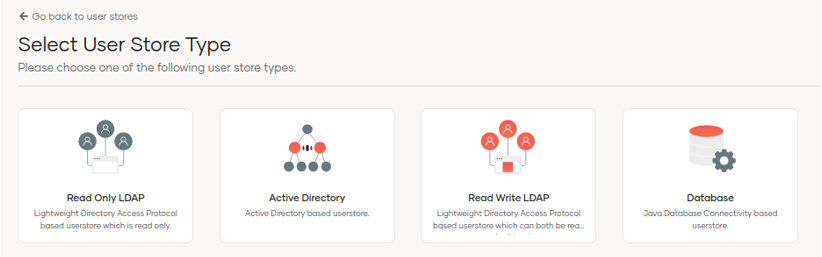
We can add the necessary configuration by using the Wizard.
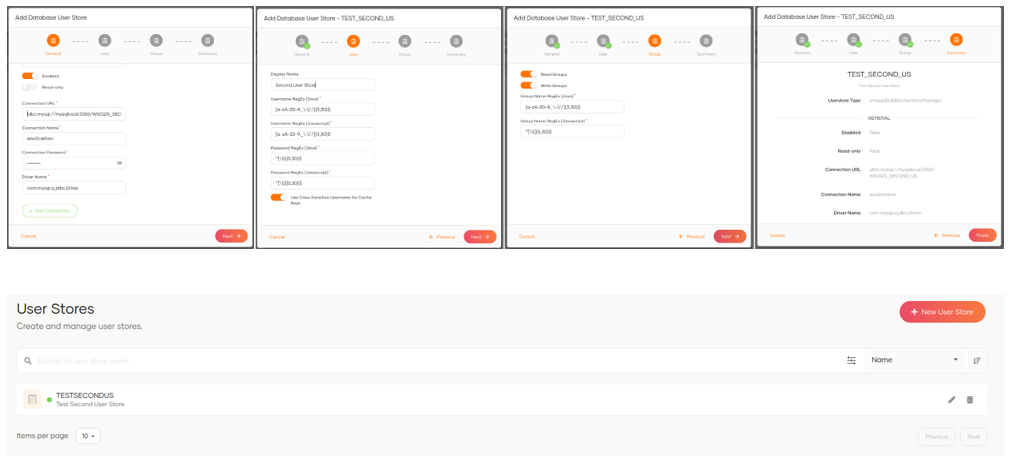
Once the user store is configured, we can add new users.
5.6 Attributes
In this section, we can view and manage user attributes; in previous versions these were defined as claims.
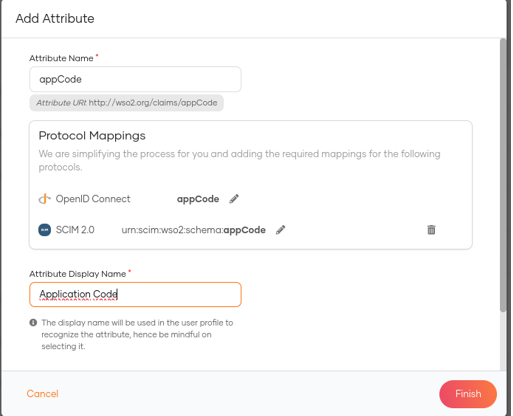
We can add new attributes and map them to the OIDC and SCIM2 protocols without having to modify the scim2-schema-extension.config configuration files as was done in previous versions, which makes the creation of new claims simpler and more straight forward.
Once the new attributes have been defined, we can use them in the applications to share user information.
6. Login & Registration with WSO2 Identity Server 7.0.0
The login and registration settings can be configured in this section. In previous versions, these options were found in identity providers.
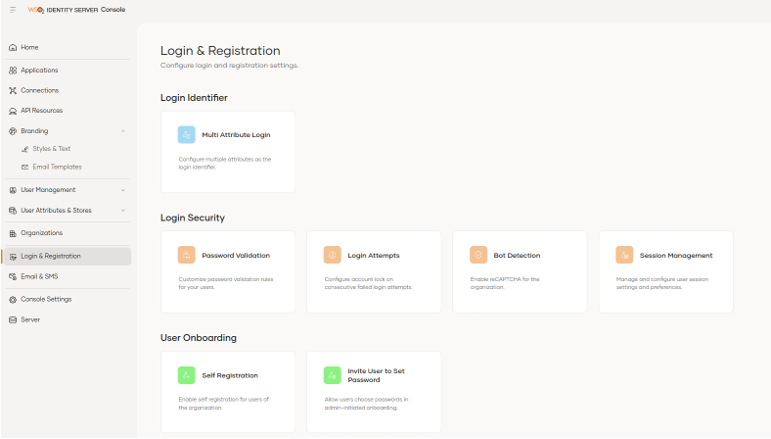
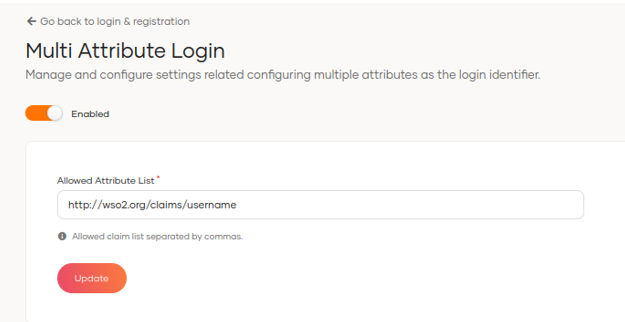
Among the notable options is the Multi Attribute Login option that allows us to enable the ability to use multiple usernames defined in Claim Username for login with one click.
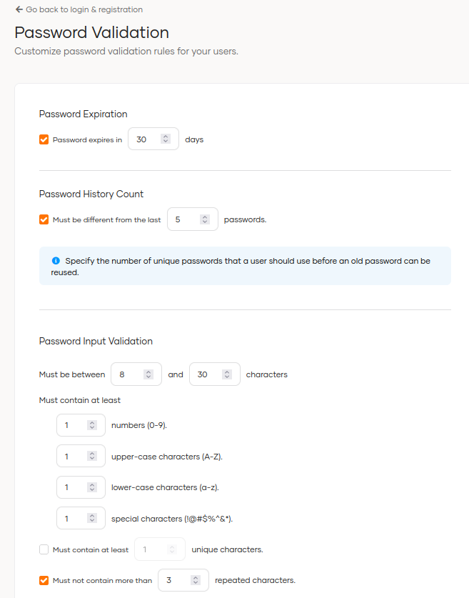
Another interesting feature is the Password Validation configuration, where we can select the password expiration time. To have this functionality previously, you had to use a connector and apply the configuration in the deployment.toml file.
We can also configure the password history, the number of characters it should have and other policies.
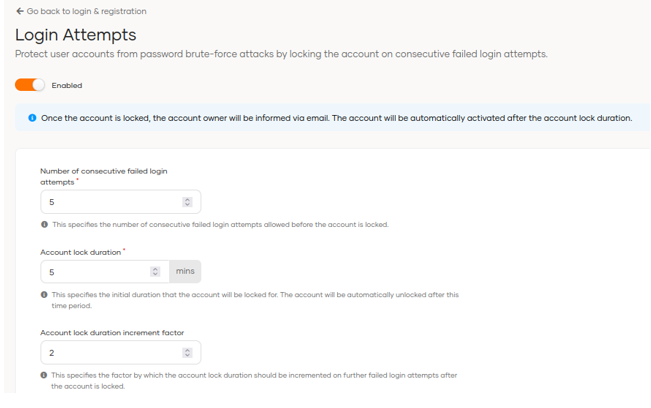
In the Login Attempts section, we can configure the number of failed attempts, the length of time the account is blocked and the account blocking duration increase factor; previously, this was done from identity providers resident.
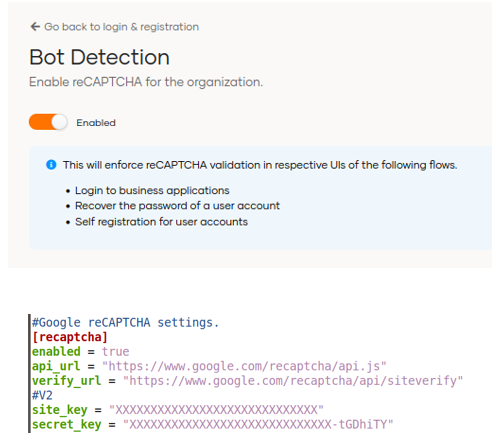
The Bot Detection option can be enabled in the interface but the Google reCAPTCHA connection needs to be configured in the deployment.toml configuration file.
Once enabled, protection will be provided in the following flows:
- Logging into commercial applications
- Recovering a user account password
- Self-registration for user accounts.
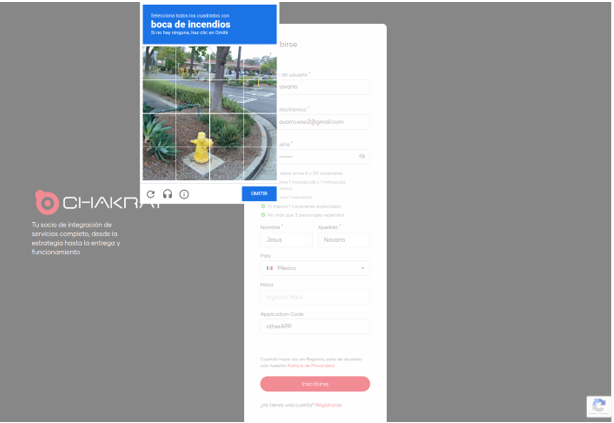
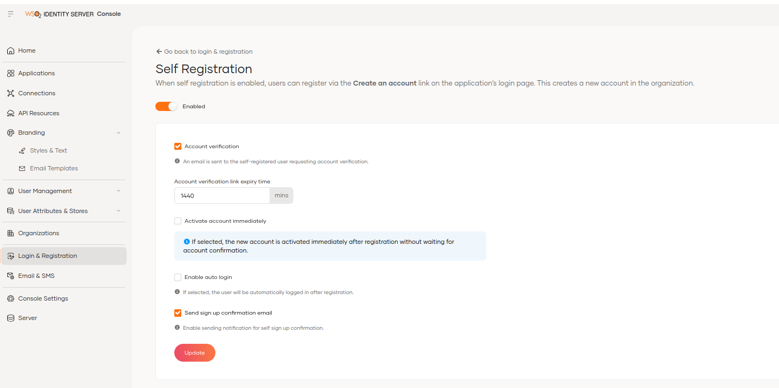
By enabling the Self Registration option, users will be able to register via the Create an Account link on the application’s login page. This creates a new account in the organisation.
6.1 Email & SMS
This section is divided into 2 sections, Email and SMS, the function of which is to configure the providers for sending notifications.
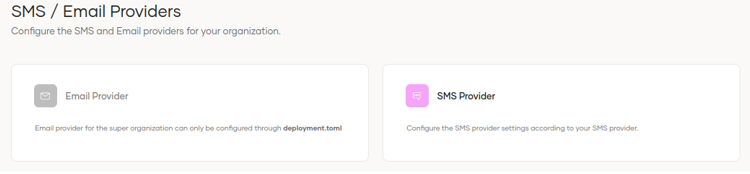
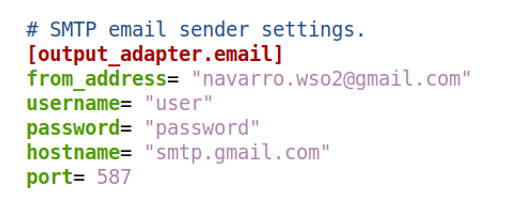
In the case of email, it has to be configured from the deployment.toml.
The SMS provider is easier to configure than in the old versions, allowing you to connect in three ways.
- Twilio
- Vonage
- Custom

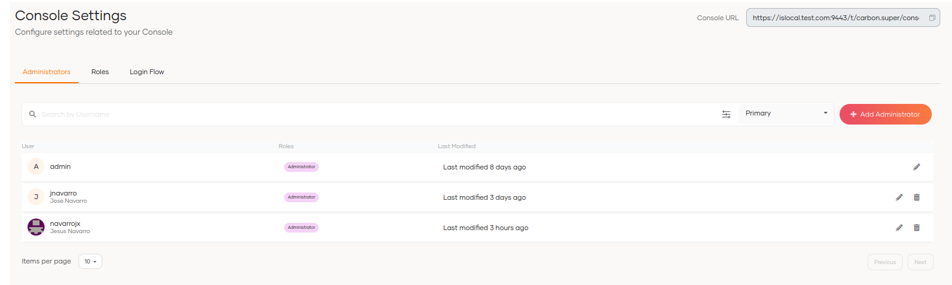
6.2 Console Settings
This allows us to configure the settings related to the administration console.
- Define users with administrator privileges
- Roles
- Login flow (MFA)
4. Summary of the new version of WSO2 Identity Server 7.0.0
The new version of WSo2 Identity Server 7.0.0 has been revamped and has improved the user experience with a modern interface that includes functionalities and features to streamline user administration and management.
The management of applications (formerly service providers) allows new solutions to be connected quickly, with improvements in the display and editing of protocols, user attributes, login methods, multiple authentication factors and
consent permissions.
The Connections section facilitates the federation and inclusion of new identity providers.
The API Resources options focus on the management of APIs at the level of roles and permissions for use by third parties.
One of the new features that has attracted the most attention is that of Branding, which allows the complete modification of the design and style of the product interfaces to adapt it to the corporate image of the client, all of which can be done through the administration console without the need to add or edit source code or configuration files.
In addition, it offers the possibility to change email templates completely online with a preview of the final result of each template.
The user, role and group administration now located in the User Management section results in a more effective user experience as changes to attributes, the creation of new roles and the assignment of permissions can be done in a few clicks in a single interface without having to switch between multiple views as was previously the case.
Claims management is changing and new functionalities have been added to be able to create and map them to the OIDC/Scim2 protocols without modifying configuration files or restarting the server.
The user store administration interface has been revamped to simplify the process.
The login and user registration management allows the configuration of the rules in well-defined and visible options. In previous versions they were in different sections and it was more difficult to locate them; now all you have to do is go to the Login & Registration section and you will find them grouped and accessible.
Important options that remain in the Carbon console, such as Multi Tenant, PAP/PDP policy management, keystores and consents, have yet to be included. This administration still has to be done in the Carbon console so we cannot remove it yet; we hope that in future versions it will be incorporated into the new interface so it won’t be necessary to maintain both administration consoles.
Overall, we can conclude that the user experience of the new version of WSO2 IS is pleasant and refreshing.
The implementation and upgrade of the current server will undoubtedly allow your entire organisation to take advantage of these new features and Chakray can help you on your way to strengthening the security of your access options. Please contact us.


Talk to our experts!
Contact our team and discover the cutting-edge technologies that will empower your business.
contact us