In this article, we will discuss how WSO2 Identity Server (IS) can reinforce the security of access to applications by including a second authentication step. We’ll also explain how to enable and configure multifactor authentication using SMS OTP.
¿What is OTP (One Time Password)?
A one-time password (OTP) is a password designed to be used only once or which is only valid for a short period of time.
In this process, the person’s cell phone is used to verify their identity. It is assumed that only the owner will have access to the cell phone to which the password is sent.
This system is commonly used for banking operations, registration on digital platforms, password recovery, etc.
Pre-requisites for the SMS OTP authentication
- Download the latest version of WSO2 IS, which can be obtained through the following link to Identity Server – On-Premise and in the Cloud.
- To send an SMS we will use Vonage as an SMS provider. For this to work an account has to be created through the following link Vonage API Dashboard.
- Once the Vonage account has been created, obtain the API Key and the API Secret as they will be used to configure our Identity Provider.

Creating a User
The steps to follow when creating a user are explained in his section:
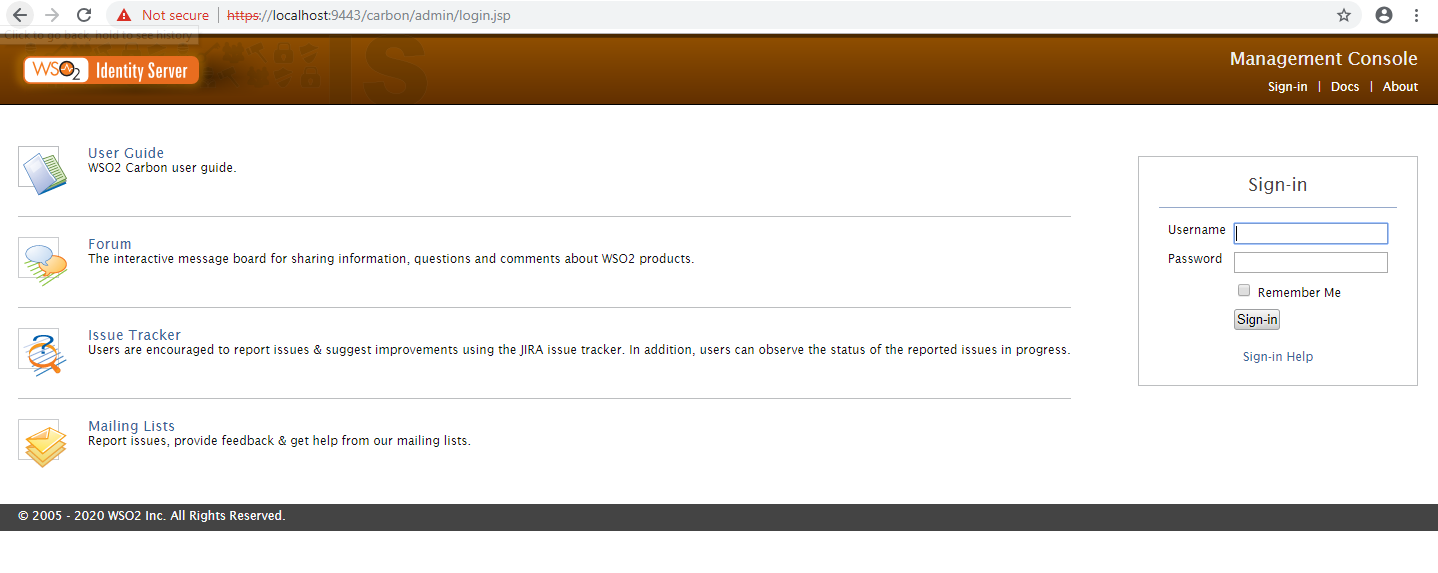
1.Login to the WSO2 administration console using the following URL: https://localhost:9443/carbon
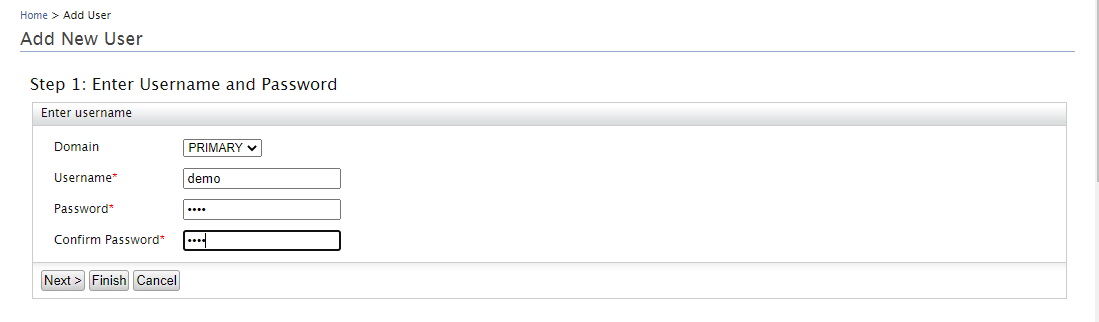
2. In the next window click on the Add New User option:

3. Then, complete the data of the user that we are going to create. As an example, the demo user will be created, to continue click on the Next button.
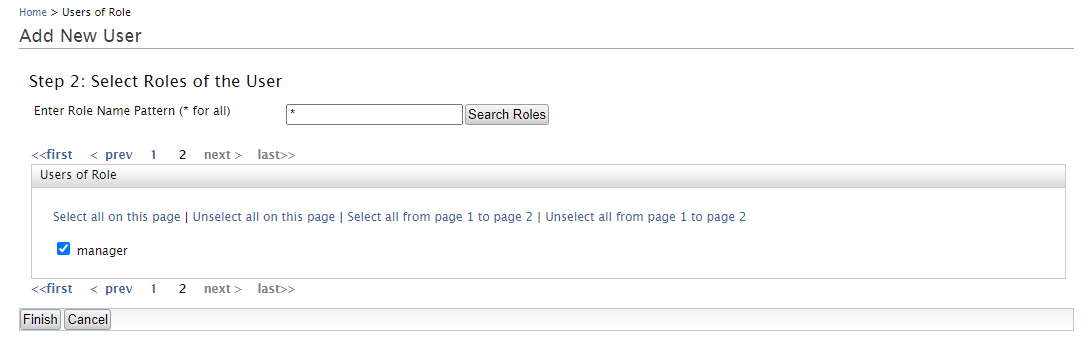
4. In the next window, select a role with login permissions. To conclude the creation of the user click on the Finish button:
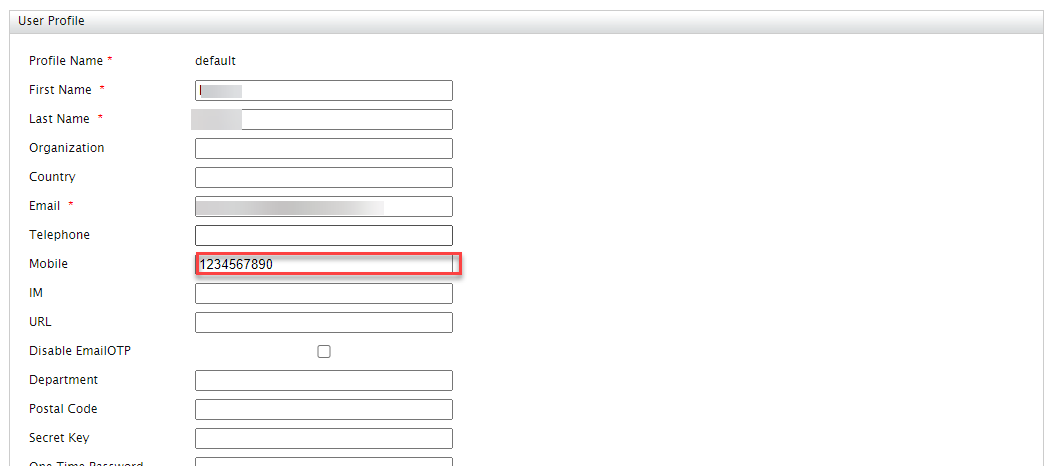
5. Then, update the user profile, including a valid cell phone number.
Configure the identity provider
To configure the identity provider the following steps must be followed.
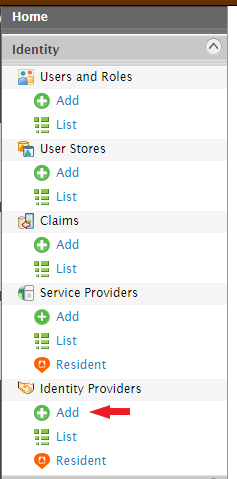
1.In the Home menu under Identity Provider, click on the Add option.
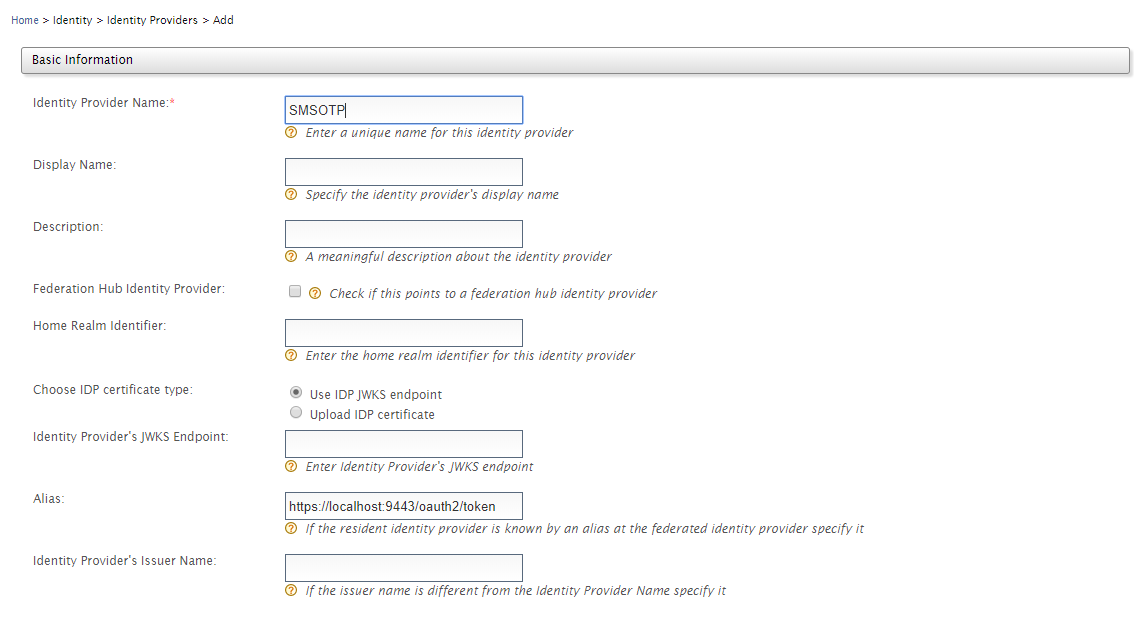
2. In the next window, in the Basic Information section, insert the following information:
| Parameter
|
Value
|
| Identity Provider Name | SMSOTP |
| Alias | https://localhost:9443/oauth2/token |
3. In the SMS OTP Configuration section insert the following data:
| Parameter
|
Value
|
| Enable | Activate checkbox |
| SMS URL | https://rest.nexmo.com/sms/json?api_key=<ENTER_API_KEY>&api_secret=<ENTER_API_SECRET>&from=NEXMO&to=$ctx.num&text=$ctx.msg |
| HTTP Method | POST |
Configure Service Provider
For this example, the service provider User Portal will be used, and these steps will be followed:
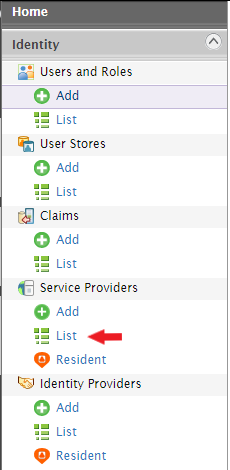
- In the administration console, click on the Service Providers option.
- Now, edit the service provider User Portal. This will be done by clicking on the Edit button.

- Then, click on the Advanced Configuration option.
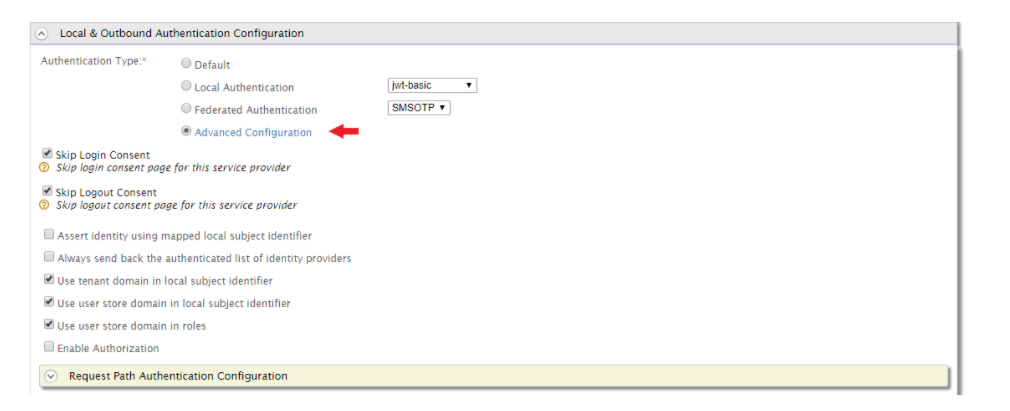
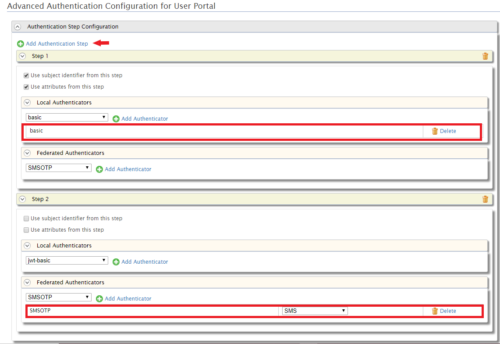
- In the next window, click on the Add Authentication Step button. In Step 2, select the SMSOTP option from the list and click on Add Authenticator.
Test the configuration
To test out the configurations just created in the previous sections, follow the steps below:
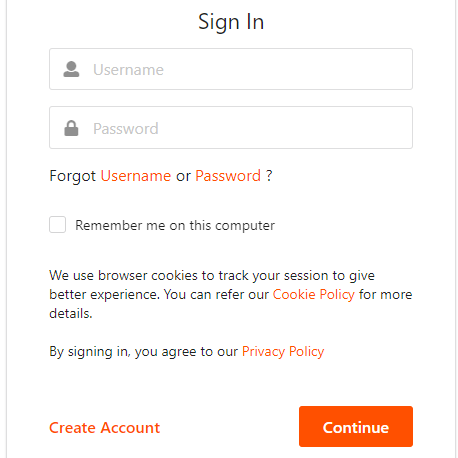
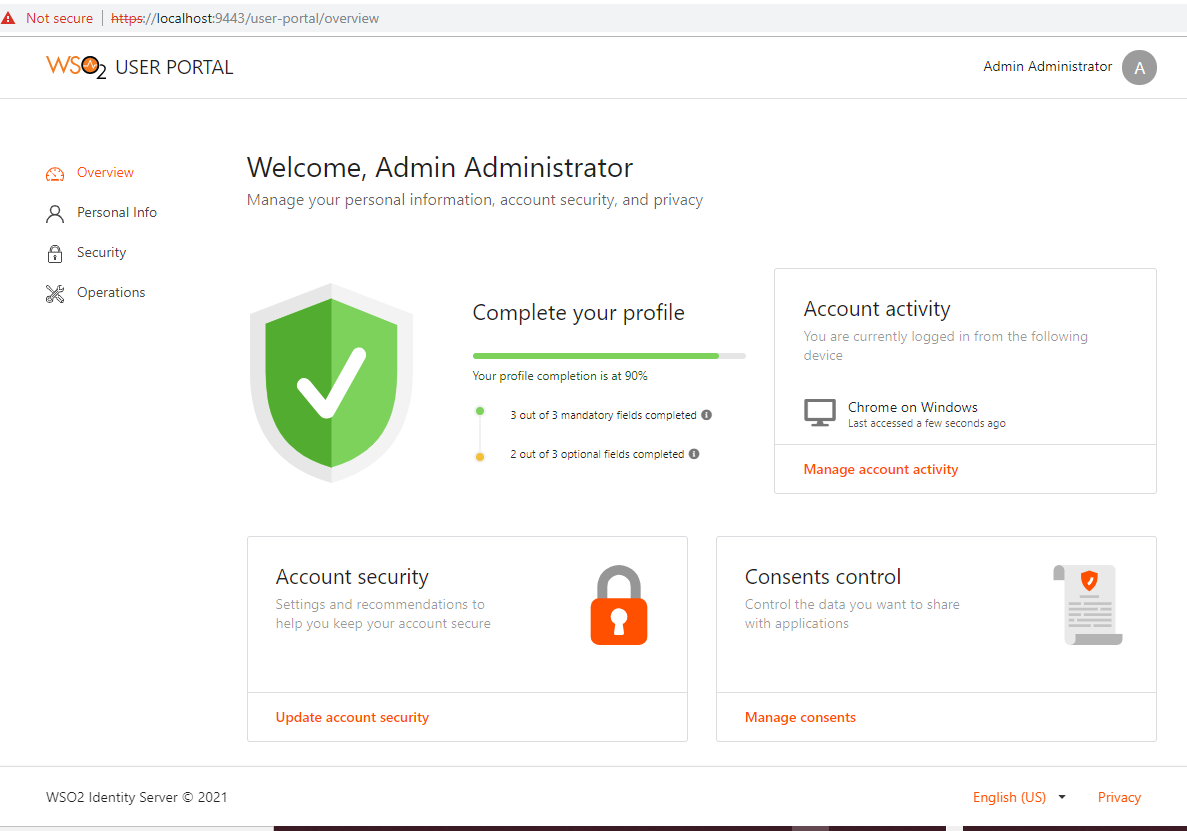
- Go to the following URL: https://localhost:9443/user-portal
- Then, insert the credentials of our demo user that we created in WSO2 Identity Server.
- Once the credentials have been entered, the next window will ask you to enter the OTP that we will have received by text message to our cell phone.
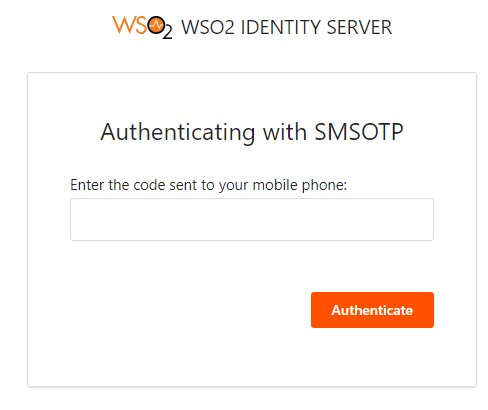
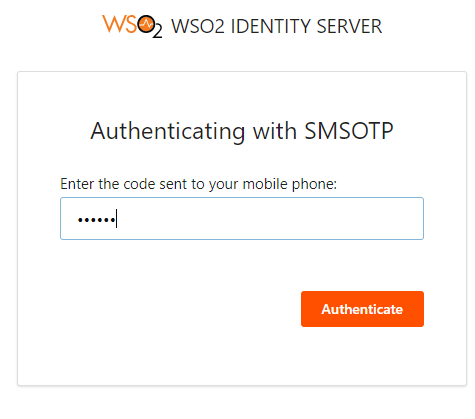
- If the code is correct, it will allow us access to the User Portal, otherwise it will indicate that the OTP is incorrect.
Conclusion
As seen in this article, with WSO2 Identity Server we can reinforce the access security to our applications by including a second authentication step. In this case, this was achieved by sending an OTP via SMS. However, it is possible to send this via email, or to include a third step using a biometric fingerprint reading.
If you want to know how Chakray can help you to strengthen your access security, then contact us!