This document aims to explain step by step the configuration for the use of the two-factor authentication by token TOTP (Time-based one-time password) in WSO2 Identity Server .
1.- User claim configuration
Firstly, a claim is a fragment of information about the user, such as username, email, role, location to which it belongs, etc. A claim provides a general and unique notion to define identity information related to the user.
Now you must configure a new claim that will be called a Secret Key, with the following information:
| Parameter | Value | Description |
| Claim URI | http://wso2.org/claims/identity/secretkey | This is the URI defined by the dialect and specific to the claim. There are different URIs available in Identity Server and these are equivalent to the user attributes shown in the users profile.These URIs are assigned to attributes in the underlying user store. |
| Display Name | Secret Key | This is the name of the claim that is displayed in the user interface. |
| Description | Claim to store the secret key | This gives you the option to describe the functionality of the claim. |
| Mapped Attribute | stateOrProvinceName | This is the name of the corresponding attribute of the underlying user store to be assigned to the claim URI value. |
| Supported by Default | selected | If it is not checked, this claim will not be requested during the user registration. |

With this step the user will have the option to generate a secret key with which the TOTP QR will be generated.
2.- TOTP configuration
Subsequently, the application-authentication.xml file found in the path <IS_HOME> / repository / conf / identity / in which the TOTP authenticator configuration is added must be configured, with the following information.
| Field | Description |
| usecase | This field can take one of the following values: local, association, userAttribute, subjectUri. If you do not specify a use case, the default is local. |
| encodingMethod | The encoding method that is used to generate the TOTP. |
| authenticationMandatory | If this value is true, TOTP authentication will be applied as a second step. |
| timeStepSize | The size of the time step, which is used to validate the TOTP. |
| windowSize | The size of the window, which is used to validate the TOTP. |
| enrolUserInAuthenticationFlow | If this value is true, it will ask the user to enable the TOTP authenticator in the authentication flow. |
| secondaryUserstore | User store settings are maintained per tenant as comma separated values. For example, <Parameter name = “secondaryUserstore”> jdbc, abc, xyz </Parameter>. |
| TOTPAuthenticationEndpointURL | This is the endpoint of the user interface that is used to collect the TOTP. |
| TOTPAuthenticationEndpointErrorPage | This is the endpoint of the error page. |
| OTPAuthenticationEndpointEnableTOTPPage | This is the endpoint of the TOTPauthenticator registration page. |
| Issuer | This is the name of the issuer that will be displayed in the Mobile Application. If not configured, the tenant’s domain will be displayed. |
| UseCommonIssuer | If it’s true, the issuer name defined in application-authentication.xml will be used as the issuer for all tenants. |
<AuthenticatorConfig name=”totp” enabled=”true”>

<Parameter name=”encodingMethod”>Base32</Parameter>

<Parameter name=”timeStepSize”>30</Parameter>

<Parameter name=”windowSize”>3</Parameter>

<Parameter name=”authenticationMandatory”>true</Parameter>

<Parameter name=”enrolUserInAuthenticationFlow”>true</Parameter>

<Parameter name=”usecase”>local</Parameter>

<Parameter name=”secondaryUserstore”>primary</Parameter>

<Parameter name=”TOTPAuthenticationEndpointURL”>https://localhost:9443/totpauthenticationendpoint/totp.jsp</Parameter>

<Parameter name=”TOTPAuthenticationEndpointErrorPage”>https://localhost:9443/totpauthenticationendpoint/totpError.jsp</Parameter>

<Parameter name=”TOTPAuthenticationEndpointEnableTOTPPage”>https://localhost:9443/totpauthenticationendpoint/enableTOTP.jsp</Parameter>

<Parameter name=”redirectToMultiOptionPageOnFailure”>false</Parameter>

<Parameter name=”Issuer”>WSO2</Parameter>

<Parameter name=”UseCommonIssuer”>true</Parameter>

</AuthenticatorConfig>
2.1.- TOTP configuration by email
To start this step you must edit the axis2.xml file located at the path <IS_HOME> / repository / conf / axis2 / to send an email notification.
The parameter <transportSender name = “mailto”> must be enabled by adding the following configuration:
<transportSender name="mailto"

class="org.apache.axis2.transport.mail.MailTransportSender">

<parameter name="mail.smtp.from">{email}@gmail.com</parameter>

<parameter name="mail.smtp.user">{username}</parameter>

<parameter name="mail.smtp.password">{password}</parameter>

<parameter name="mail.smtp.host">smtp.gmail.com</parameter>

<parameter name="mail.smtp.port">587</parameter>

<parameter name="mail.smtp.starttls.enable">true</parameter>

<parameter name="mail.smtp.auth">true</parameter>

</transportSender>
Subsequently, the sender’s email credentials (USER_NAME, PASSWORD and SENDER’S_MAIL) must be replaced in the configuration.
Add the email template to send to the user when generating the token in the email-admin-config.xml file found in the path <IS_HOME> / repository / conf / email / as follows.
<configuration type="totp" display="TOTP" locale="en_US">

<targetEpr></targetEpr>

<subject>WSO2 Carbon - Time-Based One Time Password</subject>

<body>

Hi {{ user.claim.givenname}}, Please use the token {totp-token} as the password for your login.

</body>

<footer>

Best Regards, WSO2 Identity Server Team

http://www.wso2.com

</footer>

<redirectPath></redirectPath>

</configuration>
2.2.- Configure Service Provider
2.2.1.- Deploy travelocity.com
In this example, the service provider will be configured with the travelocity.com application, for this the WAR file must first be generated.
To do this, the following commands must be executed:
mkdir is-samples

cd is-samples/

git init

git remote add -f origin https://github.com/wso2/product-is.git

git config core.sparseCheckout true
Subsequently, the project version must be selected with the following command:
git checkout -b v5.4.0 v5.4.0
Now the deploy must be carried out in Apache Tomcat Server. In order to do this the .war file must be copied in the webapps folder. For example:
<TOMCAT_HOME>/apache-tomcat-<version>/webapps.
After the previous steps, a new service provider must be configured or added for the travelocity.com application.
2.2.2.- Configuration of the Service Provider
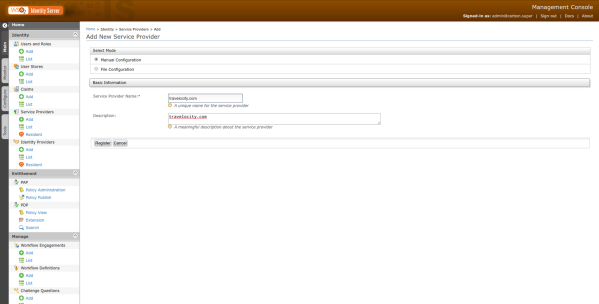
In the WSO2 Identity Server management console in the Service Providers (SP) section on the Main tab in the main menu, click on the Add option. With this action you can start the SP configuration process.
Once reach the form for the creation of a new SP, which the page was redirected to by the previous action, the name of the new SP and its description will be requested which for this test will be travelocity.com.
Then you must click on the Register button which will take us to another form where the configuration of the new SP will be completed.
Once in the new form, the following information will be requested.
- Application Certificate: Certificate generated by WSO2 from the wso2carbon.jks file in the format of the wso2carbon.pem file.
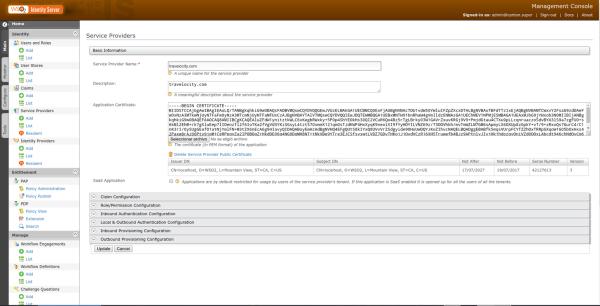
- Claim Configuration: The settings for the email properties (http://wso2.org/claims/emailaddress) and name ( http://wso2.org/claims/username ) are added.

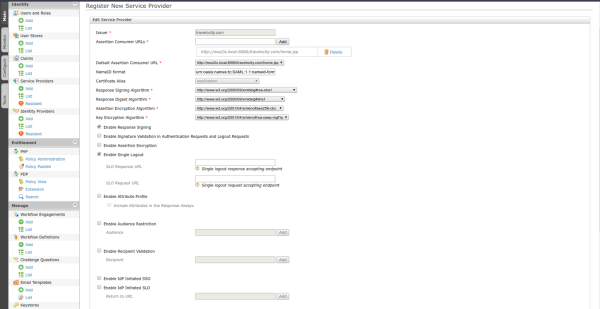
- Inbound Authentication Configuration: Click on Configure in the SAML2 Web SSO Configuration tab, if other configuration is required for the SP with SSO, you can consult the WSO2 Identity Server documentation.
| Parameter | Value |
| Issuer | travelocity.com |
| Assertion Consumer URL | http://localhost:8080/travelocity.com/home.jsp |
| Enable Response Signing | Selected |
| Enable Single Logout | Selected |
| Enable Attribute Profile | Selected |
| Include Attributes in the Response Always | Selected |
Then you must click Update to save the changes, where you will be redirected to the Service Provider page.
For the next step you must enter the Local and Outbound Authentication Configuration tab, and in the authentication type parameter you must click on advanced configuration.

With the previous step you will be redirected to a new page where the steps for authentication will be configured, for this test they will be Basic (user/password) and TOTP (Token).
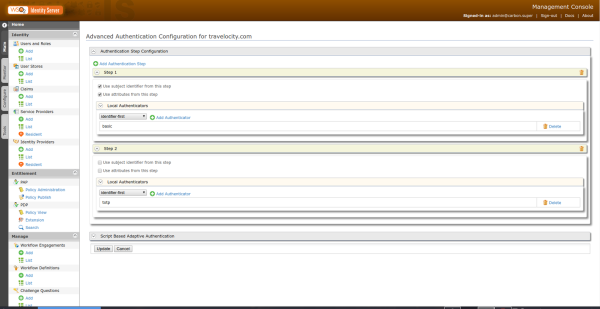
Then you must click update to finish the two-factor authentication process
3.- Tests
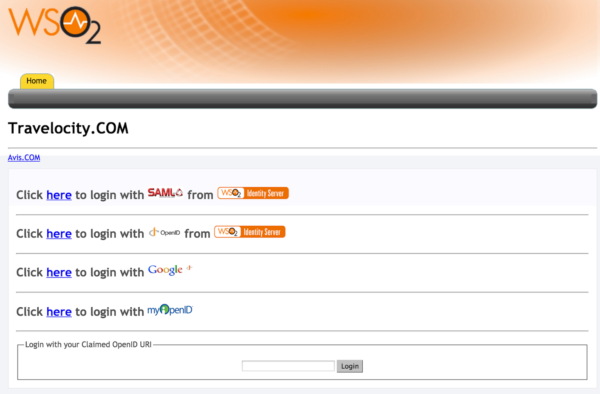
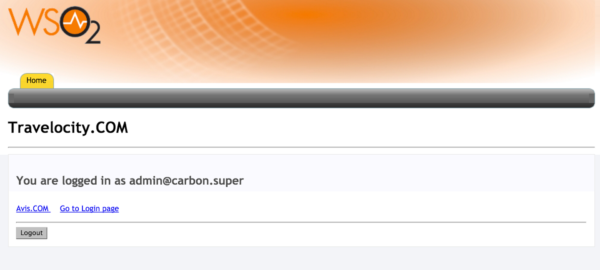
To test the configuration made previously, you must enter the url of the travelocity portal, which is http: // <TOMCAT_HOST>: <TOMCAT_PORT> /travelocity.com/index.jsp.
You must click on the option according to the configuration that was made, in this case it will be SAML.
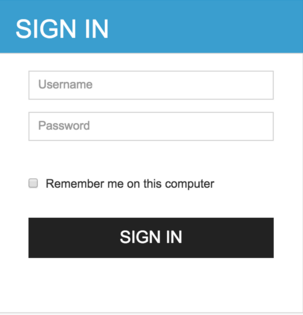
In the next window a form will be displayed where the user and password will be requested.
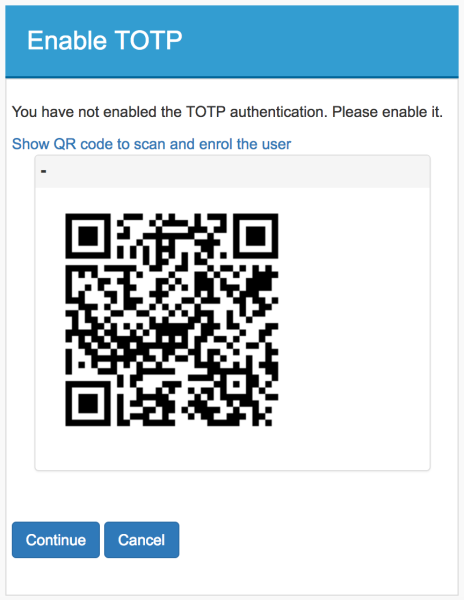
Later, if the credentials are correct, the option to generate the QR will be shown when scanned using Google Authenticator or Microsoft Authenticator.
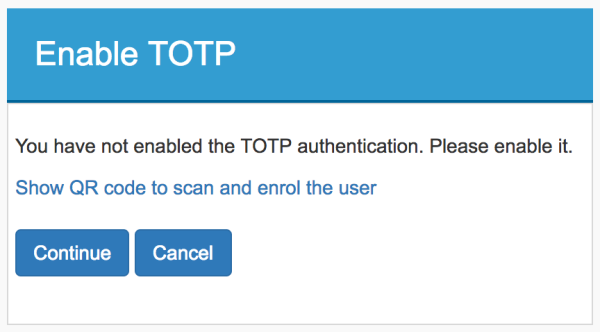
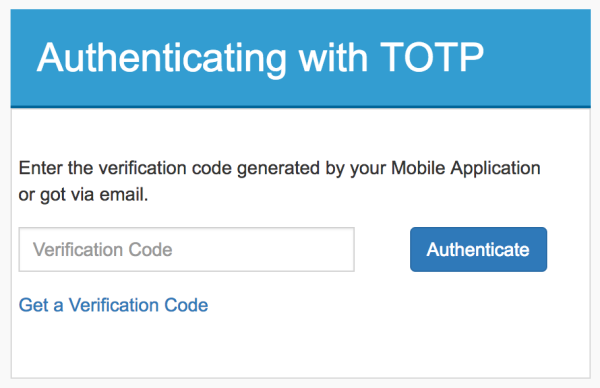
Once the previous step is completed, you are redirected to the TOTP authentication page. Here you must enter the verification code shown in the Google Authenticator or Windows Authenticator to log in. Alternatively, you can generate the verification code by clicking “Get a Verification Code” ”and using the code that is sent to your email address.
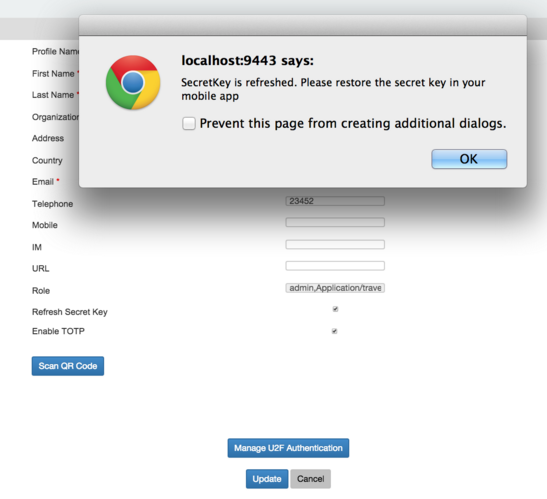
4.- Refreshing the secret key
The secret key can be updated by selecting the Refresh Secret Key checkbox on the dashboard. However, you need to re-scan the QR code to sync the new secret key with your Google Authenticator or Windows Authenticator mobile app.