In this tutorial, the integration that can take place between WSO2 Enterprise Integrator (WSO2 EI) and the InterPlanetary File System (IPFS) API will be explained and exemplified. A sequence will be set up to send the files to the IPFS services and to register the entry in a DBMS database.
This tutorial is the first of a two-part series. If you want to continue learning, then don’t miss our next tutorial!
For this purpose, the below index shall be followed:
1. What is IPFS?
IPFS, the InterPlanetary File System is a protocol and a network designed to create a p2p (peer-to-peer) method of connecting all computing devices to the same file system.
IPFS provides a high-performance, content-addressed block storage model.
2. Pre-requisites
In order to carry out the exercise, the following should be considered:
- WSO2 Enterprise Integrator (WSO2 EI) 6.6.0 or higher installed.
- Docker version 19.03.13 or higher installed.
3. Glossary
|
Word |
Description |
|---|---|
|
IPFS |
InterPlanetary File System |
|
WSO2 EI |
WSO2 Enterprise Integrator |
|
RDBMS |
Relational database management system |
|
API |
Application programming interface |
|
API REST |
A set of principles of client-server architecture consisting of clients, servers, and resources, with request management through HTTP. |
|
RPC |
Remote Procedure Call |
|
IDE |
Integrated Development Environment |
4. IPFS Installation and configuration in Dockers
In order to start the installation and subsequent configuration of the IPFS container, you should begin by creating the following folders.
- staging → a directory that you can use to store files for command line use (such as ipfs add).
- data → the volume of data that will be used to store the IPFS local repository (configuration and database).
In order to do this, the following staging commands will be executed:
mkdir </absolute/path/to/staging/>
export ipfs_staging=</absolute/path/to/staging/>
And for data.
mkdir </absolute/path/to/data/>
export ipfs_data=</absolute/path/to/data/>
Next, execute the command to begin downloading the IPFS image, and to expose ports 4001-5001-8080
docker run -d --name ipfs -v $ipfs_staging:/export -v $ipfs_data:/data/ipfs -p 127.0.0.1:4001:4001 -p 127.0.0.1:8080:8080 -p 127.0.0.1:5001:5001 ipfs/go-ipfs:latest
Where:
| Parameter | Value | Description |
| 8080 | -p 127.0.0.1:8080:8080 | Port 8080 is the HTTP gateway that allows you to consult IPFS data with your browser. |
| 4001 | -p 127.0.0.1:4001:4001 | Port 4001 is the swarm port that uses IPFS to communicate with other nodes. |
| 5001 | -p 127.0.0.1:5001:5001 | The port is for the local API.
Linking port 5001 to ip 127.0.0.1, so as not to expose the IPFS to the outside world. |
| data | -v $ipfs_data:/data/ipfs | It takes the data from the ipfs_data variable previously generated to mount the volume. |
| staging | -v $ipfs_staging:/export | It takes the data from the ipfs_staging variable previously generated to mount the volume. |
| ipfs:latest | ipfs/go-ipfs:latest | IPFS docker image name and version. |
In order to check the correct construction of the IPFS container, the following command can be executed.
docker logs ipfs
With this command, the information of the newly created container will be displayed.
Changing user to ipfs
ipfs version 0.8.0-rc1
generating ED25519 keypair...done
peer identity: 12D3KooWJcQVqoncvE4NJX4G77r4ecCuBLpkAtbRSLCCCfshzLUR
initializing IPFS node at /data/ipfs
to get started, enter:

    ipfs cat /ipfs/QmQPeNsJPyVWPFDVHb77w8G42Fvo15z4bG2X8D2GhfbSXc/readme

Initializing daemon...
go-ipfs version: 0.8.0-rc1-02d15ac
Repo version: 11
System version: amd64/linux
Golang version: go1.14.4
2020/12/28 18:43:45 failed to sufficiently increase receive buffer size (was: 208 kiB, wanted: 2048 kiB, got: 416 kiB). See https://github.com/lucas-clemente/quic-go/wiki/UDP-Receive-Buffer-Size for details.
Swarm listening on /ip4/127.0.0.1/tcp/4001
Swarm listening on /ip4/127.0.0.1/udp/4001/quic
Swarm listening on /ip4/172.17.0.3/tcp/4001
Swarm listening on /ip4/172.17.0.3/udp/4001/quic
Swarm listening on /p2p-circuit
Swarm announcing /ip4/127.0.0.1/tcp/4001
Swarm announcing /ip4/127.0.0.1/udp/4001/quic
Swarm announcing /ip4/172.17.0.3/tcp/4001
Swarm announcing /ip4/172.17.0.3/udp/4001/quic
Swarm announcing /ip4/192.141.245.27/udp/31919/quic
API server listening on /ip4/0.0.0.0/tcp/5001
WebUI: http://0.0.0.0:5001/webui
Gateway (readonly) server listening on /ip4/0.0.0.0/tcp/8080
Daemon is ready
As can be seen in the information above, when creating the container, 1 IPFS node is created in which the important information is:
| Parameter | Description |
| API server listening on /ip4/0.0.0.0/tcp/5001 | Url that will be used to link to other nodes. |
| WebUI: http://0.0.0.0:5001/webui | IPFS web-console url.
http://127.0.0.1:5001/webui |
| Gateway (readonly) server listening on /ip4/0.0.0.0/tcp/8080 | Gateway url that allows consulting data to the IPFS node from the browser.
Example: http://127.0.0.1:8080/ipfs/QmQPeNsJPyVWPFDVHb77w8G42Fvo15z4bG2X8D2GhfbSXc/readme |
The last step in the configuration process is to enter with the following command into the IPFS container.
docker exec -it <container> /bin/bash
To get the value of <container> the command must be executed.
docker ps
This will display a list of containers running in the docker, the CONTAINER ID column will show the value for that parameter.
After entering the container, the following command must be executed to eliminate the connections with the predefined nodes (Public) and to activate the private node.
Client nodes use a bootstrap node to connect to the private IPFS network. The bootstrap program connects clients to other available nodes in the network. The bootstrap of the IPFS public network can’t be used in the private network, so the existing bootstrap must be removed.
ipfs bootstrap rm --all
To verify the result of the previous operation, the following command will be executed. The result shows that the Bootstrap empty.
ipfs config show | grep Bootstrap
Once the status of the IPFS docker container has been checked, you will enter the url http://127.0.0.1:5001/webui to enter the web console.
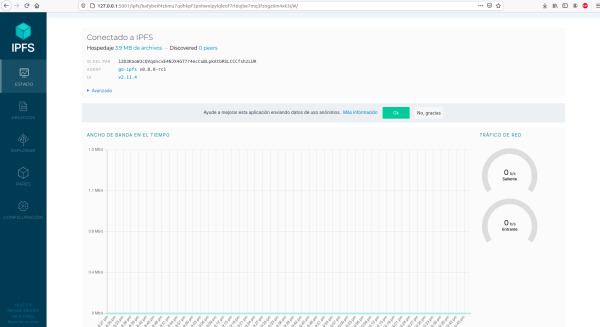
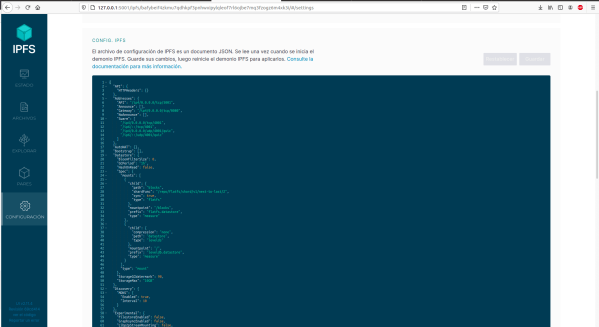
The previous configuration can also be verified by following these steps:
- On the left-hand side menu, click on Configuration.
In the IPFS CONFIG tab, the above-mentioned file with the empty Bootstrap configuration will be shown.
5. Why use the IPFS API?
The IPFS API allows you to maintain peer connections longer than any other application on the market, and a single IPFS node running instead of several can be maintained if the application can be started multiple times.
It is better to use the API rather than integrating IPFS directly in a program, since using the API means that if there is an update to the IPFS commands (CLI Command-line), services operations will not be affected.
For more information, please refer to the following url https://docs.ipfs.io/reference/http/api/#getting-started.
6. HTTP Status Codes
The status codes used in the RPC layer are the following:
| Code | Description |
| 200 | The request was processed or is being processed (streaming). |
| 500 | It means that the function exists, but IPFS couldn’t execute the request due to an error. |
| 400 | RPC with the wrong format, argument type error, etc. |
| 403 | Forbidden RPC call. |
| 404 | The RPC endpoint doesn’t exist. |
| 405 | It means that the wrong HTTP method is being used (i.e., GET instead of POST). |
7. EXAMPLE WITH IPFS API
The following is one of the ways the IPFS API RESTI can be used. For the purposes of this example, the POSTMAN application is used to consult the IPFS version by calling the /api/v0/version service.

Where the request consists of:
| Parameter | Value | Description |
| Method | POST | HTTP method to access the service. |
| Url | http://127.0.0.1:5001/api/v0/version | IPFS API Url. |
In case of success, the call to this endpoint will return with code 200 and the following body:
| Parameter | Value | Description |
| Version | 0.8.0-rc1 | IPFS version. |
| Commit | 02d15ac | Display the commit hash: |
| Repo | 11 | Display the repository version. |
| System | amd64/linux | Display the name of the operating system. |
| Golang | go1.14.4 | Display the go version. |
With the previous example, we will proceed to validate the service that will be integrated with WSO2 EI, which has the functionality to add files to IPFS. For this purpose we can call the service /api/v0/add.
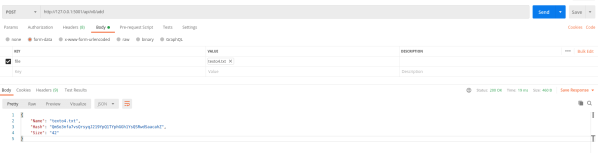
Where the request consists of:
| Parameter | Value | Description |
| Method | POST | HTTP method to access the service. |
| Url | http://127.0.0.1:5001/api/v0/add | IPFS API Url. |
| File | file | File that will enter into the IPFS. |
In case of success, the call to this endpoint will return with code 200 and the following body:
| Parameter | Value | Description |
| Name | texto4.txt | File name. |
| Hash | QmSo3nfa7vsQrsyqJ219YpQ1TYphGGh1YsQSRwdSaacahZ | Display the reference hash to the file in the IPFS. |
| Size | 42 | Display the size of the file. |
8. IPFS API Integration (/api/v0/add) in WSO2 EI
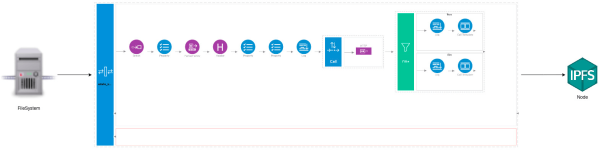
The next stage of the integration of the IPFS API file aggregation service is shown in the following diagram.

This is explained as follows, the enrich adds the information file to the message that will be sent. Then, the payloadFactory will load the file in the body and will send it to the IPFS service (api/v0/add) via a mediator call. After that, with the mediator filter, the state returned by the mediator call will be filtered, and the result of the operation will be shown in the log.
In order to create this integration, the WSO2 Integrator Studio (IS) will be used. To do so, it has to be downloaded from the following link:https://wso2.com/integration/integration-studio/
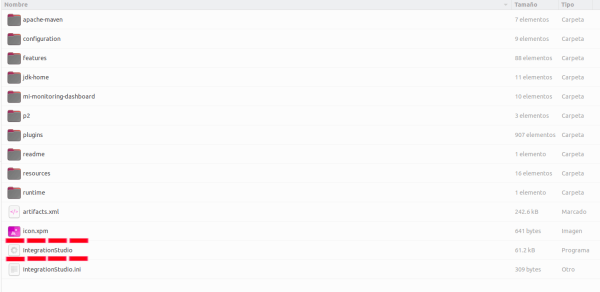
After downloading the IS and unzipping it, the structure can be checked before executing IntegratorStudio, as shown below.
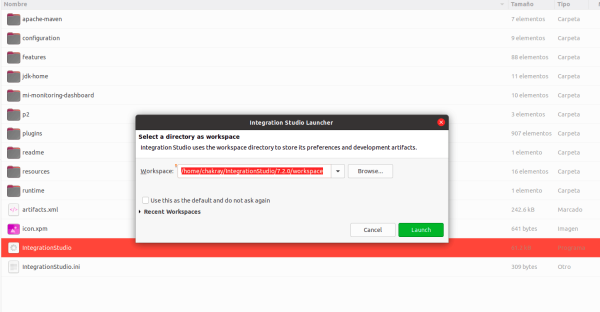
Next, the IDE will display options when it starts, which will ask for the address of the workspace in which it will operate.
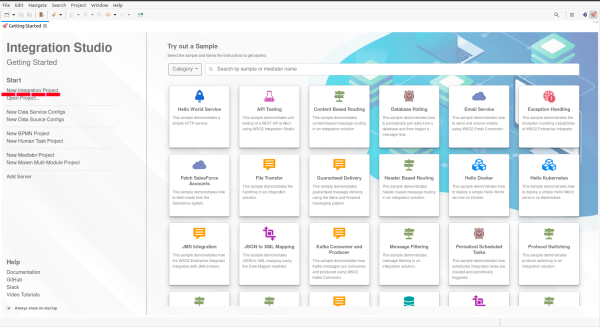
Once the IntegrationStudio IDE has been started, it will display options to initiate more efficient development.
In order to start the creation of a new project, simply click ‘New Integration Project’ on the left-hand menu.
Next, a menu will be displayed requesting relevant information for the creation of the project, such as the name and the modules that will comprise it.

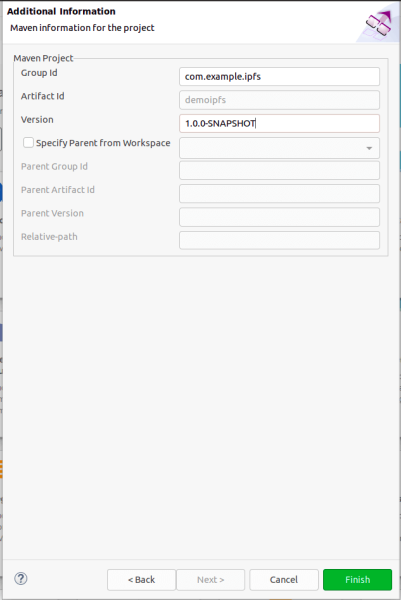
By clicking on the ‘Next’ button, another form will be displayed requesting the information for the construction of the Maven project. The data to be entered is as follows:
- Group Id → it is suggested to start with: com.example.ipfs
- Artifact Id → default is the name of the integration project.
- Version → 1.0.0-SNAPSHOT is suggested as the first version.
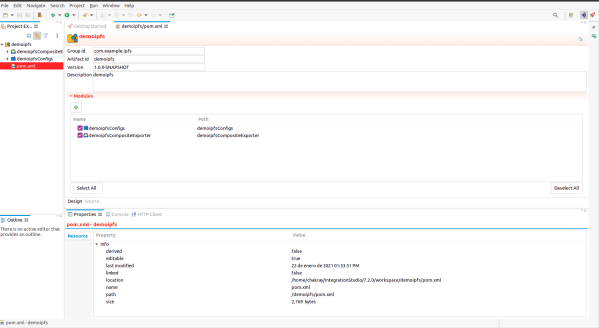
As a final step, click on the ‘Finish’ button, and the IDE will load the project. At first glance, the pom.xml of the project will be shown in which the information and modules of the project will be displayed.
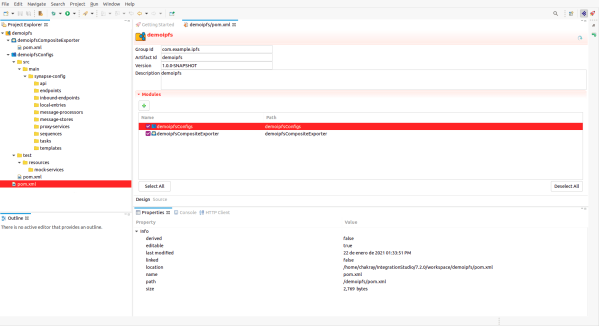
Reviewing the modules, you can see that the Configs module has a standard structure for Maven (src/main), however the synapse-config folder contains the following subfolders.
- api
- endpoint
- inound-enpoints
- local-entries
- mesage-processors
- message-stores
- proxy-services
- sequences
- taks
- templates
For the purposes of this tutorial, a service proxy will be created, by following the steps below.
- Right click on the proxy-services folder inside the demoipfsConfigs module.
- In the pop-up menu click the ‘New’ option.
- Next, select the ‘Proxy Service’ option.
When these steps are completed, a window will appear with three options:
- Create a new proxy service (Create A New Proxy Service).
- Import a pre-existing service (Import Proxy Service).
- Generate a new proxy service from a WSDL (Generate Proxy Service using WSDL file).
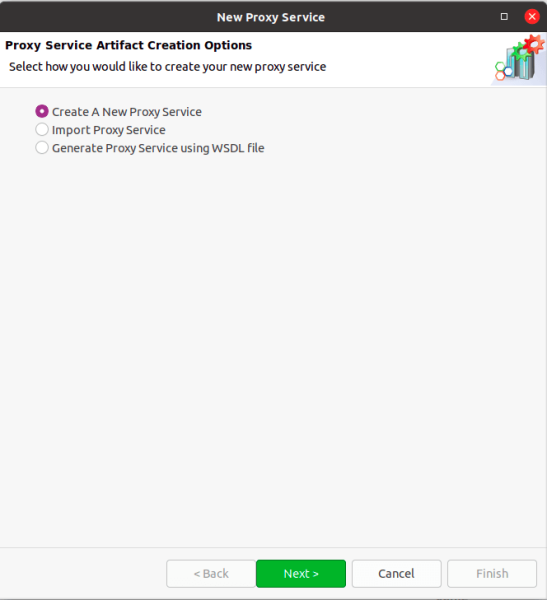
For the purposes of this tutorial, the first option (Create A New Proxy Service) will be selected. Then, click the ‘Next’ button to continue with the creation of the new proxy service, in which the name of the proxy service and the type of transport or transports will be requested.
For the purposes of this tutorial, the new service proxy will be named envio_v1_ipfs_sp because of the following naming characteristics:
| Parameter | Description |
| envío | Reference to the method which will be integrated |
| v1 | Reference to the service version |
| ipfs | Reference to API or service which will be integrated |
| sp | Service Proxy acronym |

The transport will be vfs (Virtual File System). Finally, you should click the ‘Finish’ button which will conclude the creation of a new service proxy.
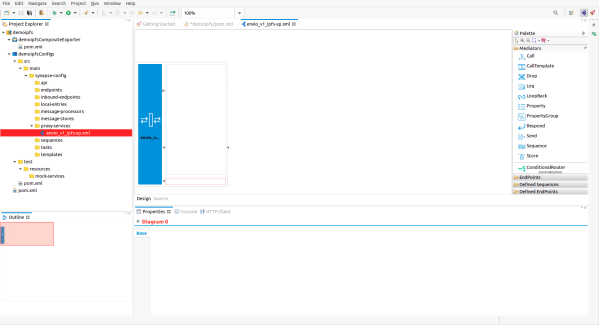
As can be seen in the previous picture, on the right side there is a palette with elements that will be used, such as Mediator Logs, Mediator Enrich, Mediator Call, among others.
Another way to create this is to select the Source option instead of Design, into which the following code can be copied.
<?xml version="1.0" encoding="UTF-8"?>
<proxy name="envio_v1_ipfs-sp" startOnLoad="true" transports="vfs"
    xmlns="http://ws.apache.org/ns/synapse">
    <target>
        <inSequence>
            <enrich>
                <source clone="true" type="body" />
                <target property="originalBody" type="property" />
            </enrich>
            <property name="messageType" scope="axis2" type="STRING" value="multipart/form-data" />
            <payloadFactory media-type="xml">
                <format>
                    <root>
                        <file filename="file" name="file" xmlns="http://org.apache.axis2/xsd/form-data">$1</file>
                    </root>
                </format>
                <args>
                    <arg evaluator="xml" expression="$ctx:originalBody" />
                </args>
            </payloadFactory>
            <header name="Content-Type" scope="transport" value="multipart/form-data" />
            <property name="messageType" scope="axis2" type="STRING" value="multipart/form-data" />
            <property name="OUT_ONLY" scope="default" type="STRING" value="false" />
            <log level="custom">
                <property name="======================== Envio de Archivo =========================" expression="$ctx:originalBody" />
            </log>
            <call blocking="true">
                <endpoint>
                    <http method="POST" uri-template="http://127.0.0.1:5001/api/v0/add" />
                </endpoint>
            </call>
            <filter regex="200" source="$axis2:HTTP_SC">
                <then>
                    <log level="full" />
                    <call-template target="file">
                        <with-param name="message" value="HELLO WORLD!!!!!!" />
                    </call-template>
                </then>
                <else>
                    <log level="full" />
                    <call-template target="file">
                        <with-param name="message" value="HELLO WORLD!!!!!!" />
                    </call-template>
                </else>
            </filter>
            <send />
        </inSequence>
        <outSequence />
        <faultSequence />
    </target>
    <parameter name="transport.PollInterval">5</parameter>
    <parameter name="transport.vfs.FileURI">file:///home/chakray/Documentos/WSO2/EI/test
    </parameter>
    <parameter name="transport.vfs.ContentType">application/octet-stream; charset="UTF-8"
    </parameter>
    <parameter name="transport.vfs.ActionAfterProcess">DELETE</parameter>
    <parameter name="transport.vfs.FileNamePattern">.*\..*</parameter>
    <parameter name="transport.vfs.Locking">disable</parameter>
</proxy>
Later, the change will be requested to be saved in the xml file and the CAR will be generated. For this purpose, select the demoipfsCompositeExporter module and right click on it to display a pop-up menu with the option “Export Composite Application Project”.The following window will THEN be displayed.
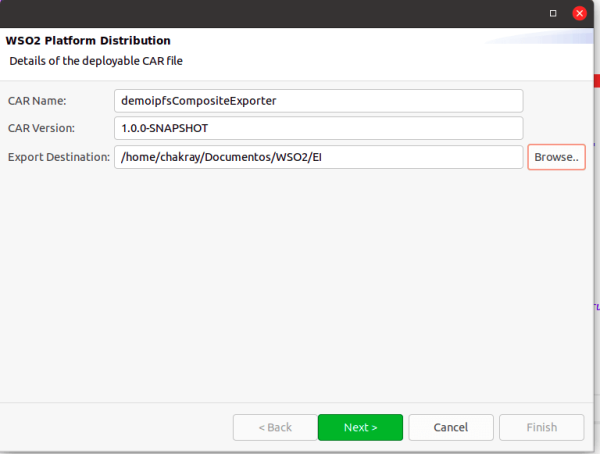
Where the following information will be requested:
- CAR name.
- CAR version.
- The link where the CAR will be deposited.
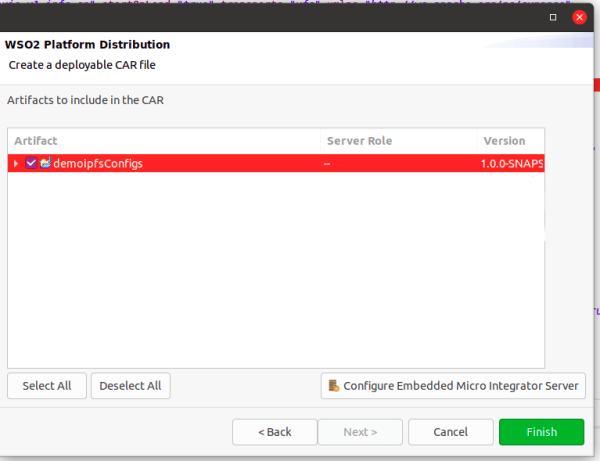
After clicking the ‘Next’ button, the list of artifacts added to the CAR will be displayed. The “demoipfsConfigs” module must be selected.
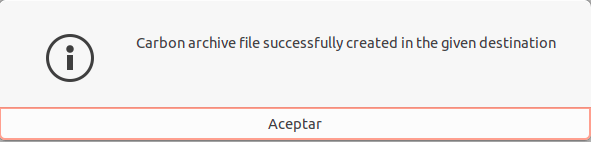
Finally, click the ‘Finish’ button and the following message will be displayed if the process was successfully completed.
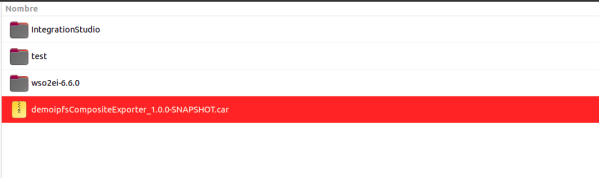
You can check the CAR file in previously entered pathway.
9. CAR INSTALLATION IN WSO2 EI
In order to carry out the installation of the previously created CAR file, the following steps must be carried out.
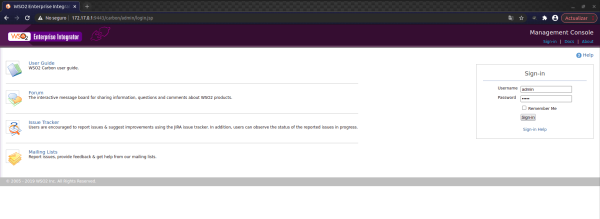
- Log into the Enterprise Integrator web console with the administrator user via the following url https://172.17.0.1:9443/carbon.
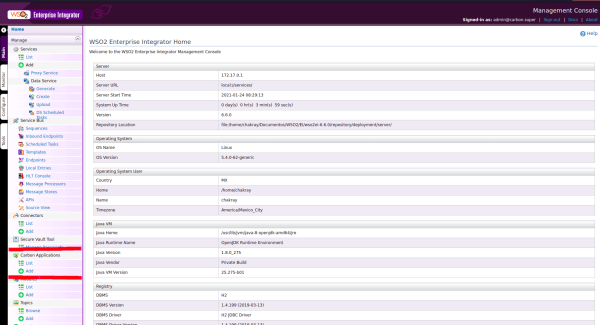
- When accessing the console, the menu will be displayed on the left-hand side. In the Carbon Applications section, click the ‘Add’ option to add the CAR that has been previously created.
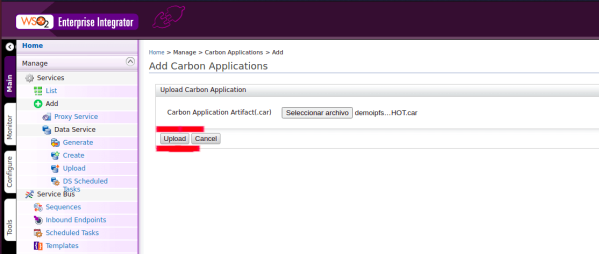
- Next, a form will be displayed where you must click the ‘Select file’ button.
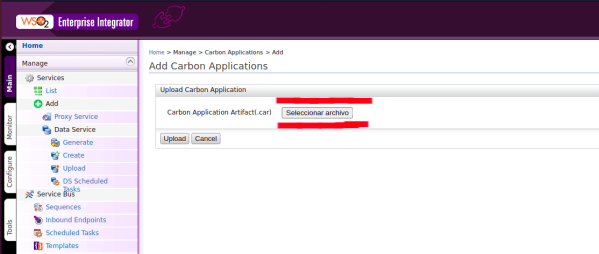
- Later, a pop-up box will appear asking you to select the CAR to be installed in the folder.
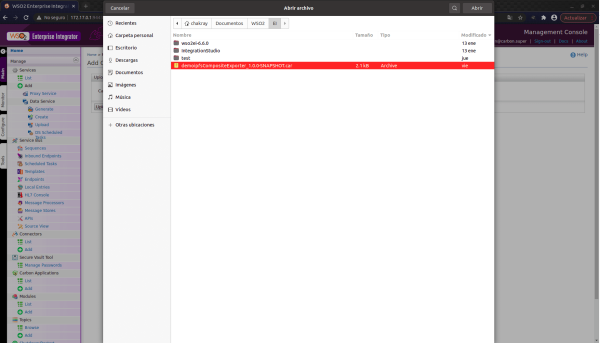
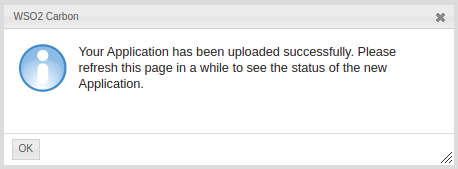
- Finally, the previous form will show the name of the CAR that was selected, then click the ‘Upload’ button.
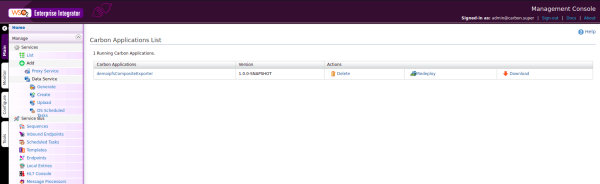
- If the deployment was successful, 2 points should be noted:
1.- CAR successful deployment message.
2.- Displayed in the ‘Carbon Applications’ list.
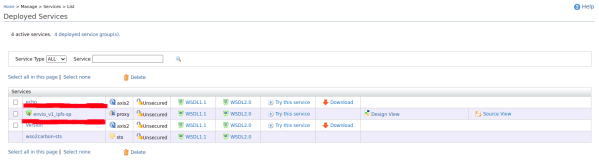
- As an extra you can see in the list of service the service proxy that was created. For this purpose, click the ‘List’ option in the Service menu section.
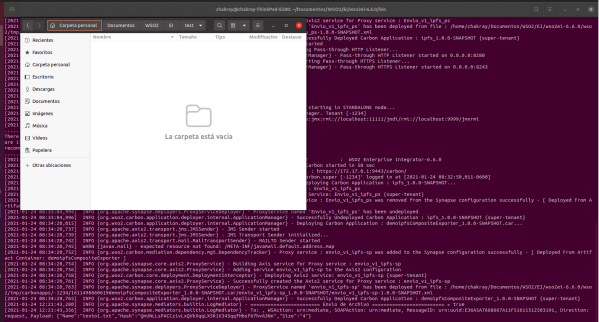
In order to test the integration of IPFS services with WSO2 EI, you can test if a file is placed in the file system that was referenced (/home/[absolutePath]/[absolutePath]/WSO2/EI/test) in the service proxy. As a response from the service, the hash generated in the IPFS is shown in the log.
To check this in the IPFS node, you can check it in the web console, by copying the generated hash and looking it up in the console.
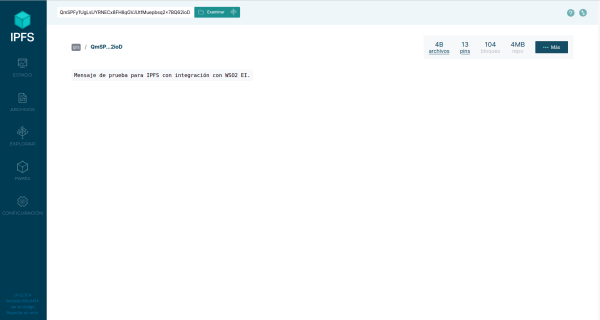
For this purpose, paste the generated hash and click ‘Examine’ in the browser to display the previously loaded document.
10. CONCLUSIONS
As you have been able to see in this tutorial on sending files to IPFS using WSO2 EI, IPFS is a file system that encrypts documents for subsequent exposure to the network (local) within the organization. By working with nodes you can add “N” nodes to the network as required by the business.
By integrating it with IPFS, the WSO2 EI tool can be configured to guaranteed delivery or storage of documents, since its features enable both failures and errors to be efficiently controlled.
By way of conclusion, the operation flow diagram of the example is shown.
REFERENCES
- API HTTP documentation: https://docs.ipfs.io/reference/http/api/#getting-started
- Documentation for command line work with ipfs : https://docs.ipfs.io/reference/cli/#ipfs-cat
- PlayloadFactory mediator documentation : https://docs.wso2.com/display/EI650/PayloadFactory+Mediator
- General information on the concept of a REST API : https://www.redhat.com/es/topics/api/what-is-a-rest-api
- Documentation on the RPC concept : https://es.wikipedia.org/wiki/Llamada_a_procedimiento_remoto
- WSO2 documentation for using VFS: https://docs.wso2.com/display/ESB500/VFS+Transport
- PlayloadFactory practical example: https://medium.com/think-integration/construct-and-send-multipart-form-data-using-wso2-ei-5cd548d095ee