The purpose of this article is to explain how to create and publish a GraphQL API in WSO2 API Manager 3.1.0.
What is GraphQL?
GraphQL stands for Graph Query Language. It is a query language similar to SQL developed by Facebook in 2012, which includes a runtime environment and a font system.
GraphQL is an alternative method to a REST interface for creating a communication-based service interface using the web protocols HTTP and JSON as a data exchange format. It has several advantages over REST, in that it is able to make several queries on a single request, returning only the data required by the client.
As with the definition of a WebService payload, using an XSD scheme, we will also define a scheme here with the design of our entities and mutations (operations on the entities, for example: additions, deletions, etc.) which will be accessible from our GraphQL Server.
The main purpose of the GraphQL is to avoid multiple server queries.
A GraphQL service is created by defining types, and fields in those types, then providing functions for each field in each type. For example, a GraphQL service that indicates which user has logged on (me) and the name of that user could look like:
type Query {
  me: User
}

type User {
  id: ID
  name: String
}
Along with functions for each field in each type:
function Query_me(request) {
  return request.auth.user;
}

function User_name(user) {
  return user.getName();
}
Once a GraphQL service is running, you can receive GraphQL queries to validate and execute. A received query is first checked to ensure that it only relates to the defined types and fields, and then the functions provided are executed to produce a result.
An example of a query is shown below:
{
  me {
    name
  }
}
The result of the query would be as follows:
{
  "me": {
    "name": "Luke Skywalker"
  }
}
To learn more about GraphQL and check out some examples you can visit the following link:
Integration of a GraphQL API with WSO2 API Manager 3.1.0
Nowadays, a Schema Definition Language (SDL) scheme can be used to design a GraphQL API in WSO2 API Manager, similar to creating a SOAP API using WSDL and developing a REST API using OpenAPI Specifications (also known as Swagger Definitions).
The following example will detail how to create and publish a GraphQL API in WSO2 API Manager 3.1.0.
Requirements
- Java 1.8. or higher
- WSO2 API Manager 3.1.0
Steps for creating and publishing a GraphQL API in WSO2 APIM 3.1.0.
1. For this example, we will use the following StarWarsAPI file, which you can download here. This file contains the definition of the scheme of the Star Wars movie saga, and will serve us to run specific queries, for example, to obtain all the movie titles, the number of episodes, or the character, planet, species, vehicle, and ship names, etc.
2. Download WSO2 API Manager 3.1.0 from the following link
3. After downloading the product, decompress the wso2am-3.1.0.zip file. Then, in order to start the WSO2 API Manager service, access the following route: <WSO2APIM_HOME>\bin, and execute the following command:
En Linux/Mac: sh wso2server.sh start
En Windows: wso2server.bat --run
4. Once the service has started, enter the API Manager Publisher portal using the following url:
https://<hostname>:9443/publisher
Remember to replace the hostname with the IP of the service on which WSO2 API Manager is installed, or simply enter “localhost” if you are running it from your computer, like this:
https://localhost:9443/publisher
NOTE: By default, the product is assigned with the localhost value as the hostname. To change this value, click on the following link with the instructions.
5. Log in with the corresponding credentials. In this case we will use the default admin:admin.

NOTE: If you need to change the access credentials, click on the following link with the information.
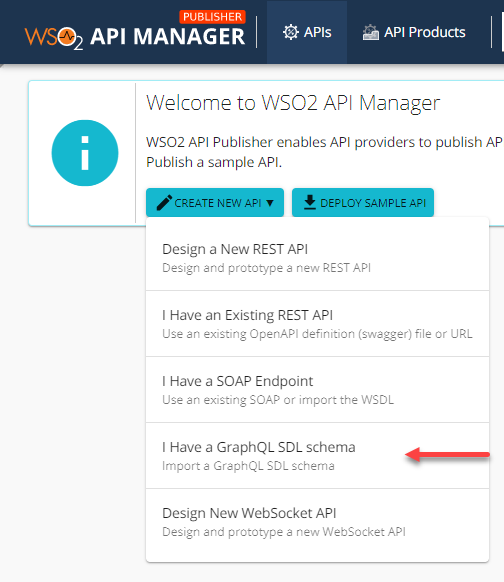
6. Once you have accessed the console, click on CREATE NEW API to create the API, then click on the I Have a GraphQL SDL schema option to import the GraphQL schema.
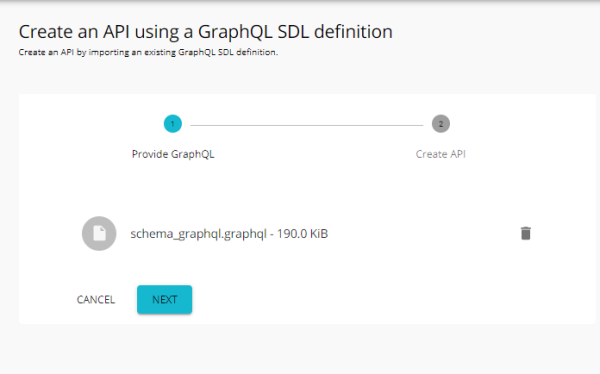
On the following window, it will request that you upload the file with the extension .graphql, from point 1 by clicking on BROWSE FILE TO UPLOAD, and then selecting the schema_graphql.graphql file.
NOTE: The file extension may be .graphql, .txt or .json.
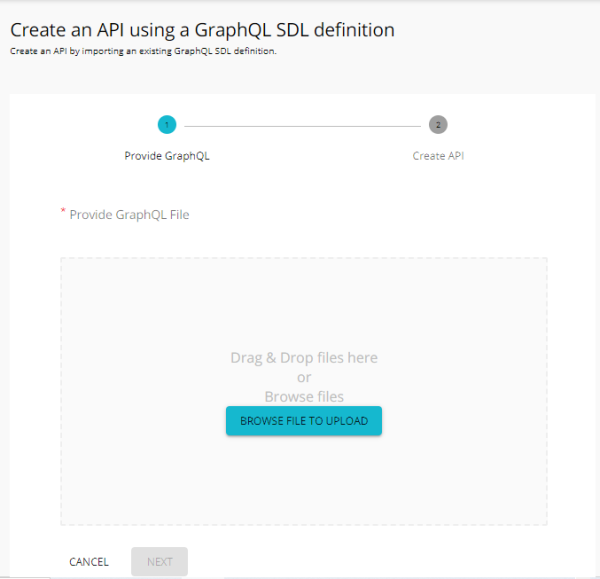
Once you have chosen and uploaded your file, click on Next to continue.
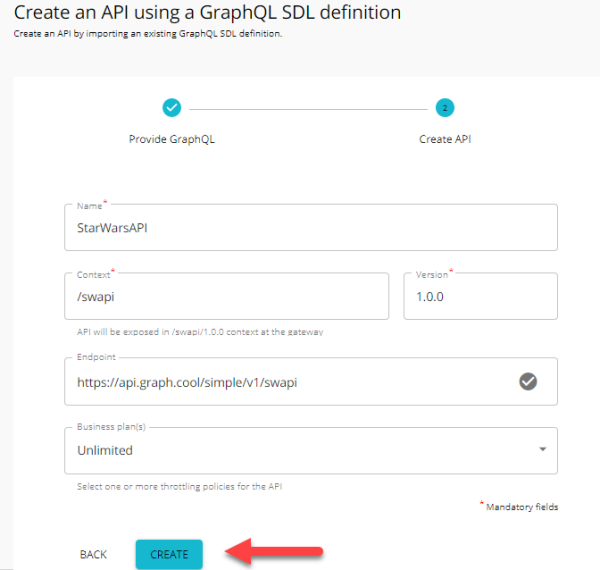
7. In the next part, in order to create the definition of your API, you should enter the name of your API, the context, the version, the endpoint and the business plan. In this example, we will use the following data:
| Name | StarWarsAPI |
| Context | /swapi |
| Version | 1.0.0 |
| Endpoint | https://api.graph.cool/simple/v1/swapi |
| Business Plans | Unlimited |
Once finished, click on CREATE.
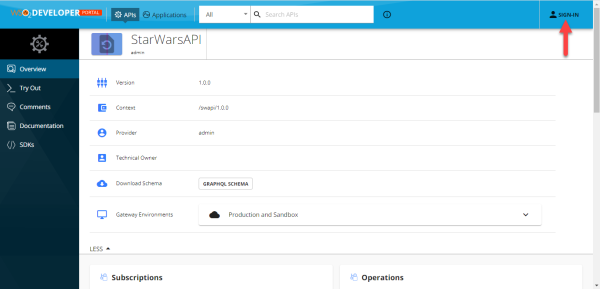
8. On the next window, you will see that your API has been created.
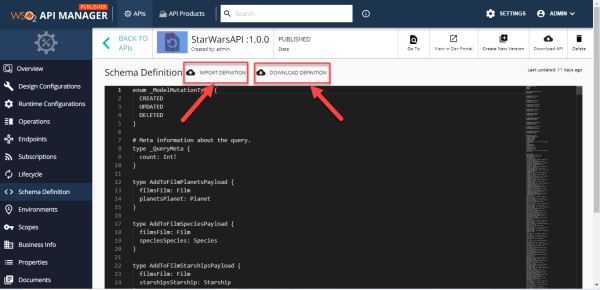
9. An important detail is that you can check the definition of your API. This can be done by clicking on the Schema Definition option.
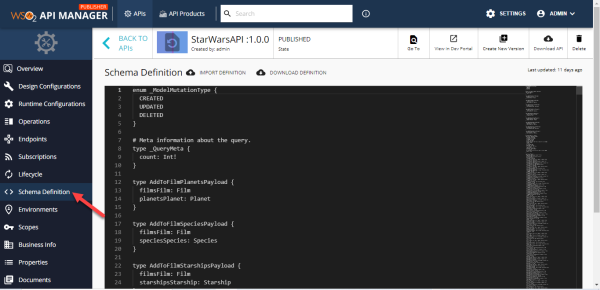
If required, you can download your API definition and make the corresponding modifications, and then import it to update the scheme definition.
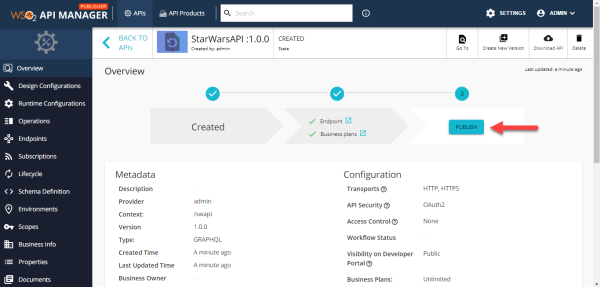
10. Once your API has been created, publish it by clicking on PUBLISH.
11. Once published, you’ll need to run a test of your API. To do so, go to the Dev Portal console by clicking the View in Dev Portal option.

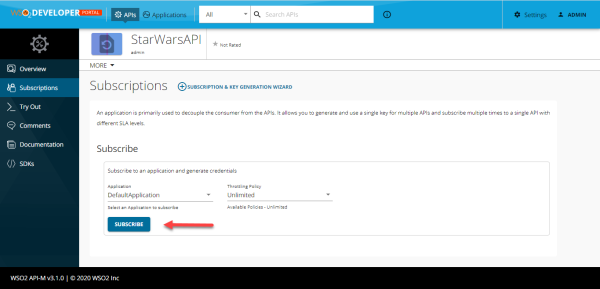
12. Once inside, click on SIGN IN to sign in with your username. In this example, we use the credentials admin:admin.
13. To consume the API, you have to subscribe. To do so, click on the Subscriptions option and then on SUBSCRIBE.
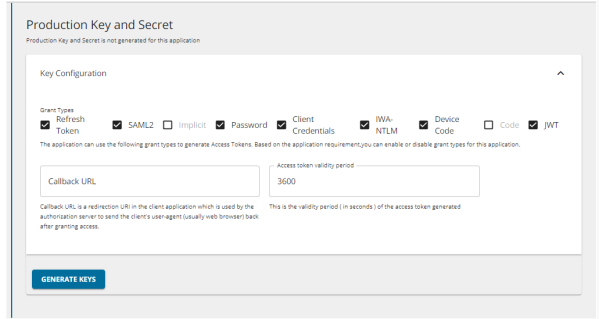
14. Once you have subscribed to your API, proceed to generate the Production Keys, for which we click on GENERATE KEYS.
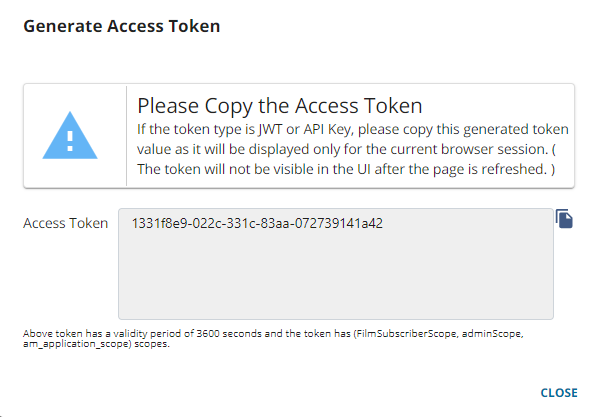
15. On the next window, copy the Token that has been generated.
16. Now, test your API by clicking on the Try Out option.
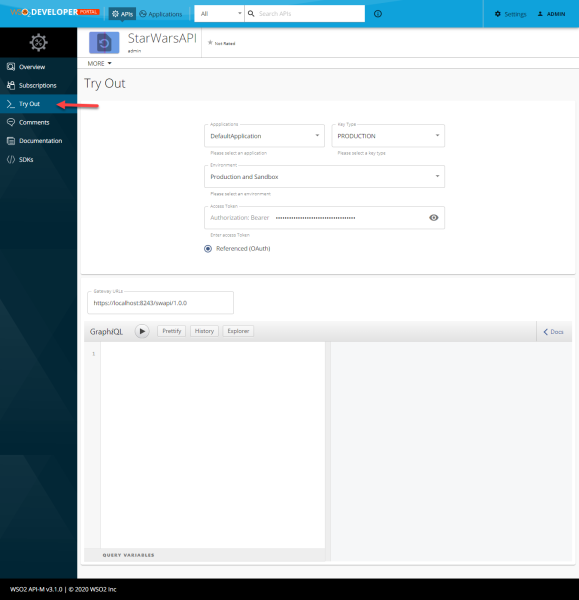
At the bottom, you will find the GraphQL query analyzer.
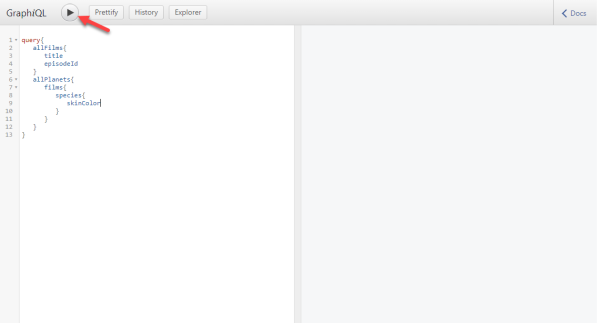
17. In order to try your API, enter the next payload example on the query analyzer. What we want to obtain is the list of all the films with their respective title and episode number, in addition to the skin color of the species of all the planets.
query{
   allFilms{
      title
      episodeId
   }
   allPlanets{
      films{
         species{
            skinColor
         }
      }
   }
}
18. Once our query has been entered, click on Execute.
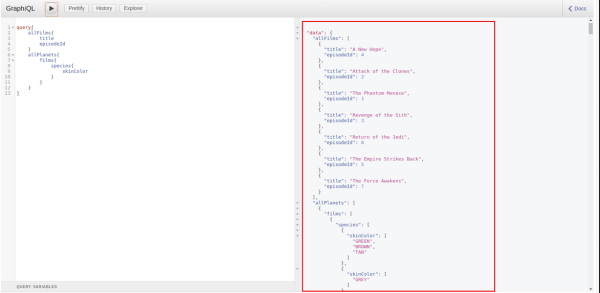
19. Finally, the result will be displayed on the right. The query includes all the films with their respective title and episode number, as well as the skin color of the species on each planet.
Conclusions
As you can see, when you run a GraphQL query, you get exactly what you need. GraphQL queries always return predictable results. Applications that use GraphQL are fast and stable because they control the data they receive, not the server.
GraphQL is a tool that is presented as an alternative to REST. The main improvement it offers is optimization, as well as the transfer of the information from the server to the client.