On a daily basis, our DevOps team builds a multitude of architectures to provide solid foundation for integrations and further development. Other times our job involves reviewing existing architectures, reorganizing, and proposing improvements. In the majority of cases time perimeter security is a point to be reinforced. Therefore, in this article, we will explain some of the enhancements that we usually offer by default and explain how to protect your APIs by installing and configuring ModSecurity in Nginx.
Terms glossary: Hardening, Red Tor, User Agent, and WAF
In this section, we will define some of the terms that we will be discussing in the article:
Hardening
Hardening is the process of enhancing the default configurations of operating systems in order to improve security, prevent privilege escalation, avoid vulnerabilities, unused services, or exposed ports.
Tor Network
Tor Network is a network created by software created over the internet network. It uses encryption, VPN, and hops between nodes of that network to provide anonymity. It is often used by hackers to hide their IP address. This network can be used simply for anonymity and research purposes, or for not so lawful purposes
User Agent
User Agent refers to the identifier where service and version information is displayed. This can usually be found in the headers of services, software scanners, web servers, and services in general.
WAF
Web Application Firewall (WAF) is an application firewall. It works in the same way as a network firewall by filtering packages according to its policies or rules. A WAF is used specifically for the application layer, and thoroughly filters the traffic at the application level, being able to detect attacks and establishing custom or OWASP-defined filtering or rules.
Use cases or scope of application
In general, the context is always the same or very similar. It involves web servers or Linux/Windows virtual machines that act as gateway to the platform as an application web server or proxy.
The common factor is that these OS are usually found by default, something not at all recommended in a computer that creates a boundary between the Internet and our internal network.
The reality we are facing
Nowadays, almost all organizations have a network firewall or NGF and a DMZ zone. What usually happens is that if the policies have not been configured properly, the network firewall usually ignores the services that are exposed at an application level, this means that it is not properly limited to the service, host, or application that we are exposing. The correct thing to do would be to apply the signatures of the OS (Ubuntu Linux, Windows server etc.), then apply the signatures of the service (Apache, Nginx, ISS, ISS), followed by the application signatures.
Once these adjustments are finished, we can add the basic WAF module. Some firewalls have this module, which does not act with the same effectiveness as a WAF, mainly because it is not one. However, it offers some improvement. On the other hand, we have the anti DDoS policies, if your firewall has this option, it is advisable to enable it. We know that these are extra functions and that they will not be as effective as hardware or a dedicated host.
In some organizations we may encounter the above scenario and make the necessary recommendations. We will also add some baseline improvements when we deploy our architecture or audit or rectify the customer’s architecture.
Procedure performed
- First, we generate a pre-hardening report on all the hosts that are part of the architecture or project.
- Secondly, we share the result with the client, we make our recommendations, and we see how far they want to go.
- The hardening process varies depending on the OS. There are several guides or tools to manage it, such as CIS Benchmarks. However, we usually prepare automated processes for the hardening of large numbers of assets, although we first develop and test the hardening automation, then we can use Ansible or combine with Bash or PowerShell as appropriate.
After all, it is a matter of incorporating the security perspective in a cross-cutting manner throughout the workflow and across all areas.
This is by no means optional. If we want to be up to date and protect our systems and applications, this is where the DevSecOps profile or methodology comes in.
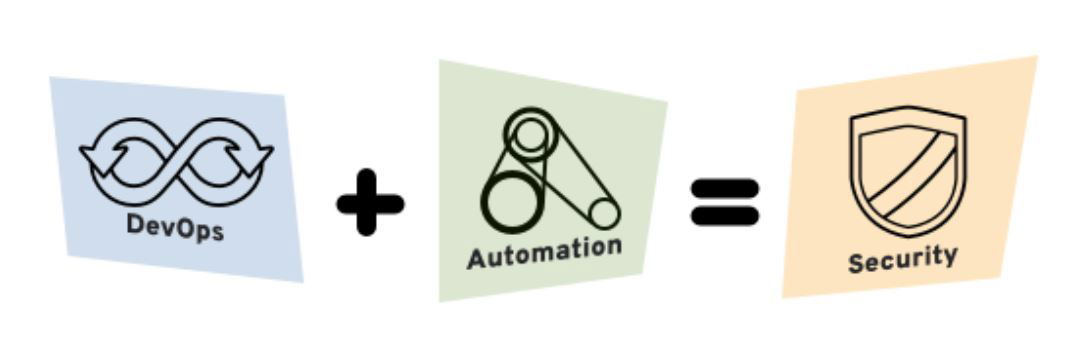
DevOps + Automation = Security
Nginx protecting applications
As mentioned above, we incorporate by default some security improvements to the above-mentioned hardening and on the proxy.
In this paragraph, we are going to discuss the technical improvements that we add to NGINX. NGINX offers the option of using the opensource WAF, modsecurity or its paid version NGINX+ called WAF.
In order to make use of modsecurity, we need to compile the latest version of Nginx preparing it to use the modsecurity module.
On this occasion, we will provide some instructions and requirements for Centos 8/Redhat.
Required packages and repositories
Next, we will install the necessary packages for Redhat/Centos 8 distribution:
# dnf update
dnf install https://dl.fedoraproject.org/pub/epel/epel-release-latest-8.noarch.rpm -y
dnf install https://rpms.remirepo.net/enterprise/remi-release-8.rpm -y


dnf install gcc-c++ flex bison yajl curl-devel zlib-devel pcre-devel autoconf automake git curl make libxml2-devel pkgconfig libtool httpd-devel redhat-rpm-config wget openssl openssl-devel nano -y

dnf --enablerepo=powertools install doxygen yajl-devel -y
dnf --enablerepo=remi install geoip-devel -y
yum install geoip-devel -y
Installation and modsecurity compilation
Now, we will install modsecurity. In order to do so, you can follow the instructions below:
#we will clone modsecurity repo for nginx in the dir opt
cd /opt/ && git clone --depth 1 -b v3/master --single-branch https://github.com/SpiderLabs/ModSecurity

# Enter the directory, download the latest version, and compile the module.
cd ModSecurity
git submodule init
git submodule update
./build.sh && ./configure

make install

# download modsecurity-nginx
cd /opt
git clone https://github.com/SpiderLabs/ModSecurity-nginx.git
Installation and compilation of Nginx with modsecurity support
We download the latest stable version from the official website, unzip, compile and install:
wget http://nginx.org/download/nginx-1.18.0.tar.gz
tar -xvzf nginx-1.18.0.tar.gz
cd /opt/nginx-1.18.0

./configure --user=nginx --group=nginx --with-pcre-jit --with-debug --with-http_ssl_module  --with-http_realip_module --add-module=/opt/ModSecurity-nginx
Setting up modsecurity
Example of Nginx configuration file enabling modsecurity:
#Sample template /usr/local/nginx/conf/nginx.conf

user  nginx;
worker_processes  1;
pid  /run/nginx.pid;
events {
     worker_connections  1024;
 }

 http
     include	  mime.types;
     default_type  application/octet-stream;
     sendfile        on;
     keepalive_timeout  65;
     server {
         listen       80;
         server_name  your-server-ip;
         modsecurity  on;
         modsecurity_rules_file  /usr/local/nginx/conf/modsecurity.conf;
         access_log  /var/log/nginx/access.log;
         error_log  /var/log/nginx/error.log;
         location / {
root   html;
index  index.html index.htm;
         }
         error_page   500 502 503 504  /50x.html;
         location = /50x.html {
root   html;
Reloading and testing the configuration
Now, we will apply the necessary changes to configure modsecurity, validate that the configuration is correct, and restart the service:
#Configuring modsecurity in nginx

sed -i 's/SecRuleEngine DetectionOnly/SecRuleEngine On/g' /usr/local/nginx/conf/modsecurity.conf
sed -i 's/\/var\/log\/modsec_audit.log/\/var\/log\/nginx\/modsec_audit.log/g' /usr/local/nginx/conf/modsecurity.conf


#Testing config
nginx -t

# We enable the domain and start the nginx service
systemctl daemon-reload
systemctl start nginx
sudo systemctl enable ssh
systemctl status nginx
Configuring modsecurity with OWASP rules
We download the OWASP rules from the OWASP repository and include them in the modsecurity configuration:
git clone https://github.com/SpiderLabs/owasp-modsecurity-crs.git /usr/local/nginx/conf/owasp-crs
mv /usr/local/nginx/conf/owasp-crs/crs-setup.conf.example /usr/local/nginx/conf/owasp-crs/crs-setup.conf

echo "Include owasp-crs/crs-setup.conf" >> /usr/local/nginx/conf/modsecurity.conf
echo "Include owasp-crs/rules/*.conf" >> /usr/local/nginx/conf/modsecurity.conf

nginx -t

# If everything goes well, we restart the system.
systemctl restart nginx
Blocking access from the Tor Network
In this section, we will explain the ability of Nginx to block an IP and limit its access.
To block access to certain IP addresses in Nginx the syntax is as follows.
deny 192.168.1.2;

deny 192.168.1.3;
Now that you know how to block IP listings, we can download the output node listings from the torproject source.
If we create a script for downloading the IP list and then format the output, we can have a list similar to this one:
deny 104.244.73.215;
deny 198.98.62.107;
deny 104.244.79.203;
deny 209.141.55.90;
deny 209.141.41.214;
deny 143.110.236.82;
deny 93.95.227.227;
We can save the above output in a file, for example include /opt/nginx_deny_tor.txt;
It is advisable to automate the previous step to keep the list updated, we could do it with CRONTAB.
If we go now to the Nginx documentation, we can see that one of its many options enables us to block a list of IP addresses, we can include the list as shown in the example:
location / {
   include /opt/nginx_deny_tor.txt;
   #…...etc...
}
Blocking vulnerability scanners or similar via user agent
location / {
   include /opt/nginx_deny_tor.txt;
   if ($http_user_agent ~* (^w3af.sourceforge.net|dirbuster|nikto|wpscan|SF|sqlmap|fimap|nessus|whatweb|Openvas|jbrofuzz|libwhisker|webshag)) {
        return (
   }
As you can see in the previous section, we add a conditional based on the User Agent to the configuration location/, if it coincides with one of the options the connection will be closed.
We can modify our user agent in our Firefox browser with this tool called User Agent Switcher for testing purposes.
Conclusions
- We have discussed the importance and some system hardening tools.
- We have discussed how we can add modsecurity to Nginx as a WAF.
- We have discussed how to block connections from the Tor Network.
- We have explained how to close the connection to clients with unwanted User Agent.