This tutorial explains how to use a Keycloak Identity Server integrating it into WSO2 API Manager as a component.
It is important to bear in mind that if the organization already has an Identity Provider (IdP), it is possible to simply connect this to the WSO2 APIM implementation instead of migrating all user identities to the WSO2 Identity Server.
In order to do so, we will follow this index:
WSO2 API Manager
WSO2 API Manager is a solution to full lifecycle API management. It is 100% open source and it mainly provides the following functionalities for company services:
- Security: requires execution tokens compatible with OAuth2 standard.
- Flow Control: validates API execution quotas defined at multiple levels.
- Analytics: stores events, launches real-time alerts and carries out batch analysis of key performance indicators for dashboards.
- Easy Publishing: full lifecycle API management application.
- Easy Consumption: API Store application with tools to promote developer community.
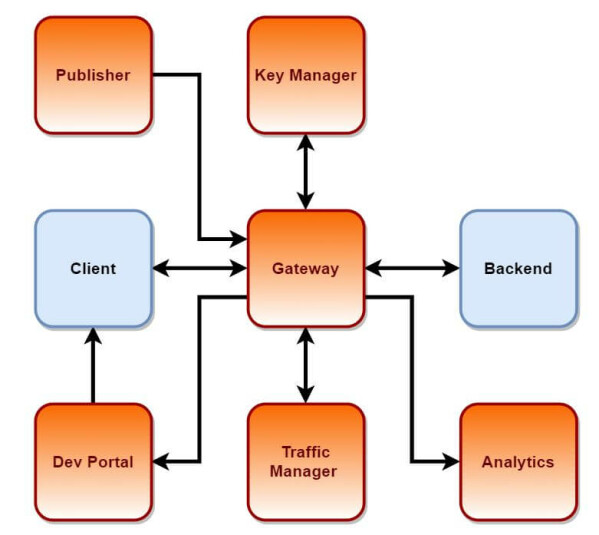
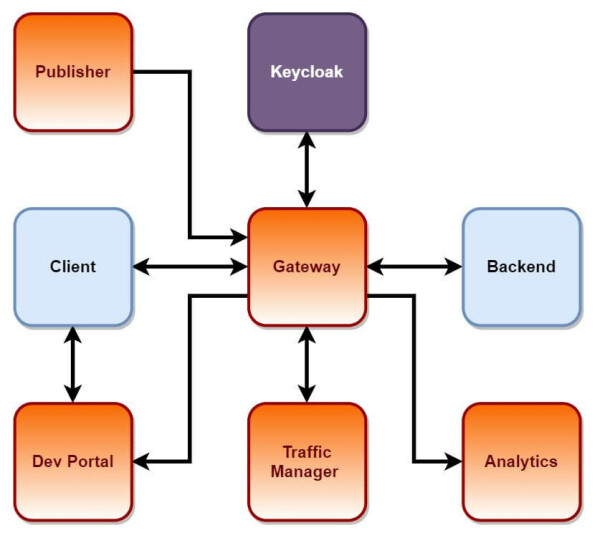
From the architectonic point of view, it is made up of the following components:
- Publisher (Backoffice Application): APIs publication application.
- Developer Portal (The API marketplace): APIs consumption application.
- Gateway (API runtime): a component verifying conditions and sending requests to the backend.
- Key Manager (API key management): token validation component.
- Analytics (API analytics & alerts): event reception and analysis component.
- Traffic Manager (API throttling & traffic management): execution quotas validation component.
The following basic diagram shows the relationship between components:
Keycloak
Keycloak is an open source software product which offers the following features to applications and services:
- Single sign-on (with SAML2 or Open ID support)
- Identity management
- Access management
This JBoss community project is currently under the stewardship of Red Hat who use it as the initial project for their RH-SSO product.
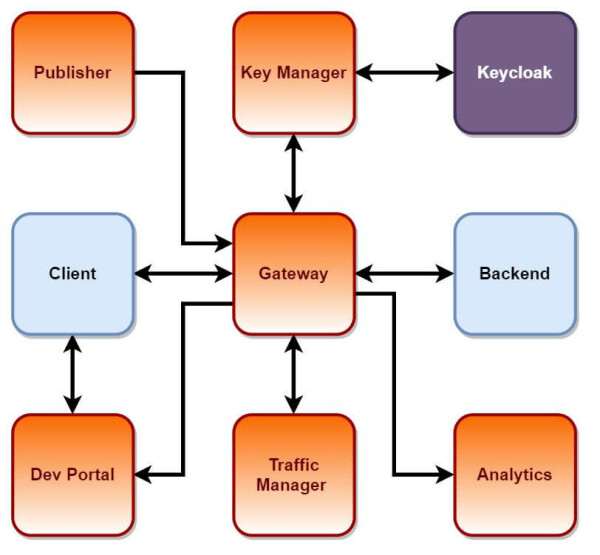
2.Integration
As an identity provider, Keycloak can be integrated with WSO2 AM and WSO2 IS products.
There are two ways to integrate it, each of them having different characteristics:
As a Federated Identity Provider:
- It does not require Java development
- WSO2 AM works as a Key Manager (tokens are generated and managed by WSO2 AM)
- Authentication is managed by Keycloak
- Authorization is managed by WSO2 AM (roles are managed in WSO2 AM)
As a Third Party Key Manager:
- It requires Java development implementing Key Manager and Key Validator interfaces
- Keycloak works as a Key Manager (tokens are generated and managed by Keycloak)
- Authentication is managed by Keycloak
- Authorization is managed by Keycloak (roles are managed in Keycloak)
The differences between the two approaches are summarized in the following table:
| Integration Type |
Java development required |
Token Management |
Authentication Management |
Authorization Management |
|---|---|---|---|---|
|
Federated Identity Provider |
No |
WSO2 AM |
Keycloak |
WSO2 AM(*) |
| Third Party Key Manager |
Yes |
Keycloak |
Keycloak |
Keycloak |
*If you want Keycloak to also manage authorization, a minor Java development is required extending OAuth2ScopeValidator class.
the appropriate approach should be selected depending on project requirements.
Steps for a laboratory integration of WSO2 AM and Keycloak as a Federated Identity Provider are detailed below.
3.Requirements
Docker
In the article, Docker images of WSO2 and Keycloak are used in order to avoid unnecessary installations.
The information on how to install Docker Engine on a preferred platform is available via the following link https://docs.docker.com/engine/install/.
4.Docker Configuration
It is necessary to create a bridge network between the two containers so that they are able to communicate. This can be done by running the following snippet in a terminal:
docker network create --subnet 172.18.0.0/16 --gateway 172.18.0.1 wso2am-keycloak-net
5.Keycloak Configuration
Installing Keycloak
It is possible to start a Keycloak server quickly by running the following snippet in a terminal:
docker run --ip 172.18.0.3 --add-host keycloak:172.18.0.3 --add-host wso2am:172.18.0.2 --net wso2am-keycloak-net -e KEYCLOAK_USER=admin -e KEYCLOAK_PASSWORD=keycloak -e DB_VENDOR=h2 -ti -p 8080:8080 --name keycloak jboss/keycloak:9.0.3
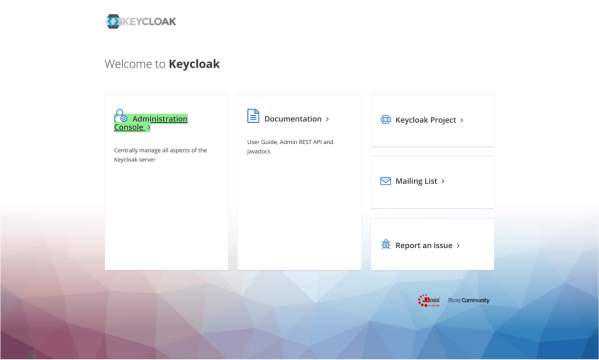
In order to verify the installation, access the console http://localhost:8080 and enter admin/keycloak credentials.
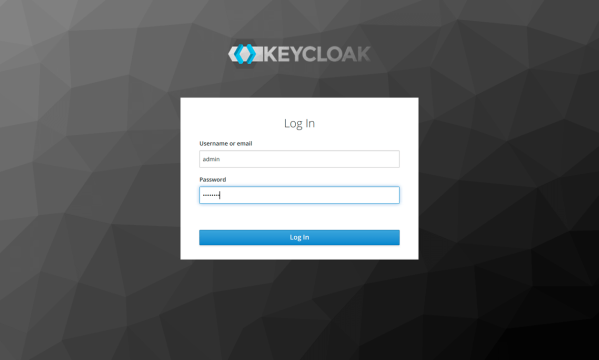
On the login screen inform the admin/keycloak credentials.
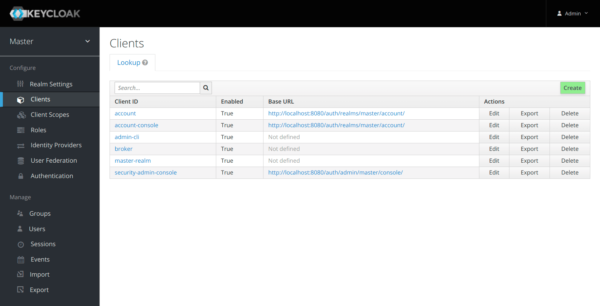
Creating a client
Access the console and create a client in the default realm.
Set the following data:
-
Client Id -> wso2apim
-
Protocol -> openid-connect
-
Root URL -> https://localhost:9443/commonauth

Change the access type to confidential in order to create a client-secret in the Settings:
- Access Type → confidential
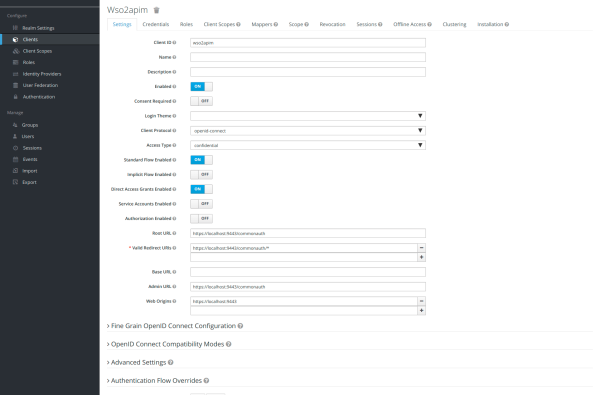
Save the configuration.
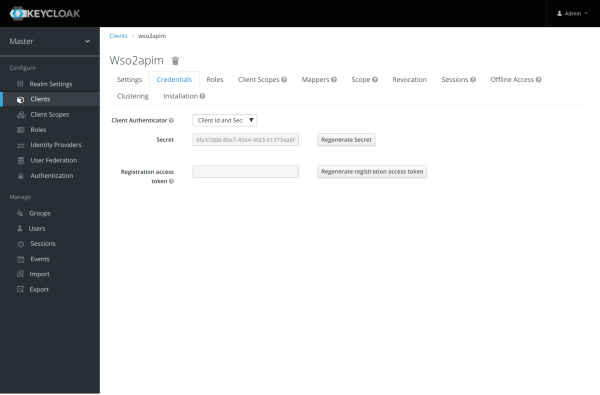
On credentials tab:
- Register the secret created in this credentials tab (for example 6fa37d08-80e7-4564-9fd3-513734a6ffbc) to use in the WSO2 AM configuration
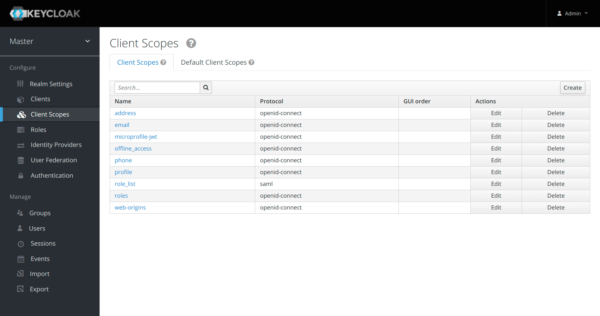
Updating the Scope Profile
Keycloak returns “profile and email” scopes by default. However, none of these returns the “group” claims that is required for WSO2 AM to allow access to the Developer Portal. Therefore, it is necessary to add the group claim to this scope .
On “Client Scopes” tab, edit the scope profile.
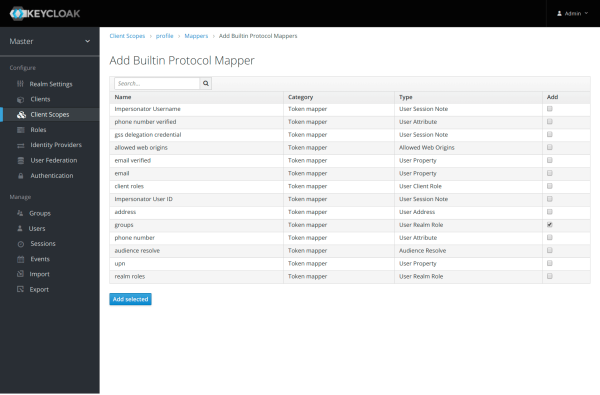
Add a “Built in” mapper via “Add Builtin”.
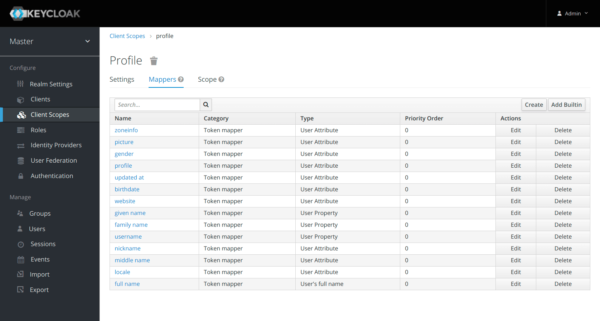
Select and add the mapper “groups”.
The initial configuration of Keycloak is complete.
6.Configuring WSO2 API Manager
Installing WSO2 AM
It is possible to set up a WSO2 AM server quickly by running the following snippet in a terminal:
docker run --ip 172.18.0.2 --add-host keycloak:172.18.0.3 --add-host wso2am:172.18.0.2 --net wso2am-keycloak-net -ti -p 8280:8280 -p 8243:8243 -p 9443:9443 --name api-manager wso2/wso2am:3.1.0
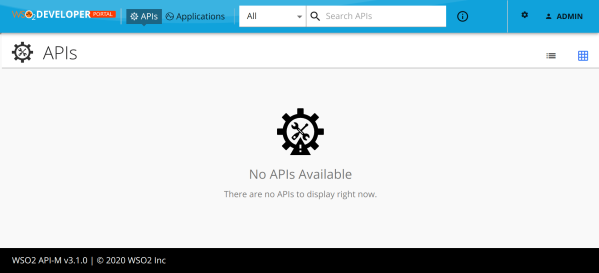
Accessing the Developer Portal
Access the URL https://localhost:9443/devportal/ using the default WSO2 admin/admin credentials

Creating the Federated Identity Provider
From the WSO2 AM management console (https://localhost:9443/carbon), create an Identity Provider, for example “keycloak”, with the following features:
On “Claim Configuration” tab -> Basic Claim Configuration -> Define Custom Claim Dialect (+ Add Claim Mapping)
- Identity Provider Claim URI: preferred_username → Local Claim URI: http://wso2.org/claims/displayName
- Identity Provider Claim URI: groups → Local Claim URI: http://wso2.org/claims/groups
On “Identity Provider Roles” tab (+ Add Role Mapping)
- Identity Provider Role: subscriber → Local Role: Internal/subscriber
On “Federated Authenticators” tab > OAuth2/OpenID Connect Configuration
- OpenId Enabled for this Idp: true
- Client Id: wso2apim
- Client Secret: (the client secret from keycloak)
- Authorization Endpoint URL: http://172.18.0.2:8080/auth/realms/master/protocol/openid-connect/auth
- Token Endpoint URL: http://172.18.0.2:8080/auth/realms/master/protocol/openid-connect/token
- Userinfo Endpoint URL: http://172.18.0.2:8080/auth/realms/master/protocol/openid-connect/userinfo
On “Just-In-Time Provisioning” tab
- Define “Always provision to User Store PRIMARY”
- Enable Provision Silently
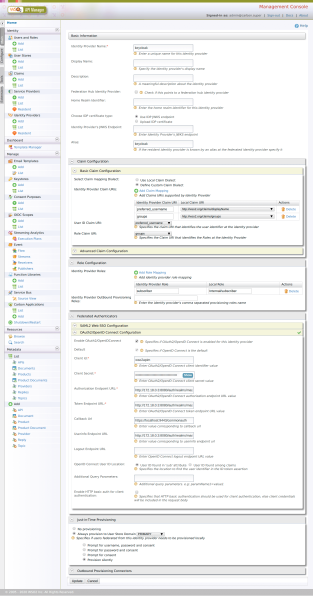
In the following image, you can see how the IdP should look:
Updating the Service Provider of the Developer Portal
Access the Carbon console and edit the Service Provider named “apim_devportal”.
Define the following features in the Service Provider:
On “Claim Configuration” tab -> Basic Claim Configuration -> Define Custom Claim Dialect (+ Add claim mapping)
- Identity Provider Claim URI: preferred_username → Local Claim URI: http://wso2.org/claims/displayName
- Identity Provider Claim URI: groups → Local Claim URI: http://wso2.org/claims/groups
On “Identity Provider Roles” tab (+ Add Role Mapping)
- Identity Provider Role: subscriber → Local Role: Internal/subscriber
On “Local& Outbound Authentication Configuration” tab
- Authentication Type: keycloak
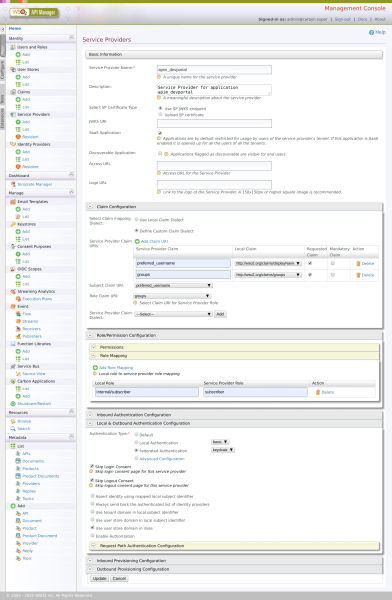
Save the Service Provider. See below for how the configuration should look:
The WSO2 configuration is complete.
7.Test with Admin User
Log out of the developer portal, then log in again. Keycloak’s login page should appear on the screen.

This time log in using Keycloak’s admin credentials (admin/keycloak).
WSO2 AM accepts the Federated IdP’s login.
8.Test with Other Users
Creating a New Role in Keycloak
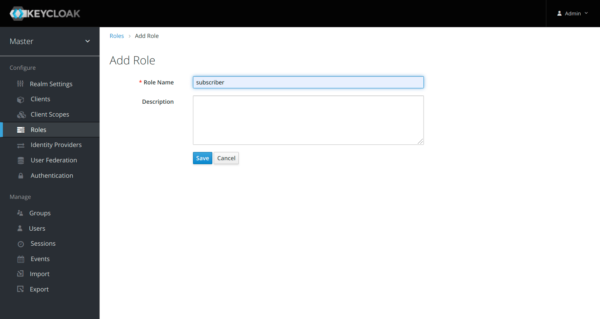
On the “Roles” tab, click “Add Role”.
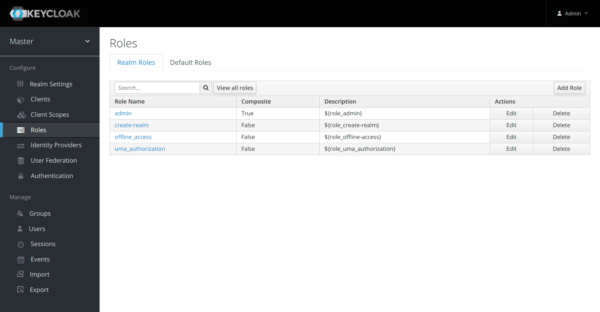
Enter the name of the subscriber.
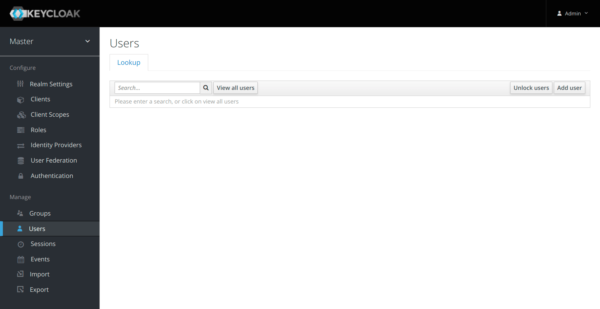
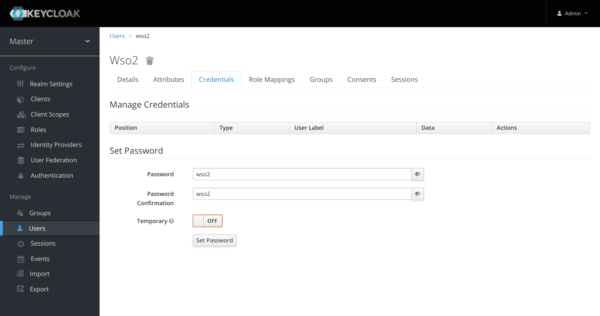
Creating a User on Keycloak
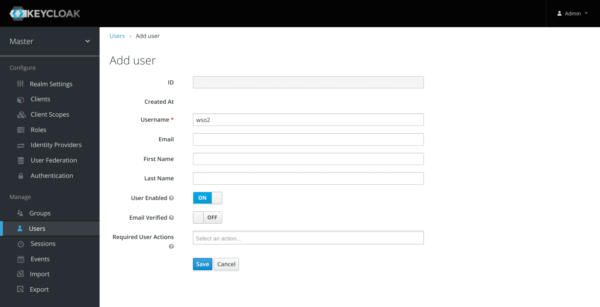
On the Users tab, click “Add User”.
Create a user, for example “wso2”.
On the “Credentials” tab, set the password (for example “wso2”) and disable the option temporary password:
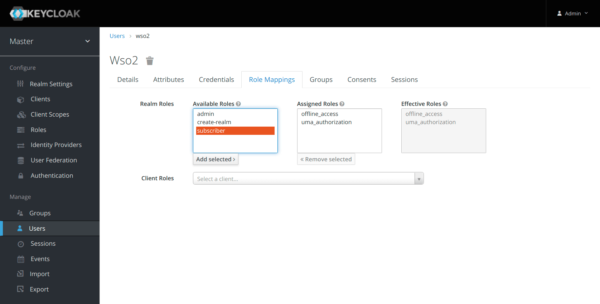
Assigning the User to the Subscriber Role
On the “Role Mappings” tab, select the subscriber role from “Available Roles” and change it to “Assigned Roles”.
Log out of the developer portal, then log in again. Keycloak’s login page should appear on the screen.
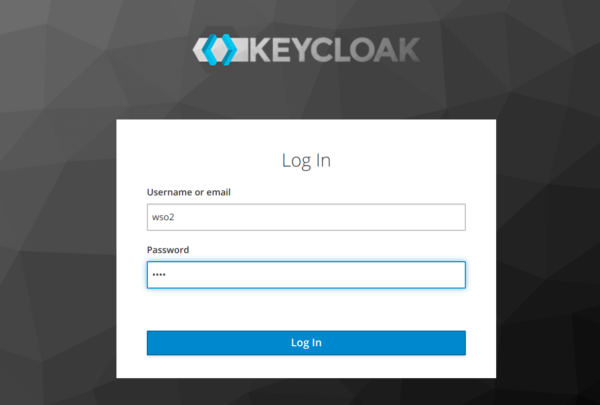
This time log in using the new user’s credentials (wso2/wso2).
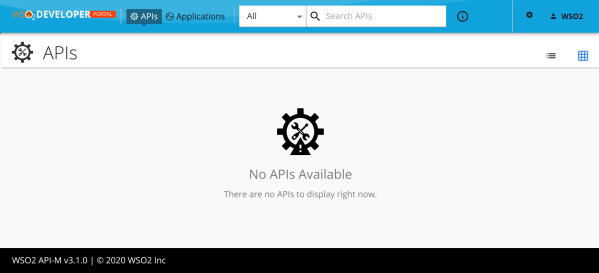
WSO2 AM accepts the Federated IdP’s login.
9.Conclusion
It is possible to use Keycloak as an identity provider for WSO2 through the OAuth2 protocol. This is done via a simple configuration and there is no need for additional developments.
To uninstall the laboratory, shut the docker containers down and eliminate them along with the created bridge network by running the following snippet:
docker stop keycloak
docker rm keycloak
docker stop api-manager
docker rm api-manager
docker network rm wso2am-keycloak-net


Talk to our experts!
Contact our team and discover the cutting-edge technologies that will empower your business.
contact us