Today, we’ll explore the API security features of the Gravitee API Management solution using OAuth 2.0 from a practical perspective.
To do so, we’ll explore the following points:
|
1. What is OAuth 2.0?
OAuth2 is an open standard for the secure authorization of communication between our APIs. It grants applications limited access to API resources by delegating authentication tasks to a proprietary (or trusted) resource within the user account.
-For more information about this protocol head to the following link: OAuth 2.0: API authentication, security, and usability – Chakray-
2. Architecture for deploying OAuth 2.0 within Gravitee API Management
In order to deploy OAuth 2.0 within Gravitee API Management , we will need to have an OAuth2 Authorization Server. This will generate and validate the access tokens used to secure our APIs. There are several options for this:
- Generic OAuth2 Authorization Server
- Gravitee Access Management, Open Source solution with Apache 2.0 license and Enterprise support provided by Gravitee.io
- Custom Adapter, such as the one available for Keycloak
In this particular case, we will be using on the solution provided by Gravitee.io, Gravitee Access Management.
The source code required to launch the Access Management solution is available via the following link: https://github.com/ChakrayES/docker-compose-gravitee-am-singlegw
We will also be using the Gravitee API Management lab that will be created in this article, and whose source code is available via the following link:https://github.com/ChakrayES/docker-compose-gravitee-api-singlegw (branch with-gravitee-am).
The authentication flow that we will cover in this article will be as follows:
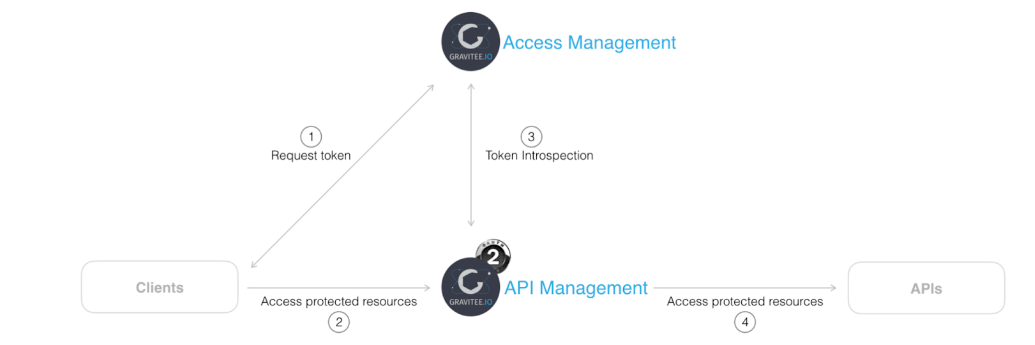
Figure 1. Authentication flow
3. Lab start up for securing our APIs through the OAuth 2.0 standard from a practical perspective
Before launching our lab services, we need to add the following lines to the machine’s local DNS file. For Linux or Mac environments, the configuration would be as follows:
/etc/hosts
# Gravitee API Management
127.0.0.1 portainer.demo.chakray.internal api.demo.chakray.internal mgt-api.demo.chakray.internal mgt-ui.demo.chakray.internal portal-ui.demo.chakray.internal

# Gravitee Access Management
127.0.0.1 am-gw.demo.chakray.internal am-api.demo.chakray.internal am-webui.demo.chakray.internal
We can also register the corresponding records within the local DNS Server, if this functionality is available on the LAN.
1.To launch the Gravitee Access Management lab, run the following command in the project’s root directory:
docker-compose-gravitee-am-singlegw % docker-compose up -d
2. We can verify the service status using the following command:
docker-compose-gravitee-am-singlegw % docker-compose ps

Figure 2. Verify service status
3. We can view the service logs using the following command:
docker-compose-gravitee-am-singlegw % docker-compose logs -f –tail 2

Figure 3. Service log
4. To launch the Gravitee API Management lab, run the following command in the project’s root directory:
docker-compose-gravitee-api-singlegw % docker-compose up -d
5. We can verify the service status using the following command:
docker-compose-gravitee-api-singlegw % docker-compose ps
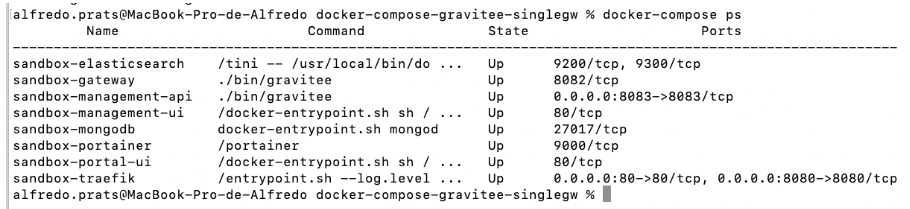
Figure 4. Verify service status
6. We can view the service logs using the following command:
docker-compose-gravitee-api-singlegw % docker-compose logs -f –tail 2
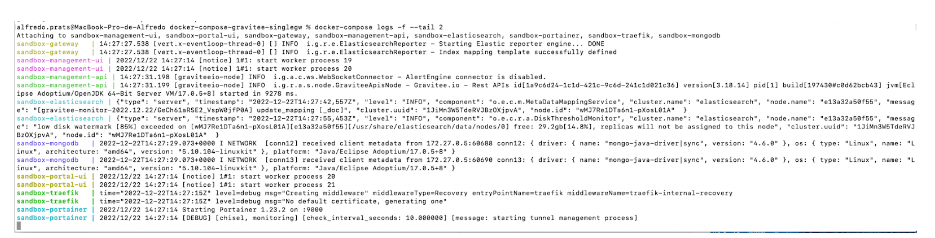
Figure 5. View service log
7. We can access the Gravitee API Management console at http://mgt-ui.demo.chakray.internal/ (user admin/admin).
8. We can access the Gravitee Access Management console at http://am-webui.demo.chakray.internal:90/ (user admin/adminadmin).
4. Protecting Gravitee API management using OAuth 2.0
We will use the API created in this article as a starting point. The objective will be to create a new plan, this time under the OAuth2 protocol.
4.1 Gravitee Access Management Configuration
1.First, we need to create an Application within the Gravitee Access Management console. To do so, open the “Applications” menu by clicking on the “+” icon.
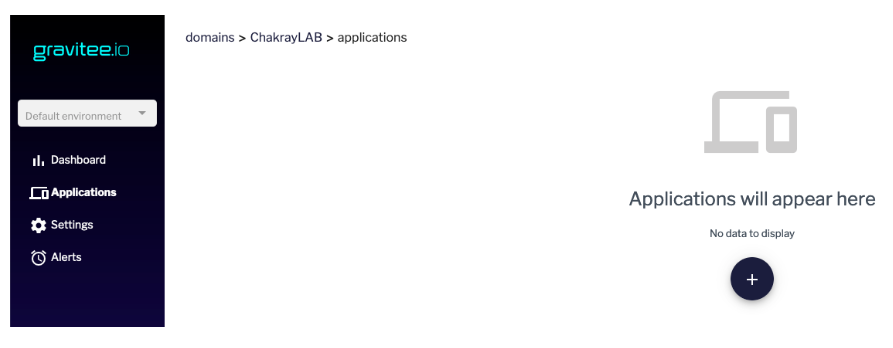
Figure 6. Gravitee Access Management Configuration
2. For this use case, and for practical purposes, select “Backend to Backend”.

Figure 7. Backend to Backend
3. Fill out the details of the new application.
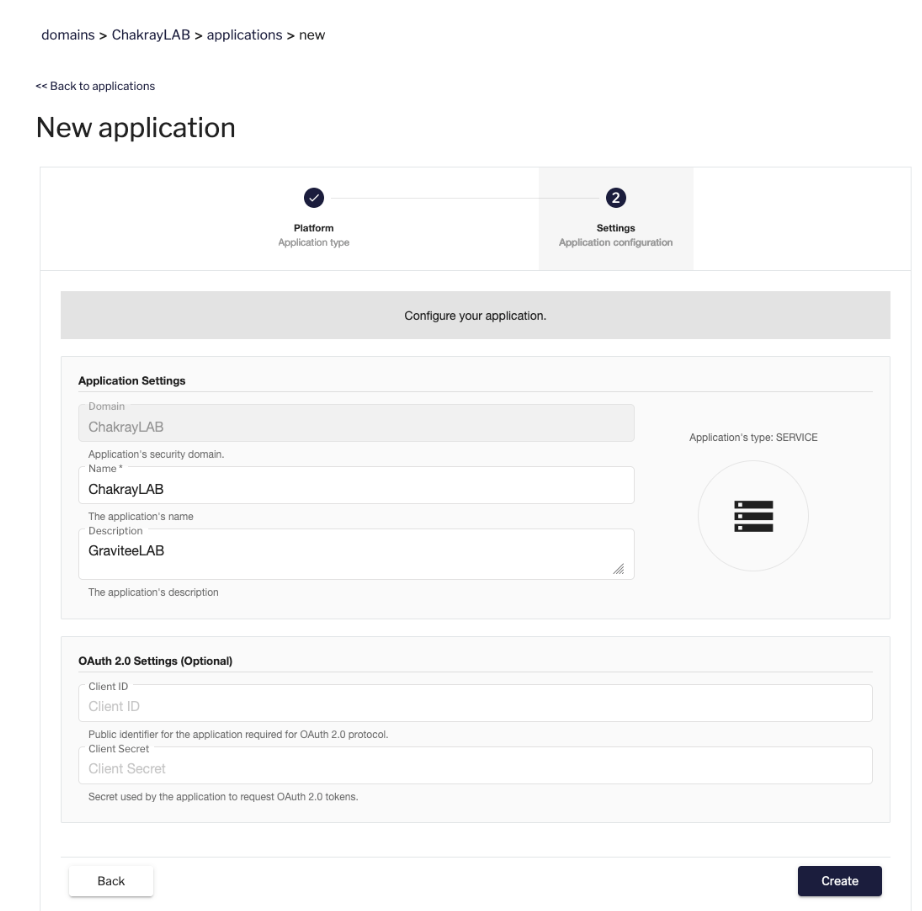
Figure 8. Fill out app information
4. We will receive information on how to use the new application as soon as it has been created.
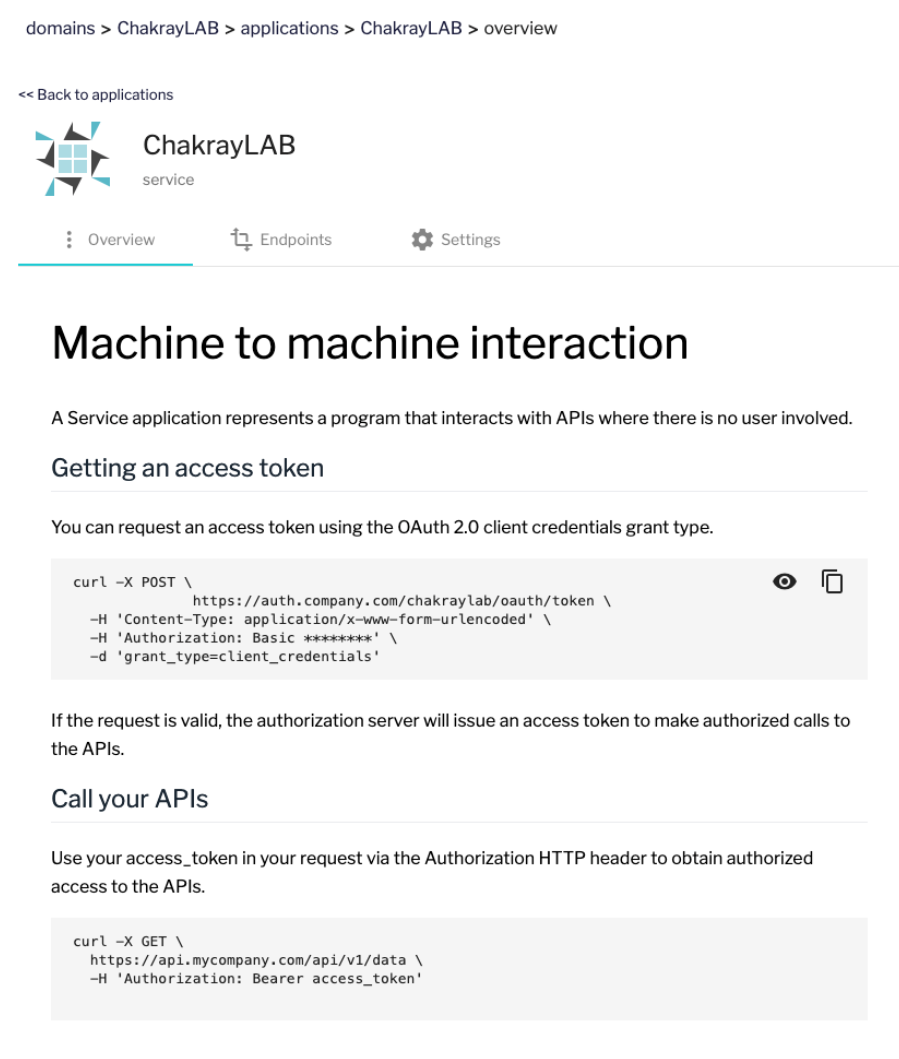
9. Using the new application
5. We can generate access tokens using the following command:
curl -X POST \
  http://am-gw.demo.chakray.internal:90/chakraylab/oauth/token \
  -H 'Content-Type: application/x-www-form-urlencoded' \
  -H 'Authorization: Basic NjkyOWFlOWEtZDZmYy00N2FiLWE5YWUtOWFkNmZjOTdhYmYyOjNFTUs4M0ZWR2NPZExrQmprLUFPd2poYnNhcnN3SUp3ZlRTa0FpYmpHUzA=' \
  -d 'grant_type=client_credentials'
Figure 10. Generate access token
4.2 Gravitee API Management Configuration
The next step is to create a new OAuth2 type plan in our API and connect it to the application we have just created in Gravitee Access Management.
1.First, we need to register our Gravitee Access Management as a new resource for our API. To do so, we need to log in to the Gravitee API Management console. Select the API “My REST Countries” and open the “Design” menu.
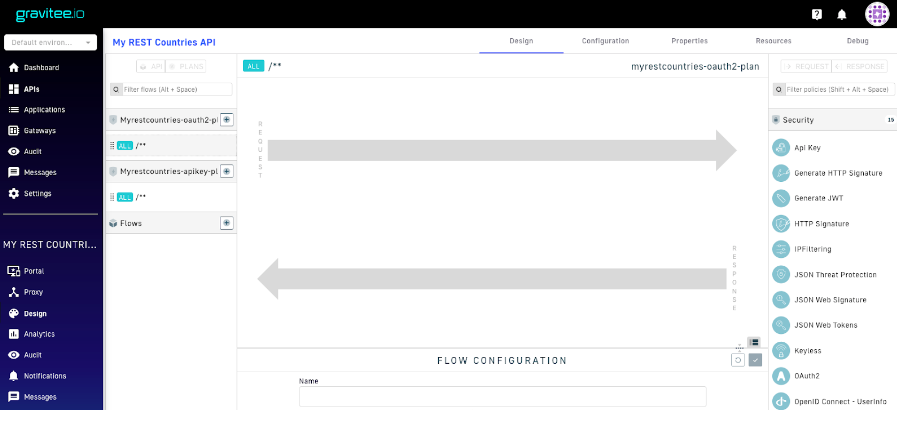
Figure 11. New Resource
2. In the “Design” menu, in the top right hand corner, select “Resources”.
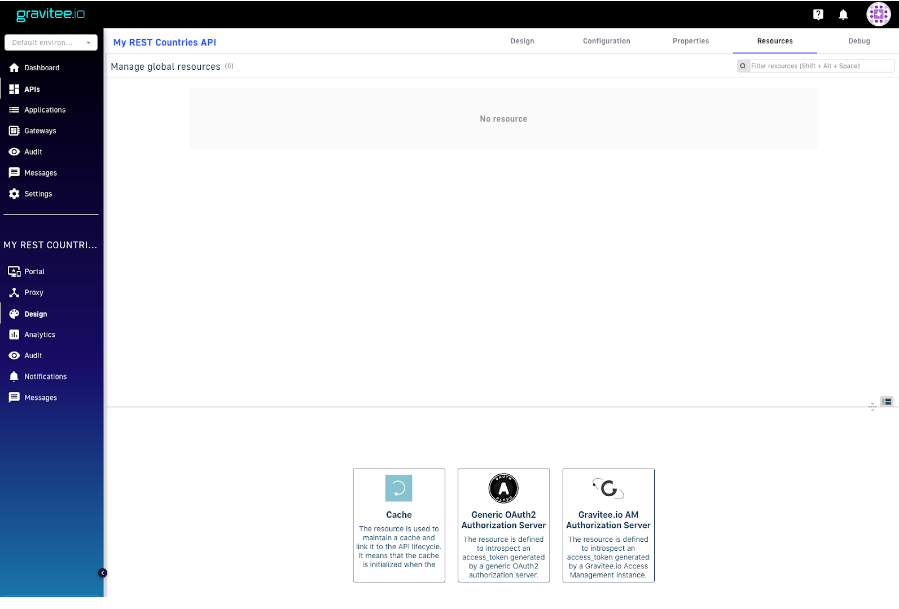
Figure 12. Resources
3. Select “Gravitee AM Authorization Server”. Fill in our Gravitee Access Management details. Take extra care when entering the security domain as it must match the one created within Gravitee Access Management.

Figure 13. Resource configuration
4. Don’t forget to hit the save your settings.
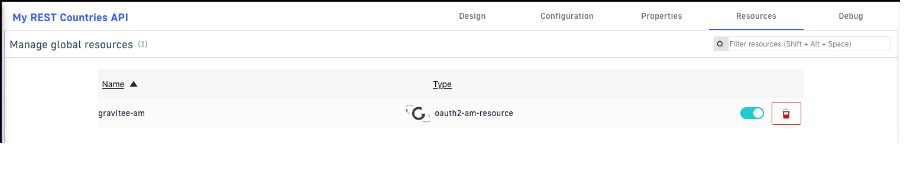
Figure 14. Save settings
5. The next step is to create an OAuth2 type plan within our API. To create our new plan, log in to our “My REST Countries” API via the Gravitee API Management console.
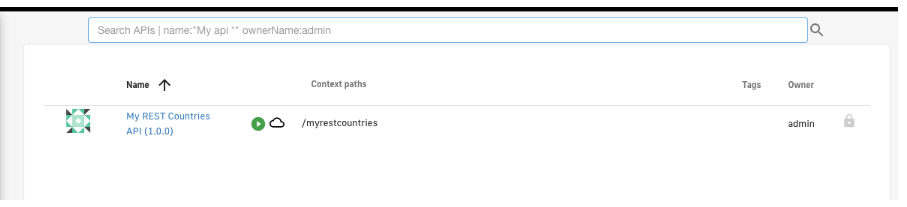
Figure 14. Create plan
6. Within the “Plans” menu, create a new Plan that is associated with our API.
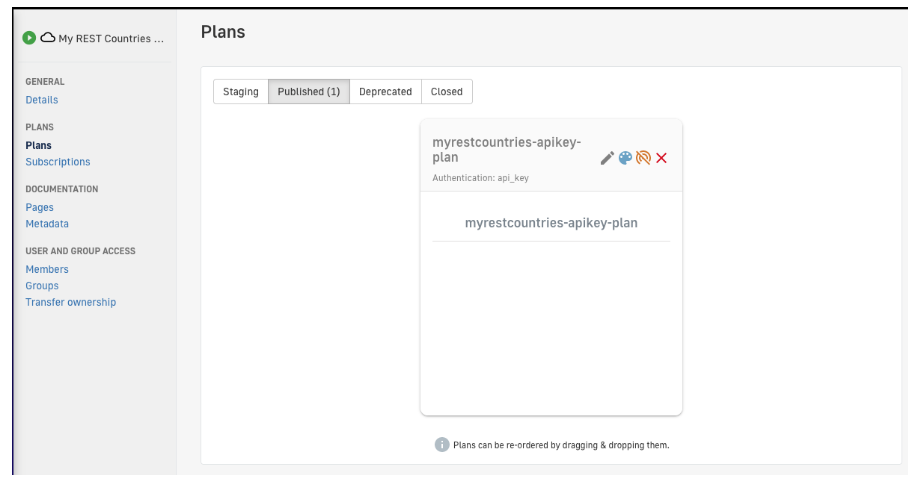
Figure 15. API associated plan
7. Fill out the details of the new plan.
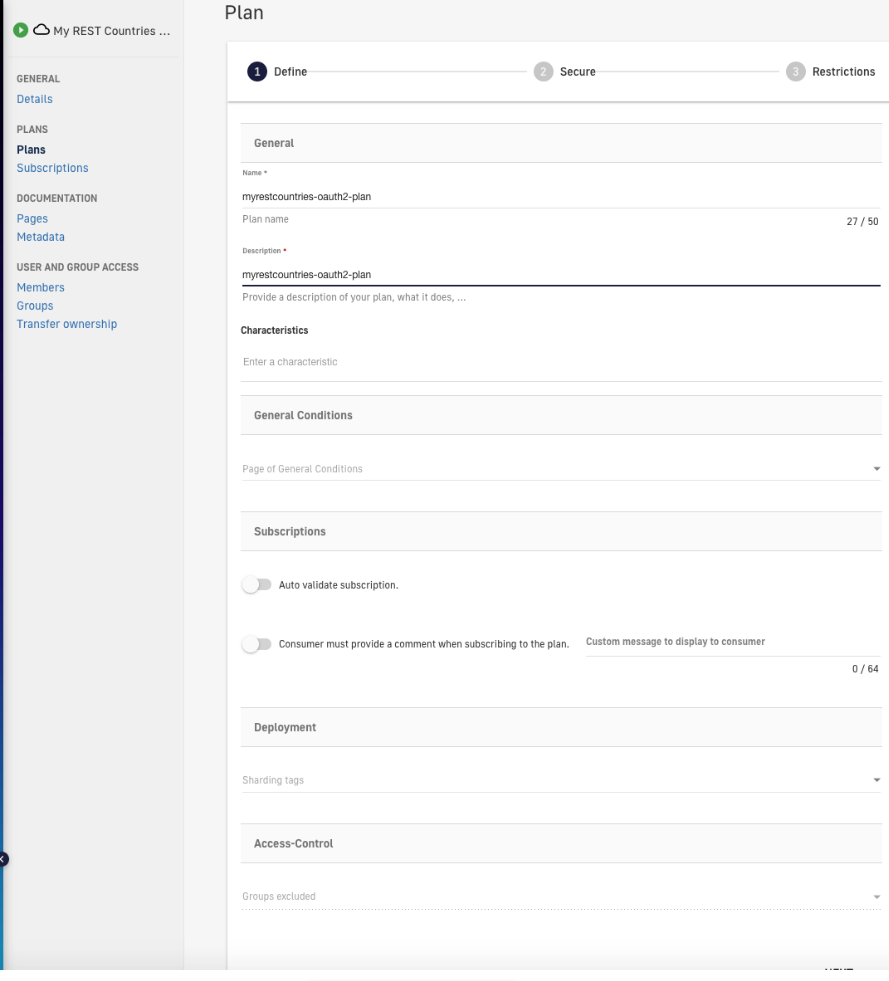
Figure 16. Fill out plan details
8. Select type “OAuth2” and give the resource a name. This must match the name given to the resource in the previous step. In this case, “gravitee-am”.
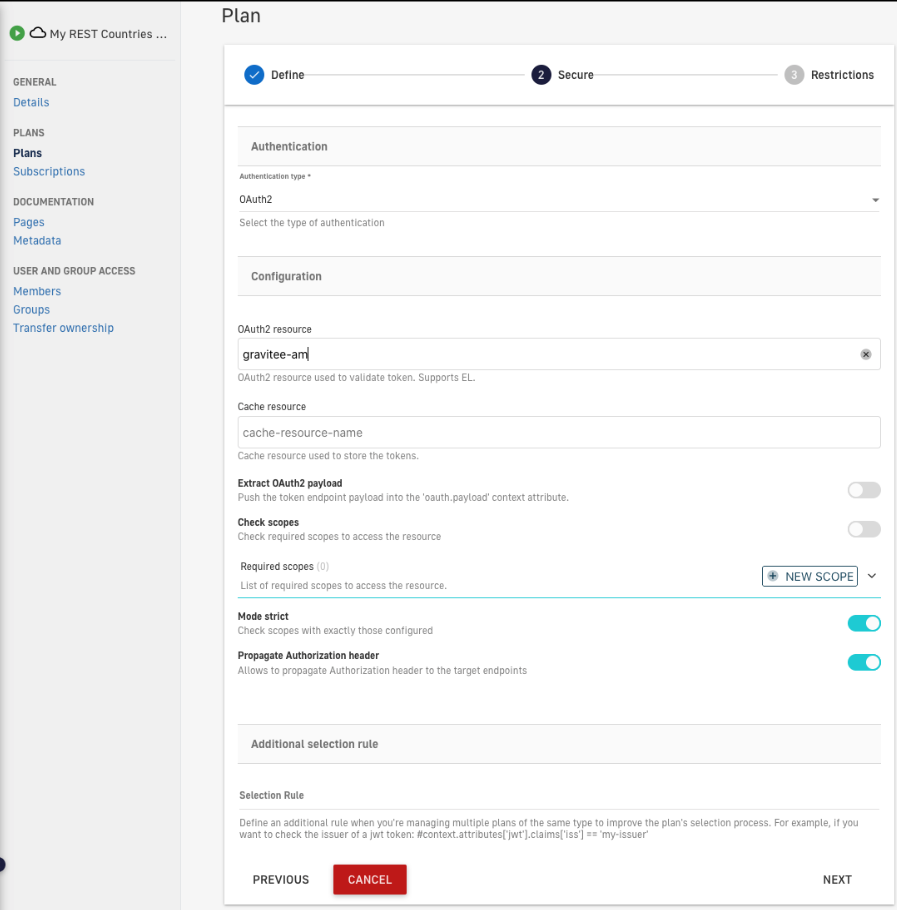
Figure 17. Select type “OAuth2”
9. Configure the consumption restrictions details.
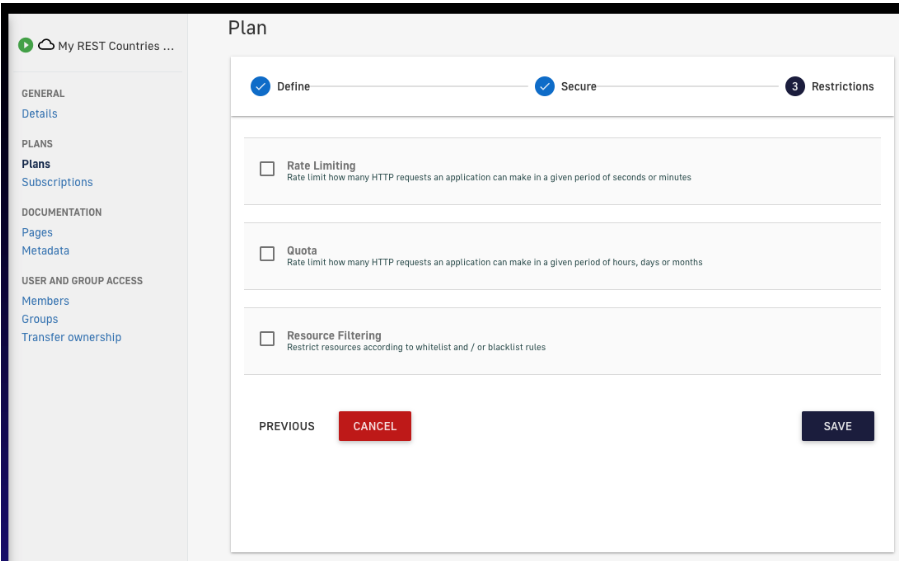
Figure 18. Relevant details
10. Finally, don’t forget to publish the plan so it can be made available.
11. We will now create a new application, associated with our Gravitee Access Management application. To do so, we will log in to the management console and open the “Applications” menu.
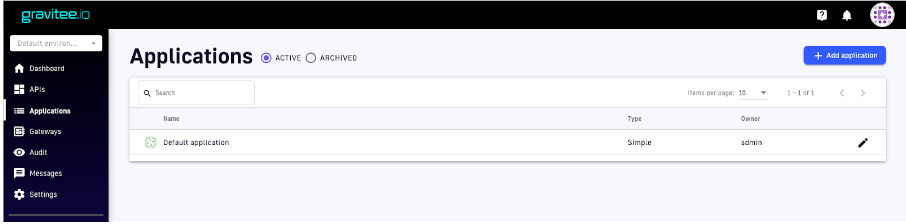
Figure 19. Create new app
12. Fill out the details of the new application.
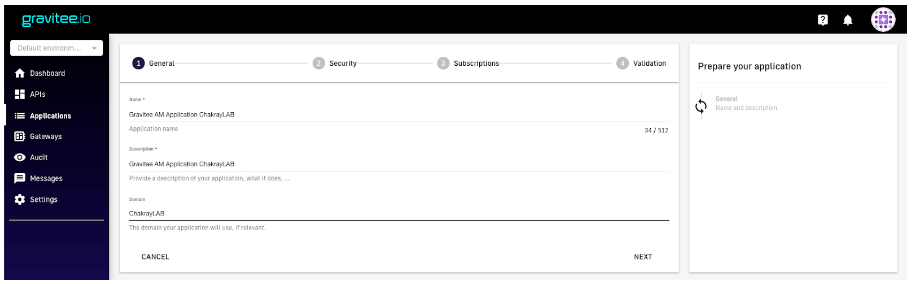
Figure 20. Fill out details
13. In the Security settings, the client_id must match the one for the application created in Gravitee Access Management. If not, access tokens will not be accepted by our subscription.
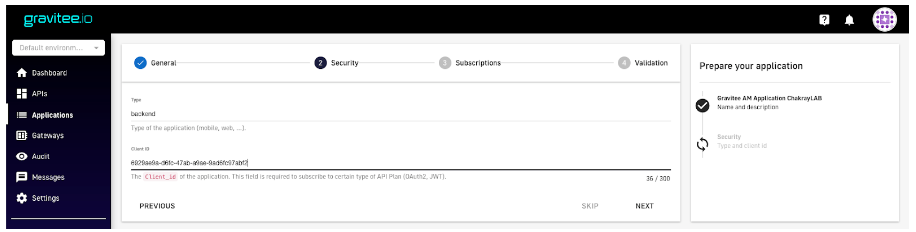
Figure 21. Security Settings
14. We can skip the API subscription for now as it will be created at a later stage.
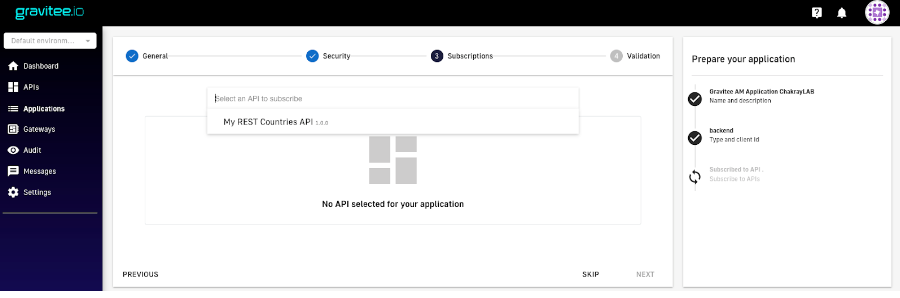
Figure 22. Skip subscription
15. Now that the creation flow is complete, the application can be created within the platform using the “Create the application” option.
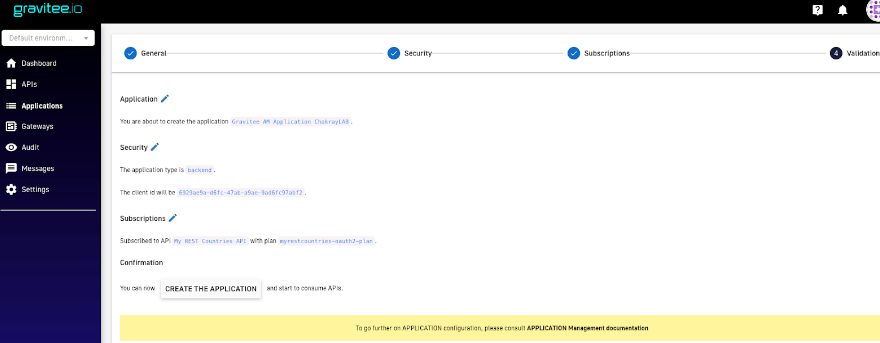
Figure 23. Create an application within the platform

Figure 24. Application created
16. The next step is to subscribe to the new application. To do so, a new subscription to the application will be created via the management console.
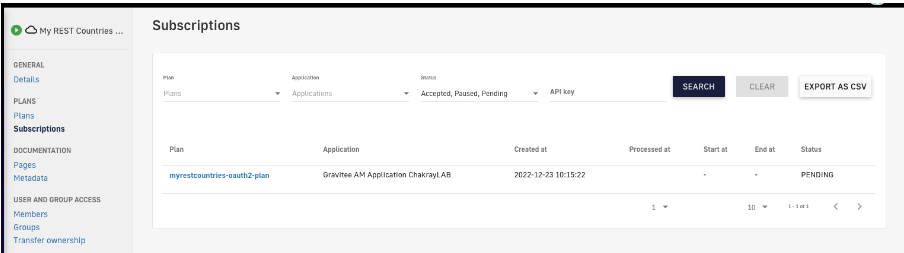
Figure 25. Subscription
17. Select the OAuth2 type plan created in the previous steps.
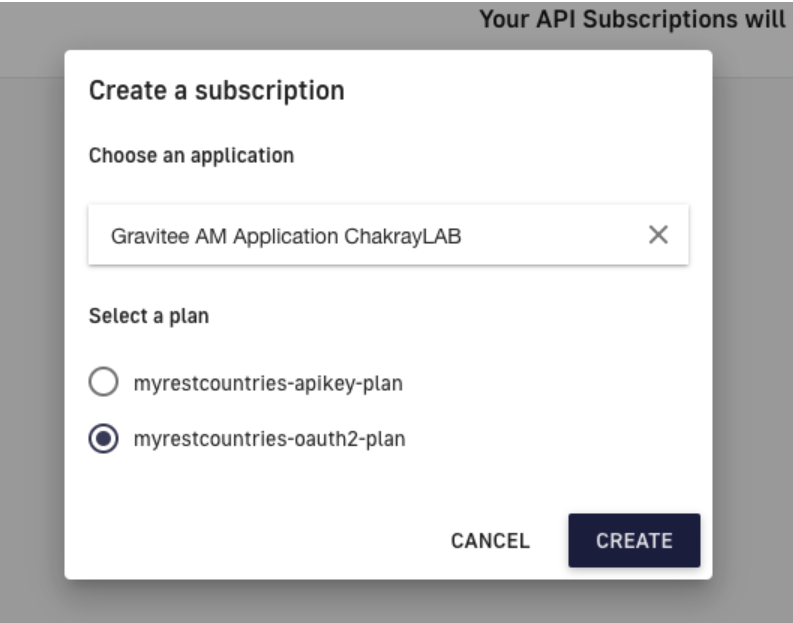
Figure 26. Create subscription
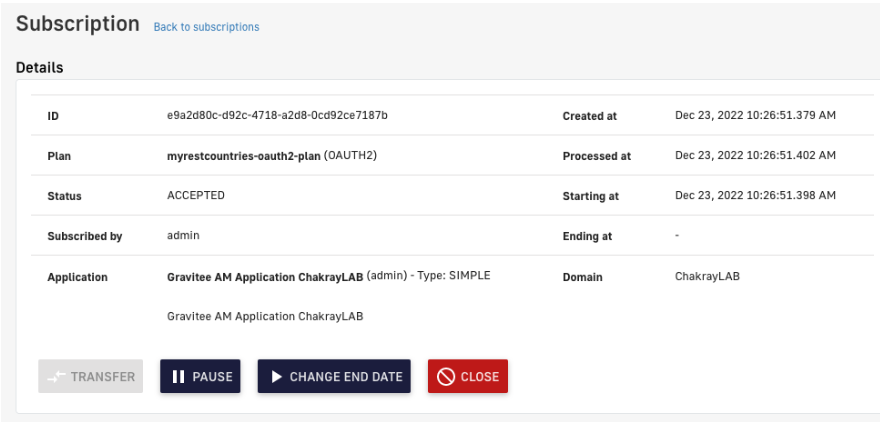
Figure 27. Subscription completed
18. To access the API, we must first request an access token from our Resource Server.
In this case, we will use a grant type Client Credentials.
curl -X POST \
  http://am-gw.demo.chakray.internal:90/chakraylab/oauth/token \
  -H 'Content-Type: application/x-www-form-urlencoded' \
  -H 'Authorization: Basic NjkyOWFlOWEtZDZmYy00N2FiLWE5YWUtOWFkNmZjOTdhYmYyOjNFTUs4M0ZWR2NPZExrQmprLUFPd2poYnNhcnN3SUp3ZlRTa0FpYmpHUzA=' \
  -d 'grant_type=client_credentials'
19. This will be our access token:

Figure 28. Access token
20. When we receive an access token, we access our API with that token using the following command:
curl \
  -H 'Authorization: Bearer eyJraWQiOiJkZWZhdWx0IiwidHlwIjoiSldUIiwiYWxnIjoiUlMyNTYifQ.eyJzdWIiOiI2OTI5YWU5YS1kNmZjLTQ3YWItYTlhZS05YWQ2ZmM5N2FiZjIiLCJhdWQiOiI2OTI5YWU5YS1kNmZjLTQ3YWItYTlhZS05YWQ2ZmM5N2FiZjIiLCJkb21haW4iOiJjZTg3ZjdkNy00OGEwLTQyMjQtODdmNy1kNzQ4YTAxMjI0ZDAiLCJpc3MiOiJodHRwOlwvXC9hbS1ndy5kZW1vLmNoYWtyYXkuaW50ZXJuYWw6OTBcL2NoYWtyYXlsYWJcL29pZGMiLCJleHAiOjE2NzE3OTY1MDIsImlhdCI6MTY3MTc4OTMwMiwianRpIjoiMUtzNE9aeklOWkdWLVBIQ1NPOFdLWWFpelRQdk5MdE5OWmxSbE9jZkdqYyJ9.QQun3iAbITo8rM0yYr8jjOdBGgYnCRo48eur08fF7EnpsmQBLN1e7AaITNfOPPk1yqYRuCTNp7U6fCLv4eOWmr7UBW3o5VmH5zkjn1uq43pb_suIfSwqFaPiJeq8ehVqRJUFwQ3y_cbfMBKsEGi8UdJP-U0r2PCxrE1Cuf7ItsbhUYWZzzjQbguqh3fo8Sdoc5gWseqj2lOBJwSk_d4DkFW_cckag8fEp9Dz670urjBxuSjdibBGtuISpEA1HiXBxvsq4encUoyraVRQA_cu00FrIM6chJbWxFDpspynHNwcMj8Tfpz_w-EynA6cf5b2mkP_yoctMOCKQXT6HezS0w' \
  "http://api.demo.chakray.internal/myrestcountries/alpha/es" | jq
21. We can monitor the consumption of the API via the Analytics dashboard.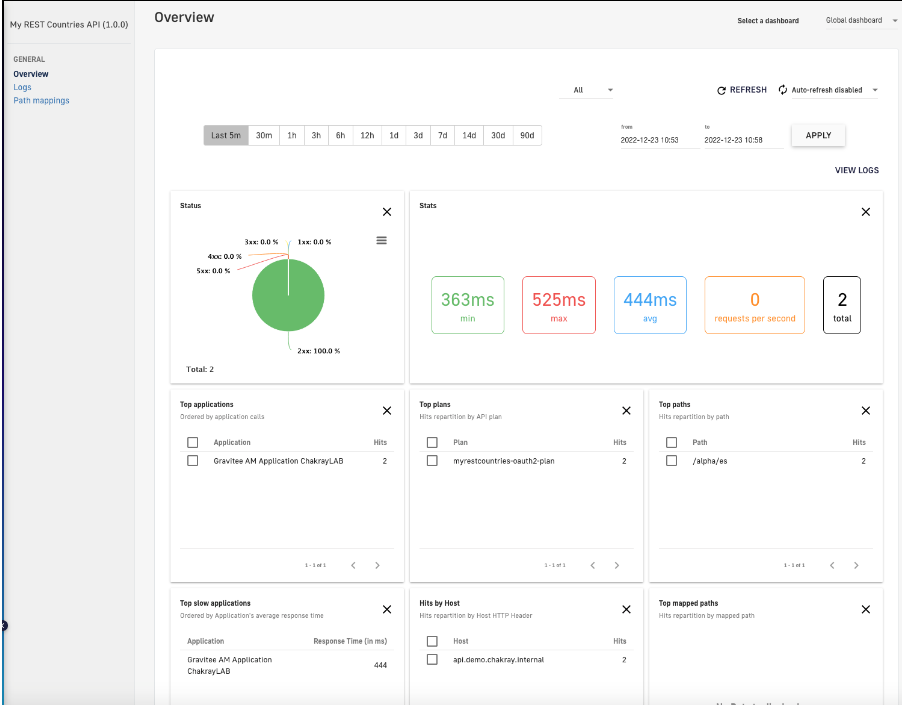
Figure 29. API analytics
From this dashboard we can see how requests have been consumed using the OAuth2 plan created in this article.
5. Chakray & Gravitee
As an official Gravitee.io Partner, Chakray has all the necessary knowledge and tools to tackle any API Management project, thus providing the peace of mind of having a team specialized in its display, development, and subsequent maintenance, not to mention manufacturer support for Enterprise environments. We’ll be more than happy to discuss your use case and explore the best APIfication for implementing an API Management within your company. Contact us today!