Just starting out with the Boomi iPaaS platform? Learn more about its fundamental components (Boomi Atoms and environments) and their significance for your integration projects. In this article, we will outline the basic procedure to establish a Boomi Atoms and environments set-up in your Boomi Atmosphere account.
Get started: overview of the concept of Boomi Atoms and environments
Before we proceed to look at Boomi Atoms and environments set-up, let’s have an overview of what each of these terms mean, their types, and their uses:
What is a Boomi Atom?
A Boomi Atom is essentially a runtime engine that exists on a single node and is assigned to a single tenant. If you are using the cloud model, your process will be deployed to a Boomi Atom Cloud (a collection of Atoms available to multiple tenants). Atoms contain all components and resources needed to execute processes from one endpoint to another, including operations like data transformations and file transfers.
What is a Boomi Environment?
A Boomi environment is a workspace that is created for running Boomi processes. It is used to distinguish between different stages of process development. It simplifies the way in which large integration projects operate by creating a separation between testing and production deployments. Users can create multiple environments, but your licensing dictates how many Atoms you can attach to an environment.
Types of Boomi environments
The two types of Boomi environments are test and production environments. As the names suggest:
- A test environment is used to assure the quality of a process before release. Only test Atom Clouds can be attached to them.
- A production environment executes the process by assuming a real-world or business-critical scenario. Basically, it is the final deployment after testing. Only production Atom Clouds can be attached to them.
Apart from its ability to classify testing and production, environments are also used to:
- Manage and separate on-premises resources such as databases to preserve data integrity.
- Segregate different client projects to prevent data from crossing over.
- Ensure version control to easily deploy changes and updates to processes.
Steps for Boomi Atoms and environments set-up
In the Boomi Atomsphere interface, you can perform your Boomi Atoms and environments set-up as follows:
- In the Manage tab, click on Atom Management.

Image 1: Atom Management selection
- Click on +New button and select Atom.
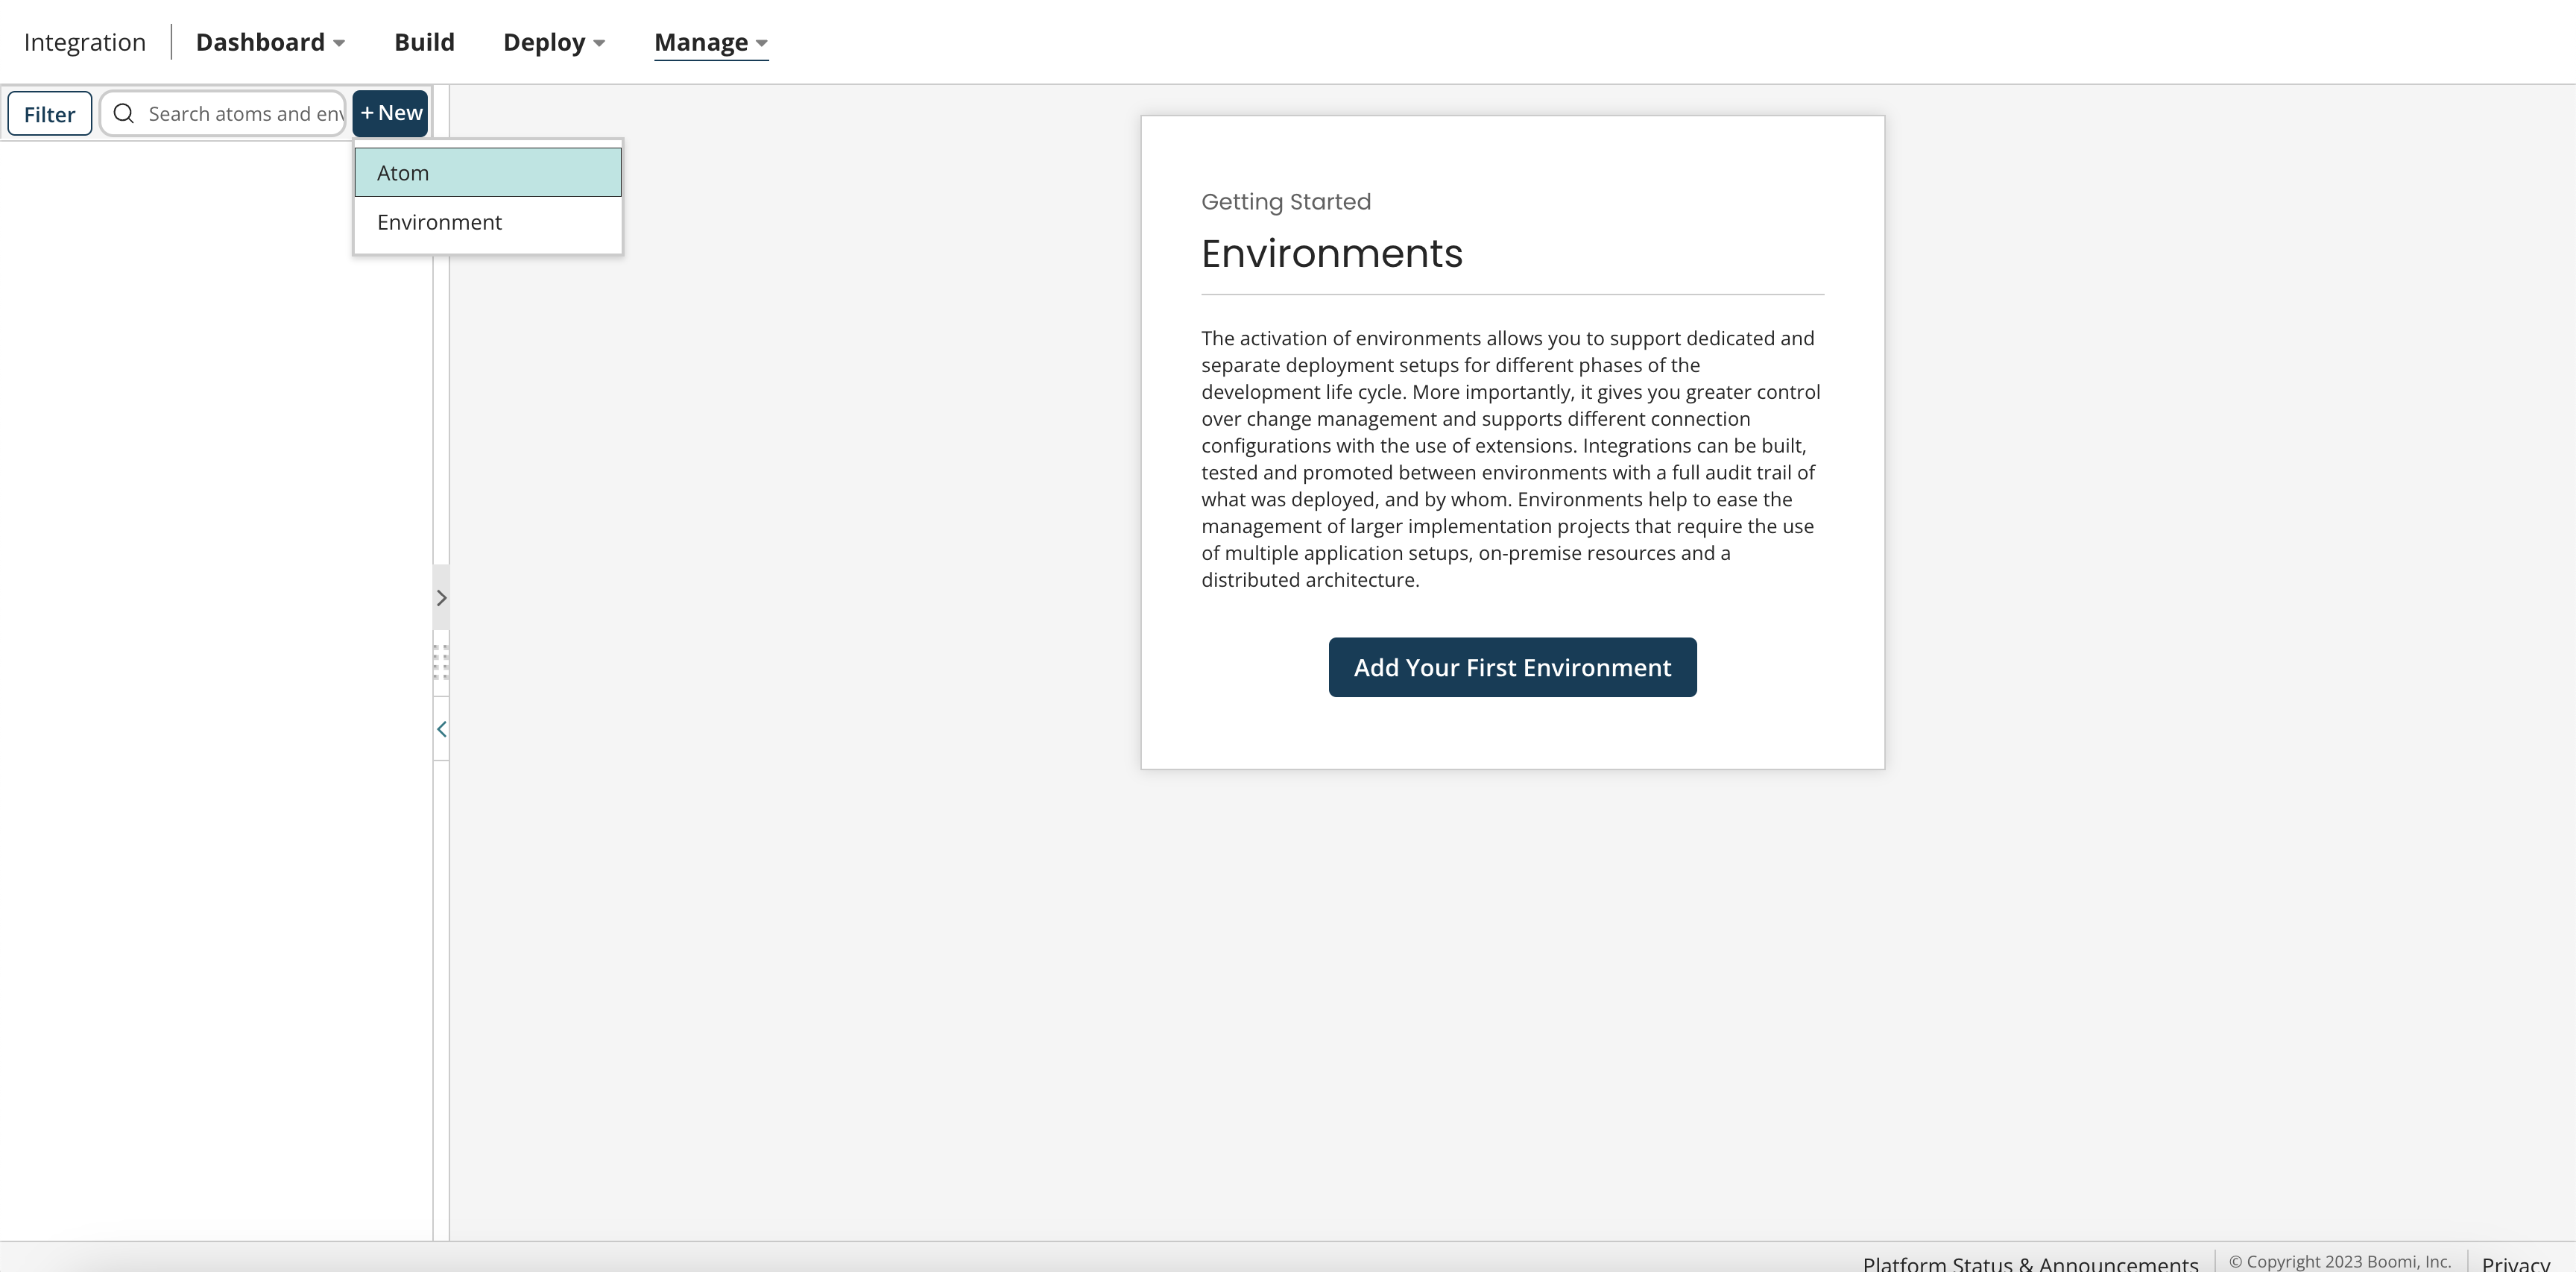
Image 2: Creating a new Atom
- You can set up your preference for your deployment: whether it should take place in the cloud or on-premises. In this tutorial, we will select the In the Cloud option. From the option to choose a cloud, you can specify the closest public cloud to your specific location. Pick the test integration cloud for your location. Finally, enter your Atom Name as Test Atom Cloud. Click OK to confirm.
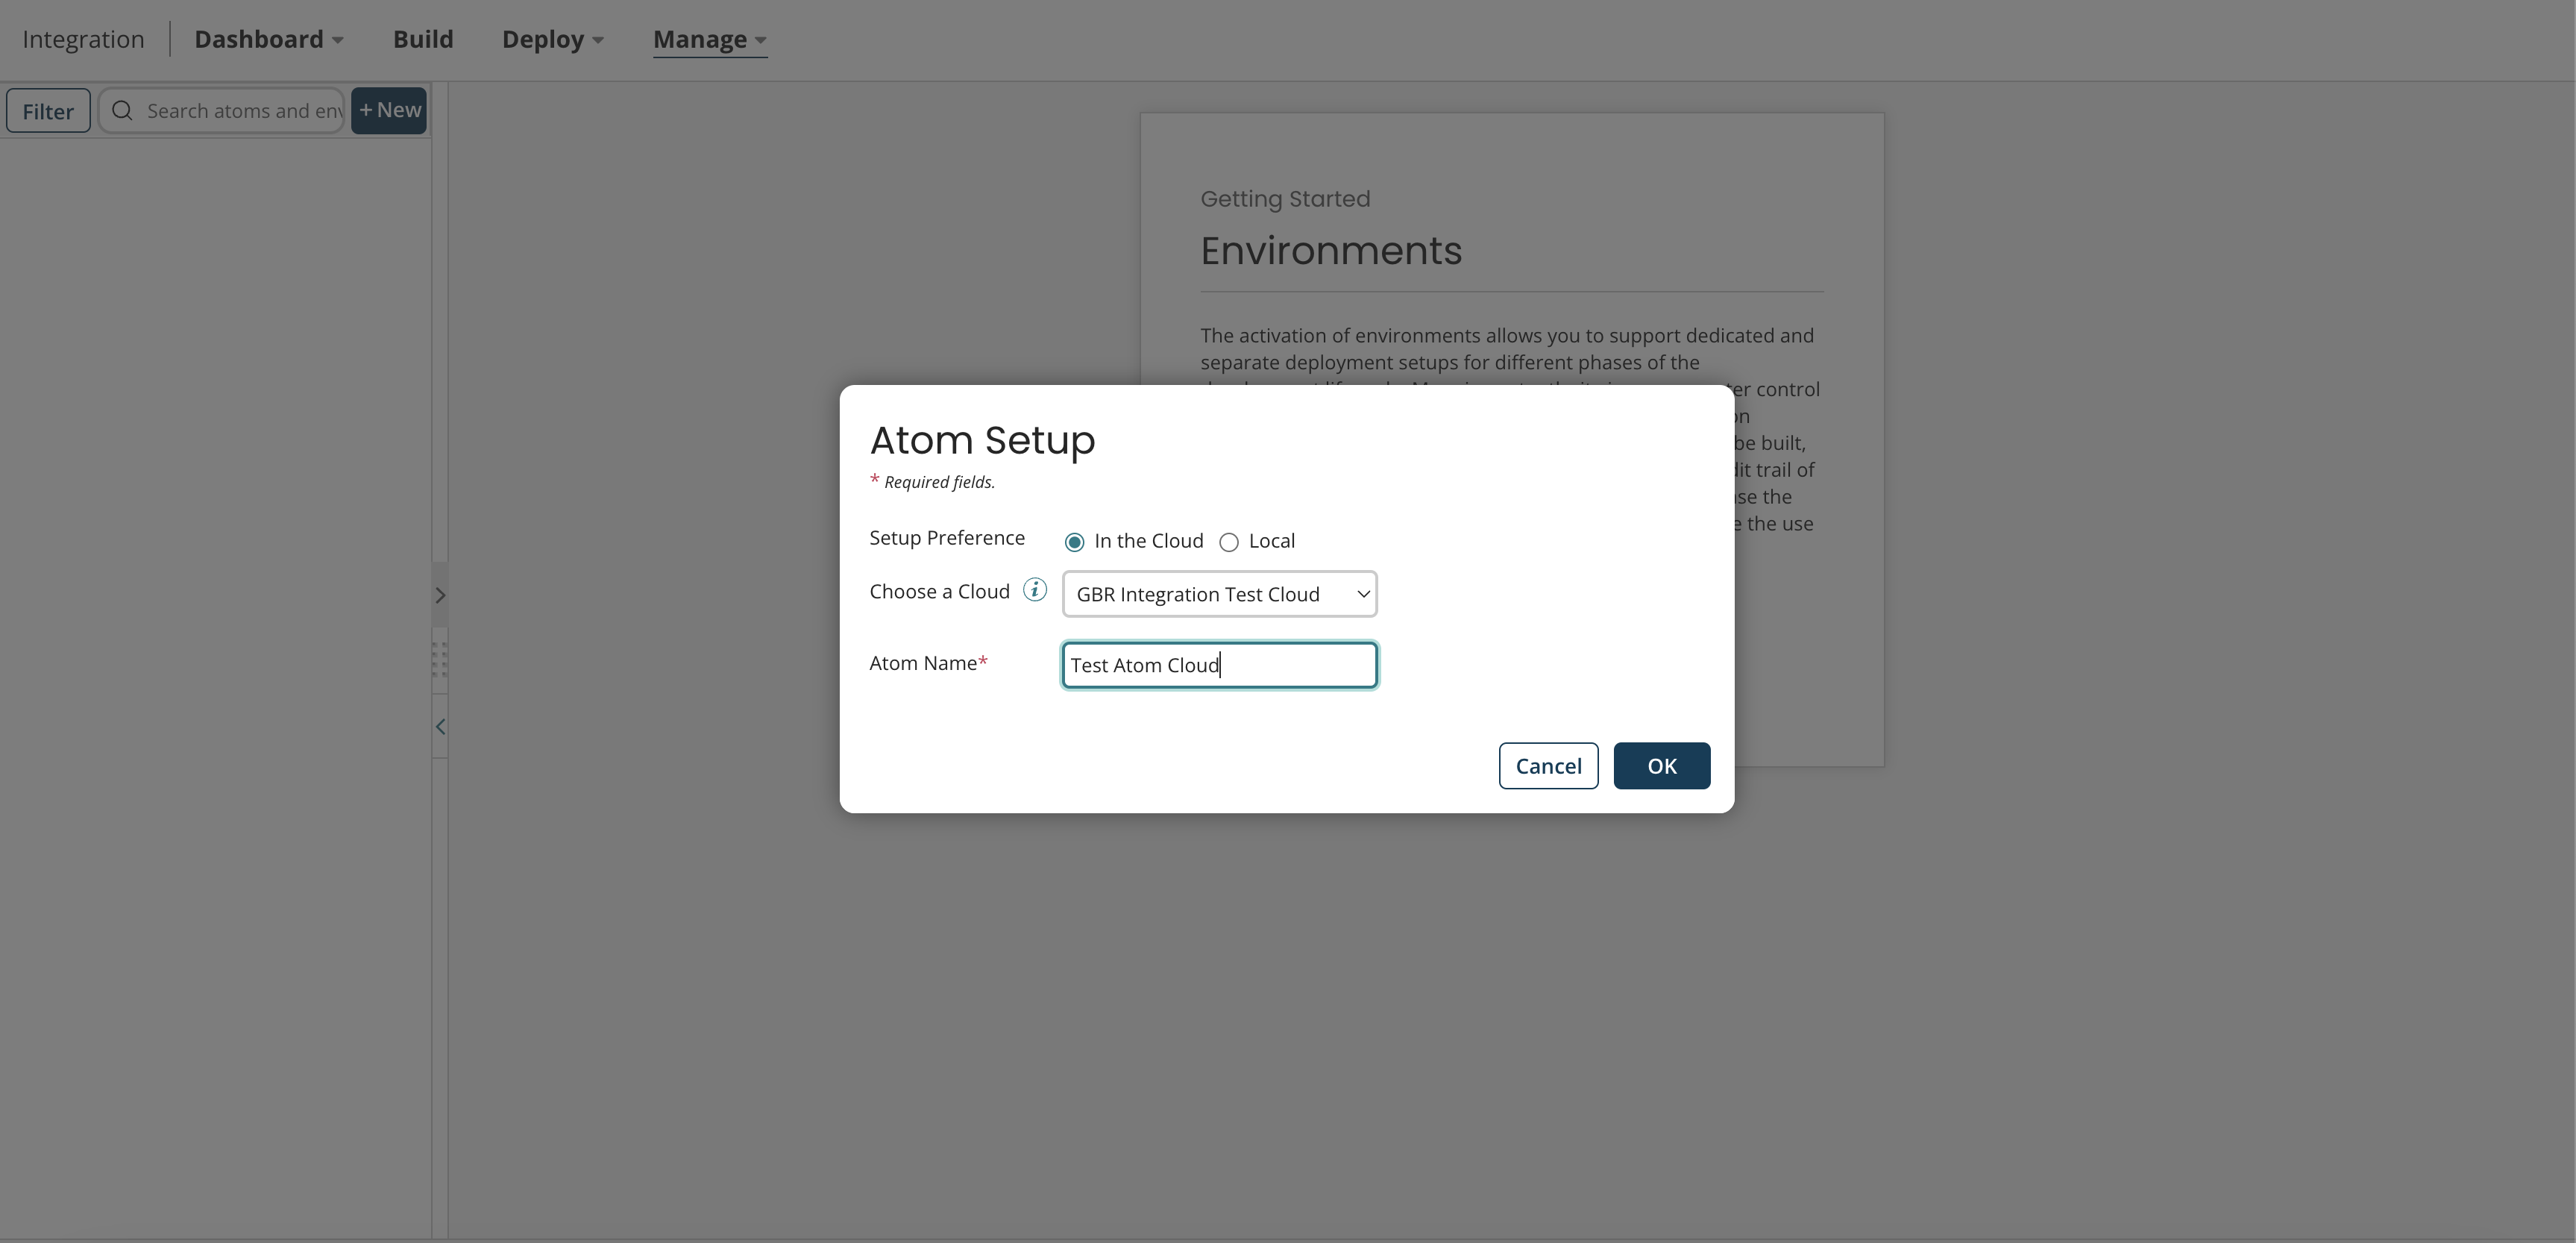
Image 3: Setting up deployment, choosing Atom type, and naming the Atom
- Repeat this process for the atom that you will be attaching to your production environment. We will name this the Atom Cloud. Once created, a popup will appear confirming that your Atom has been set up. Click close.
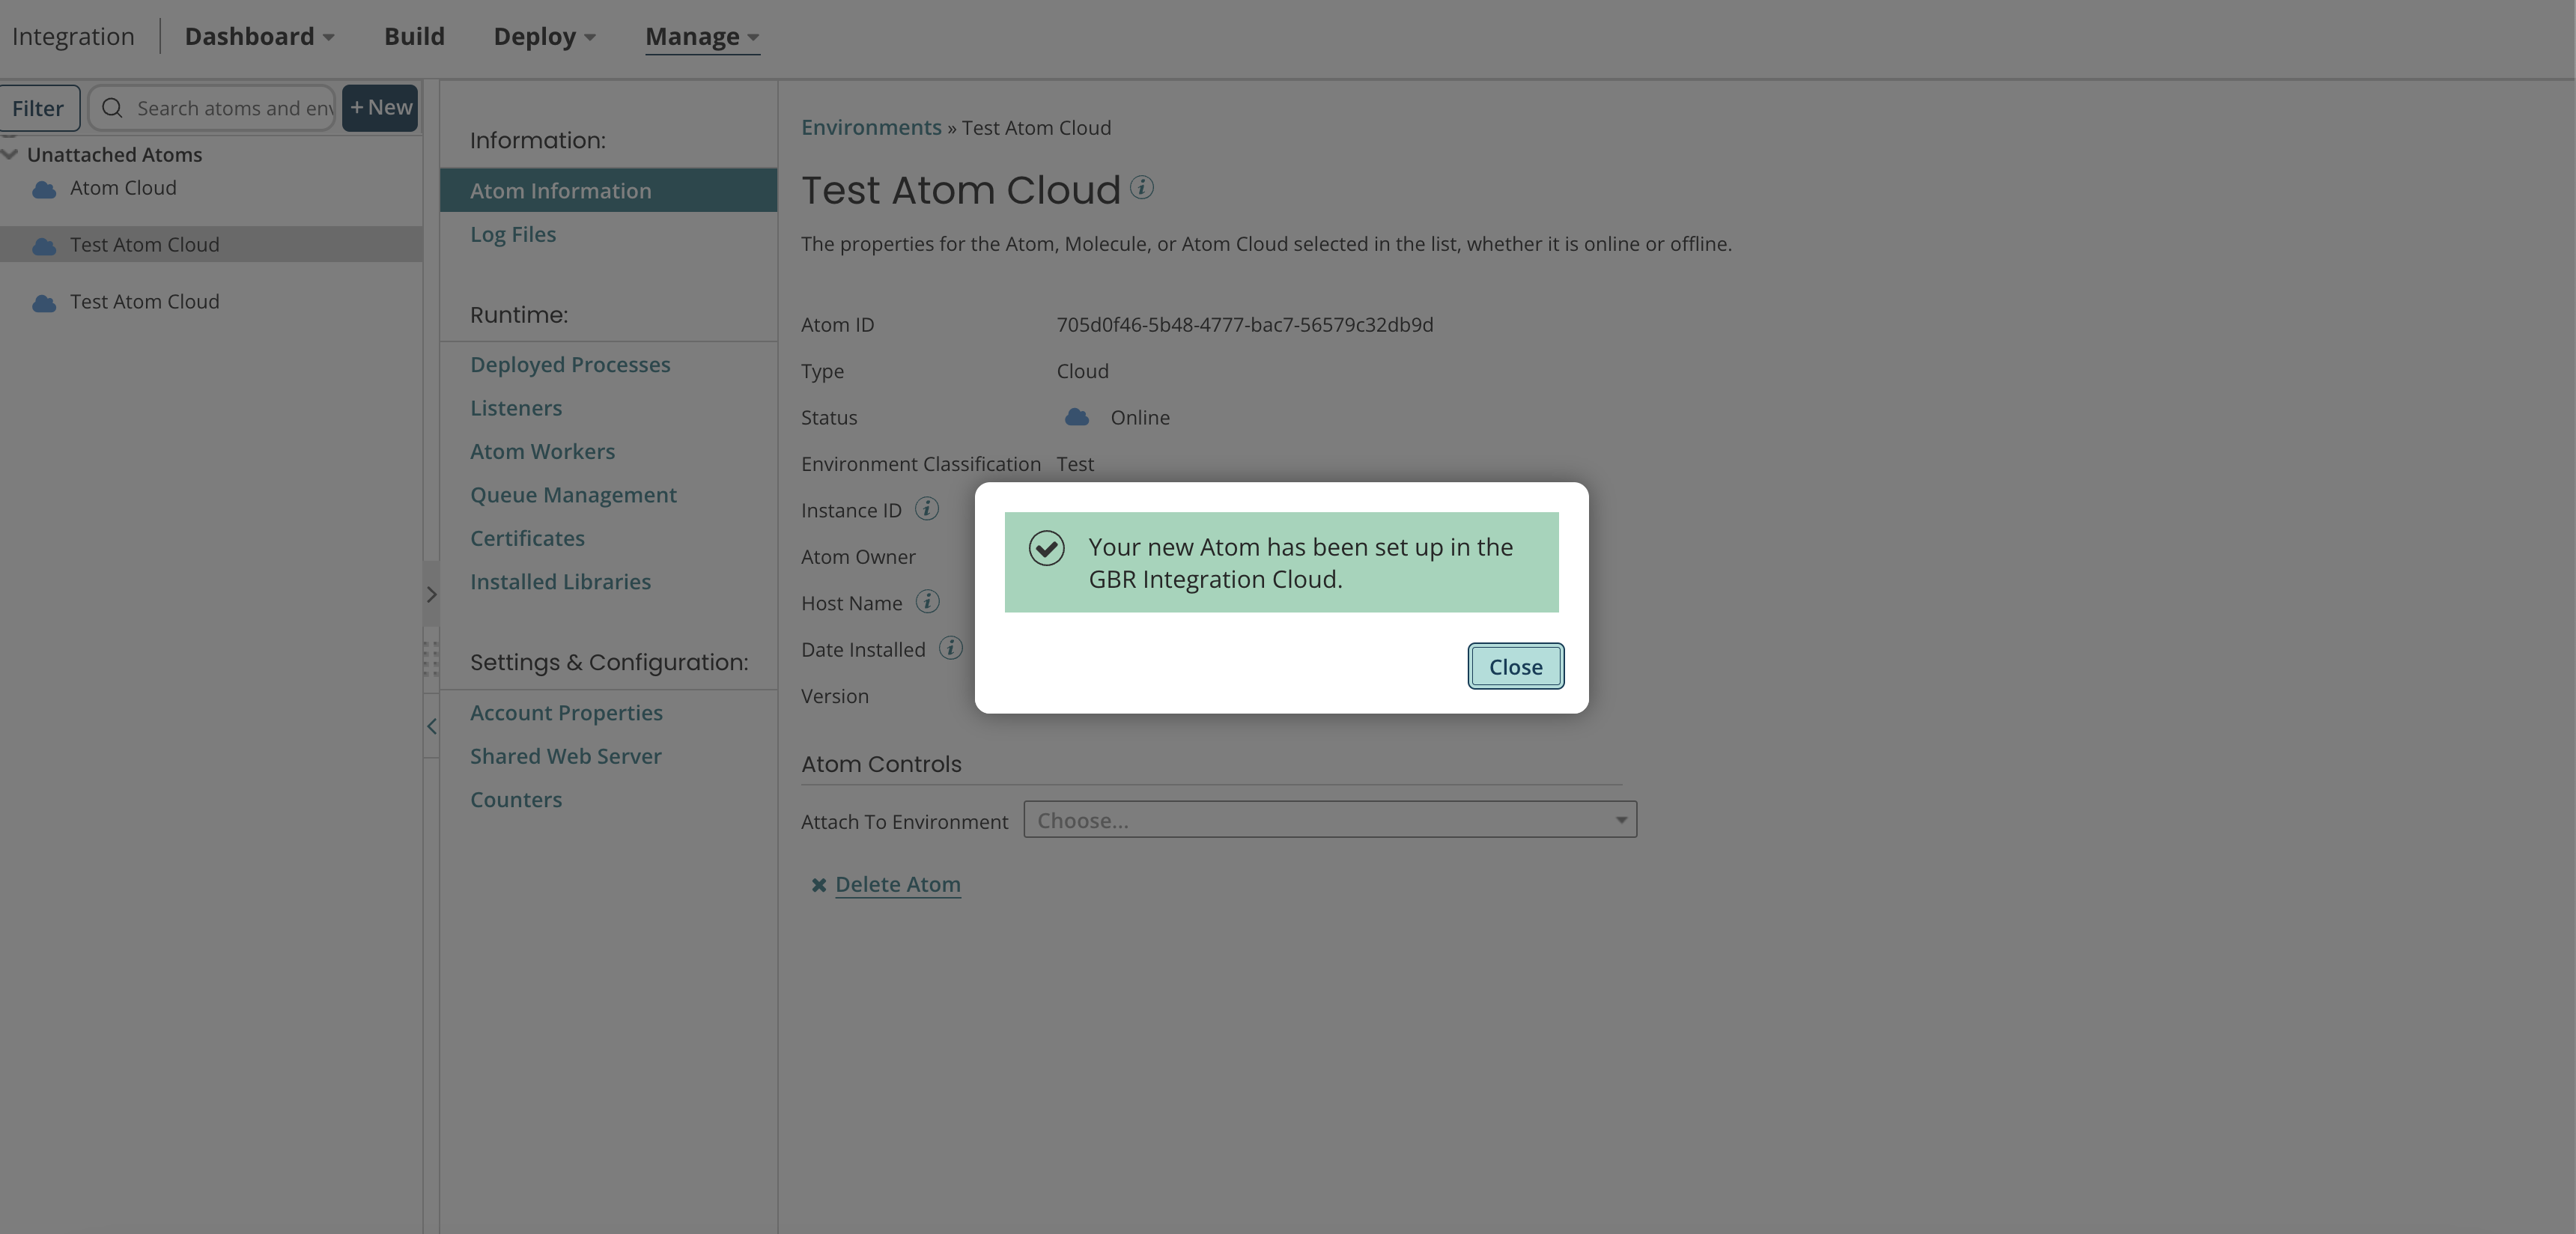
Image 4: Atom creation confirmation
- To create an environment, you must click on the same +New button and then Environment. Click on Add Your First Environment.
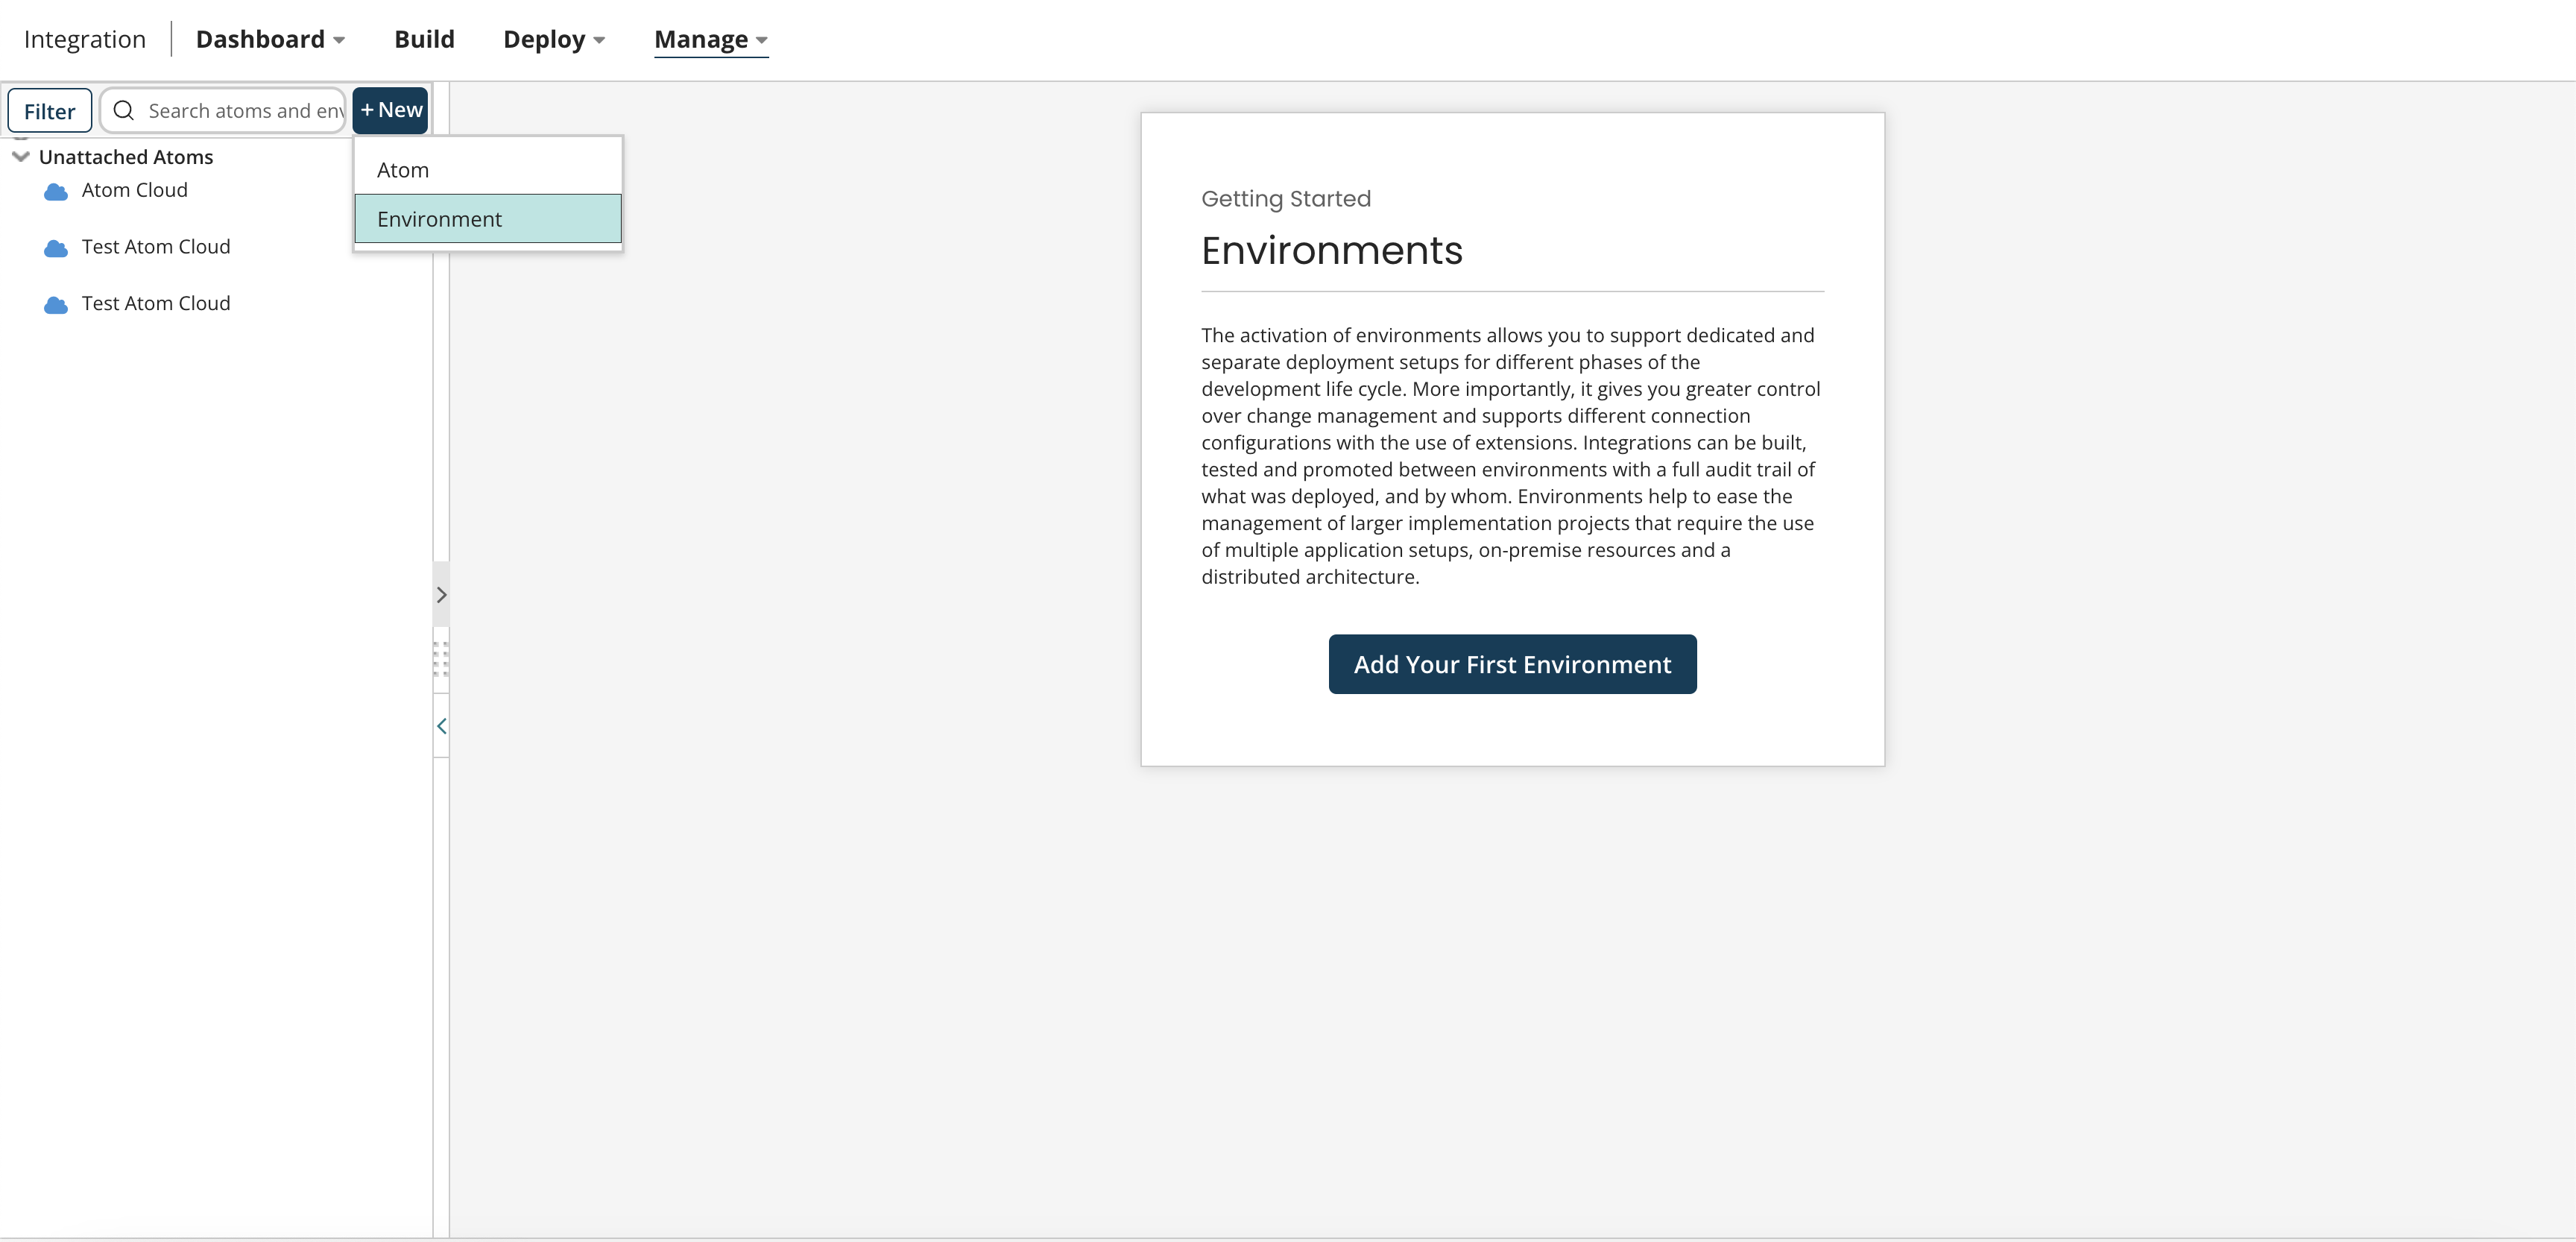
Image 5: Creating an environment
- From Environment Classification, select Production. Set the environment’s name to Production as well. Click save.
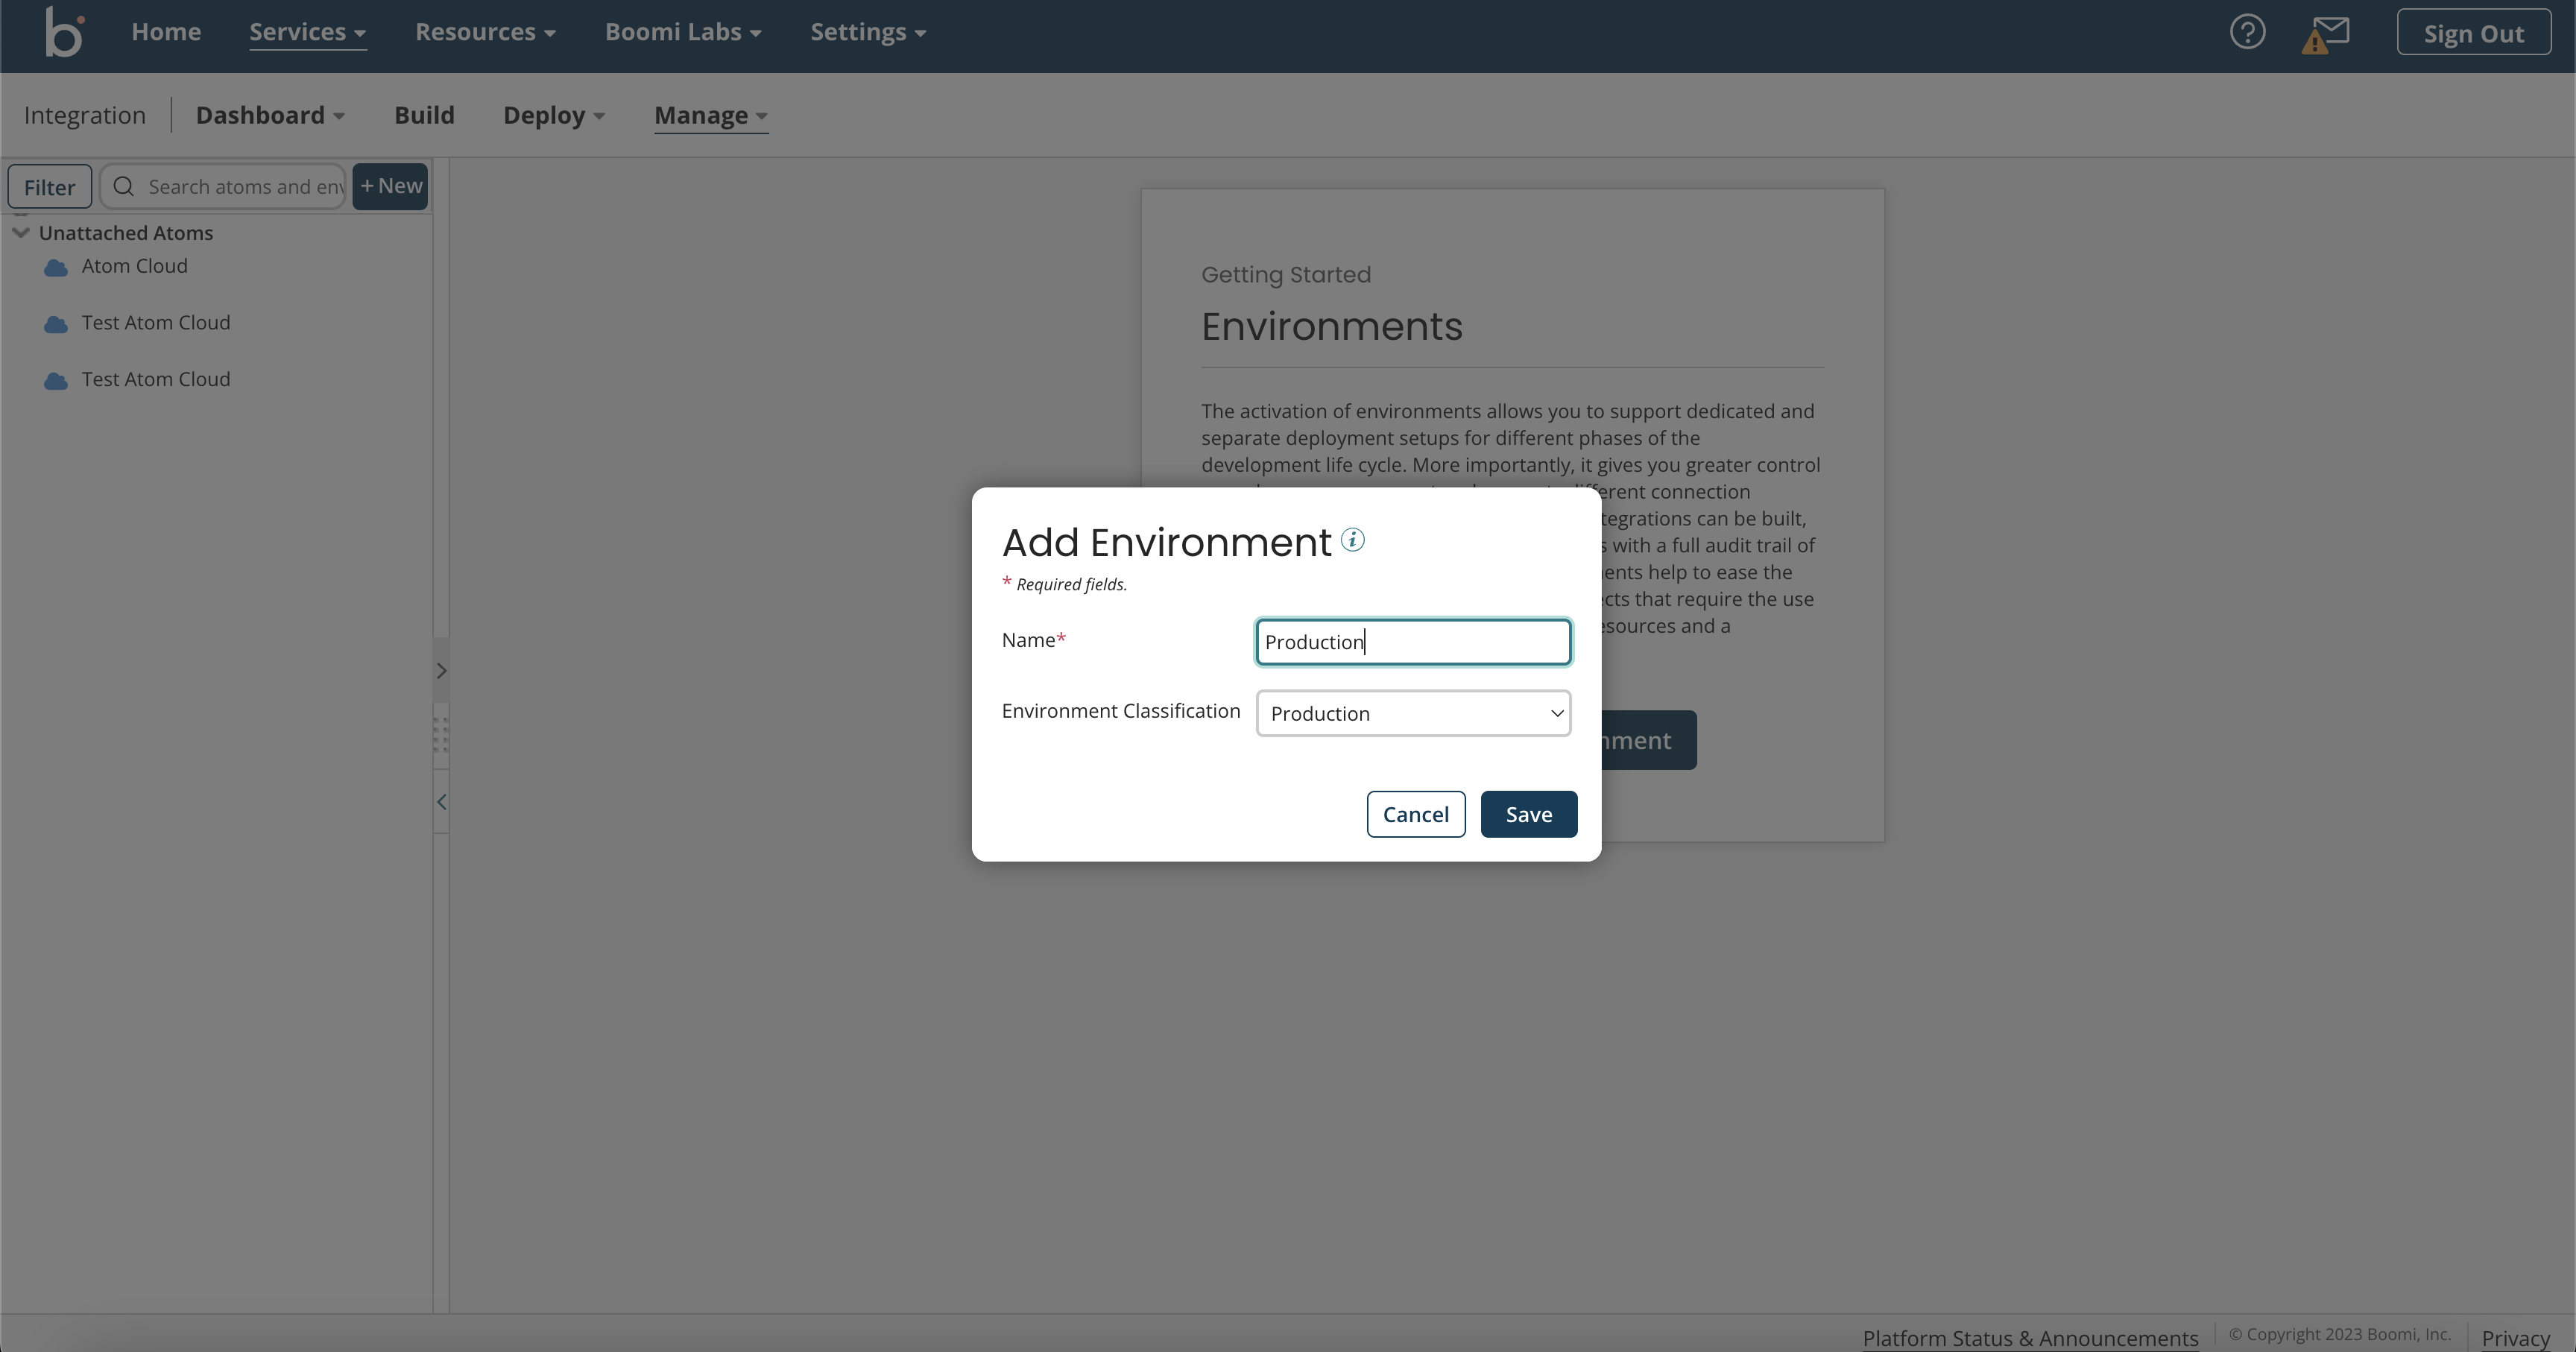
Image 6: Environment classification
- Do the same for your Test environment as well. You will now have two environments and two Atoms.
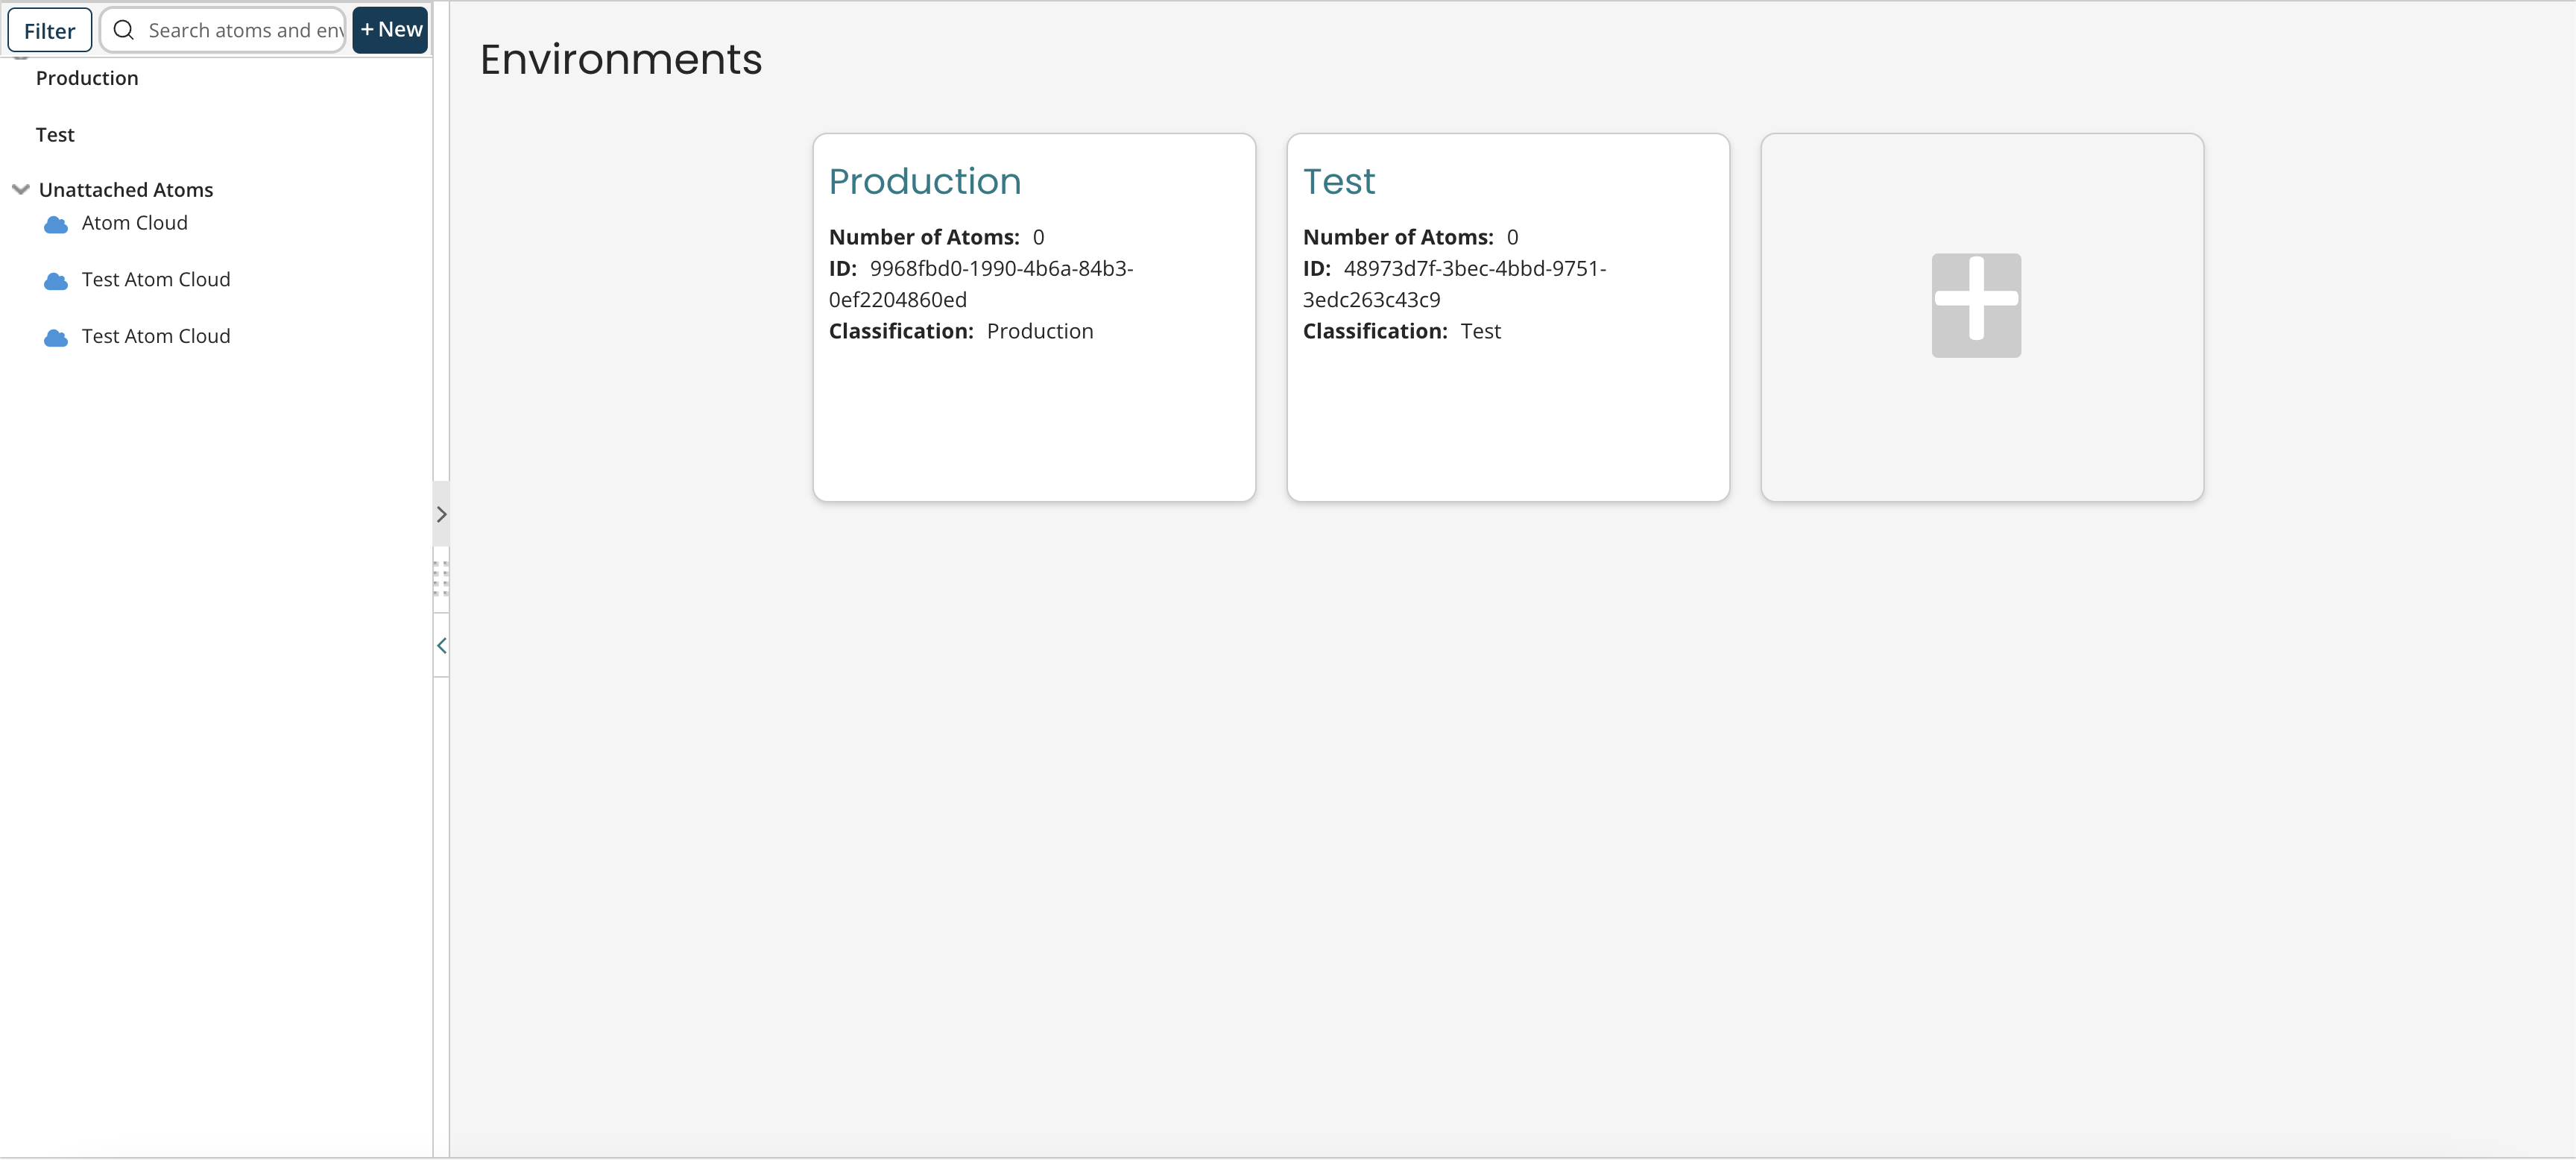
Image 7: Atoms and environments have been created
- We can now attach the Atoms to the environment of the same classification. Click on the Production environment. Under Attachments, select Atom Cloud.
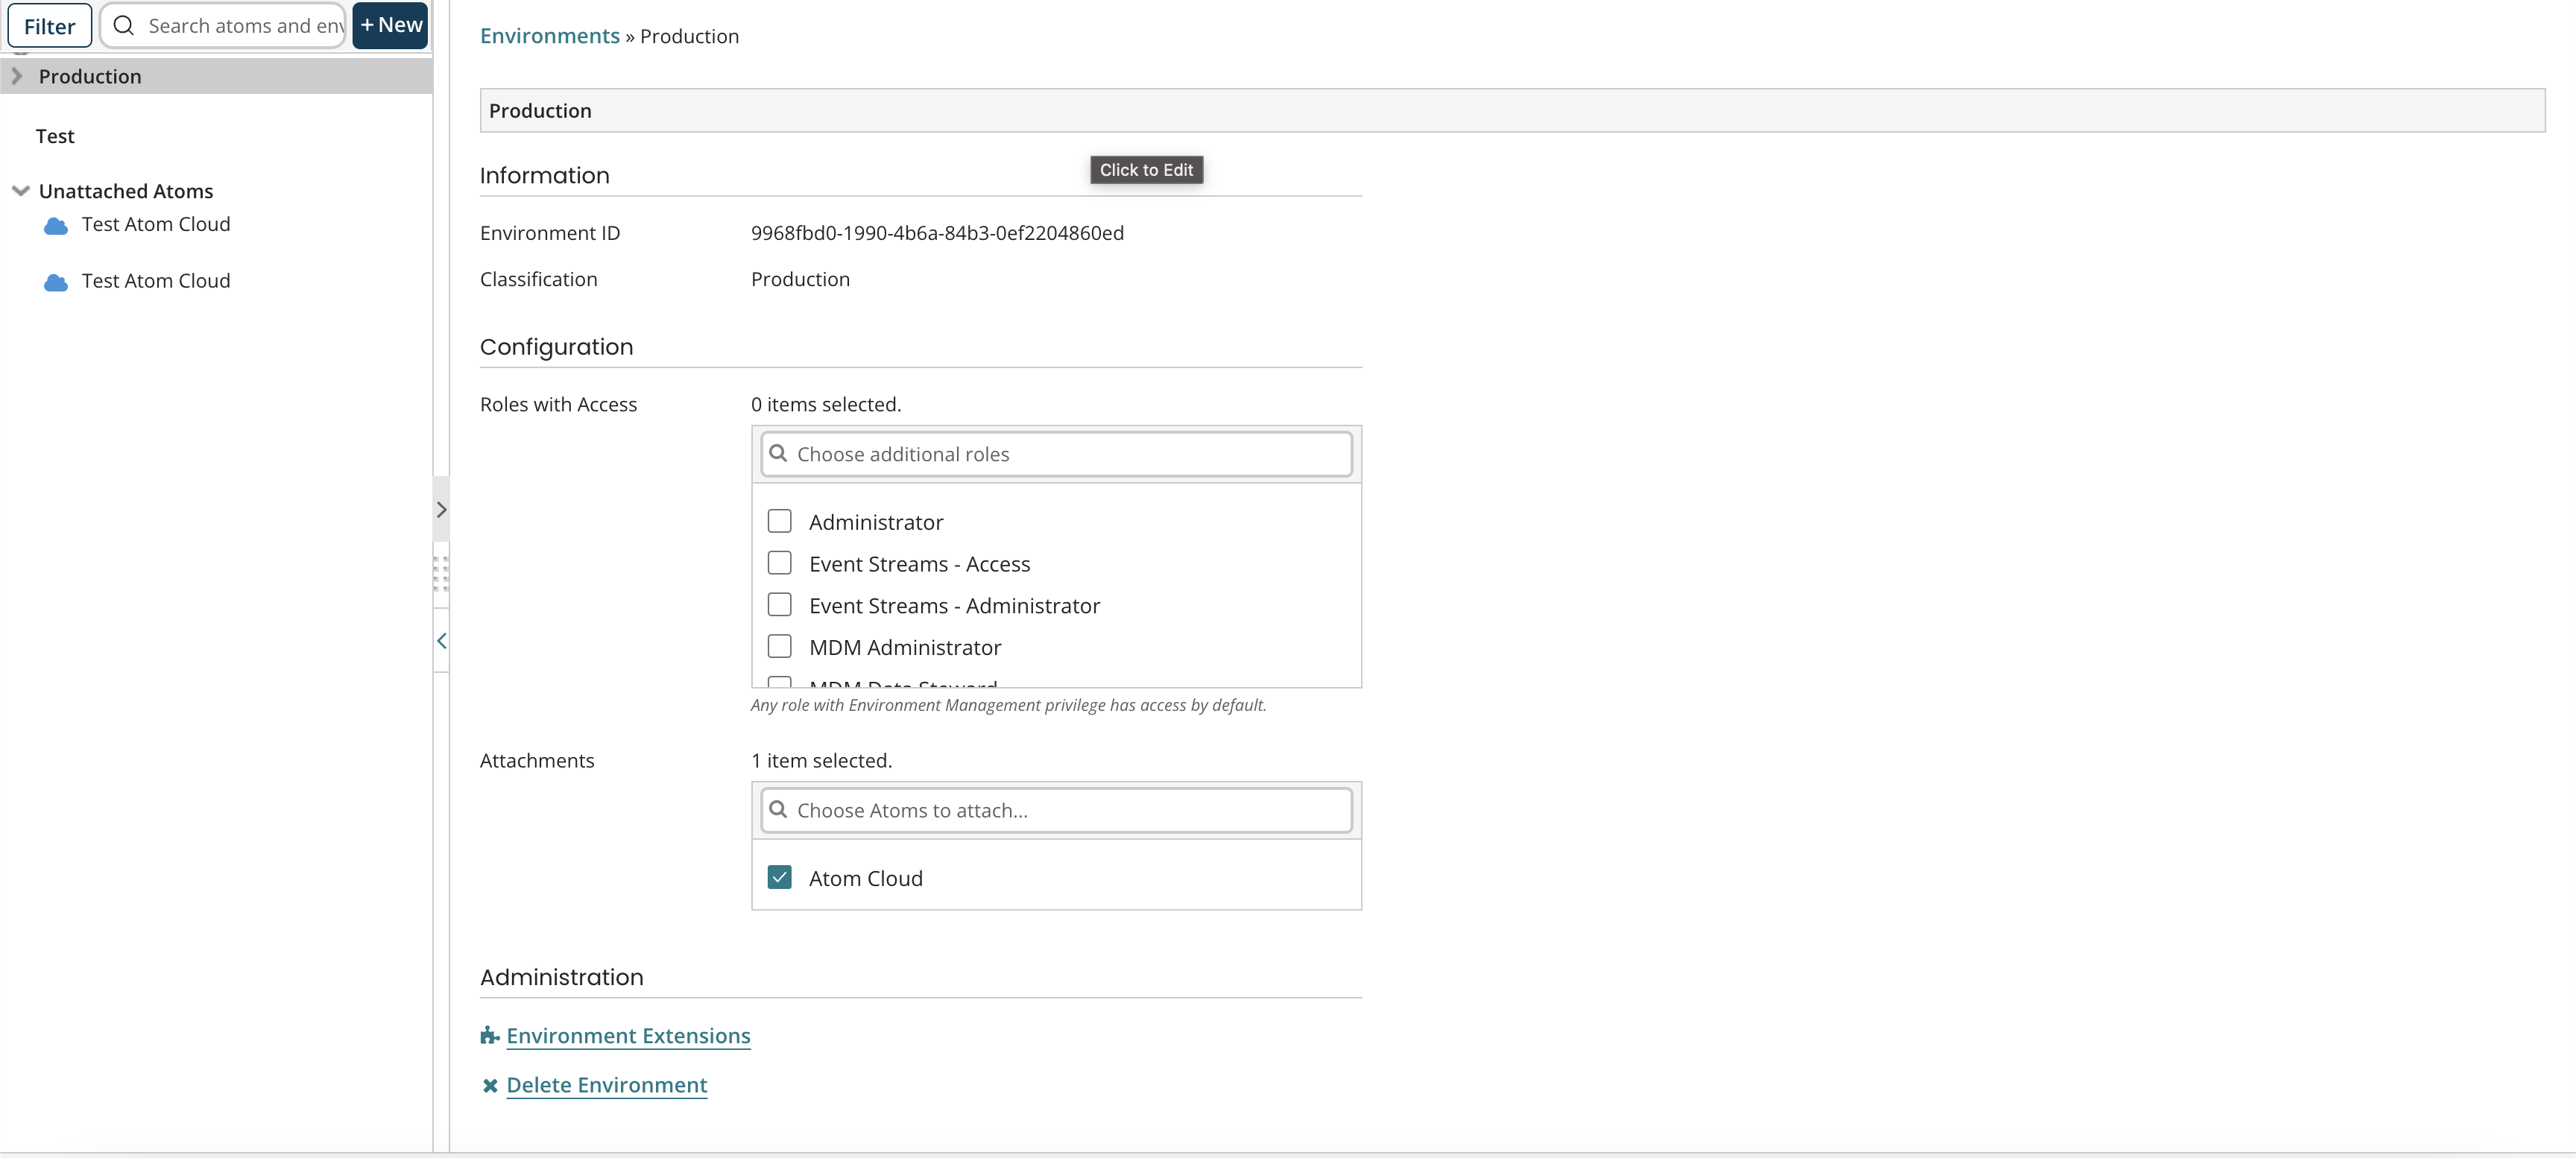
Image 8: Attaching your Atoms to the environments
- Do the same with the Test environment and the Test Atom Cloud. Your environments have now been configured. Your screen should look a little something like this after you have completed all these steps. You can see that we have no other unattached Atoms remaining and our Production and Test environments are successfully running.
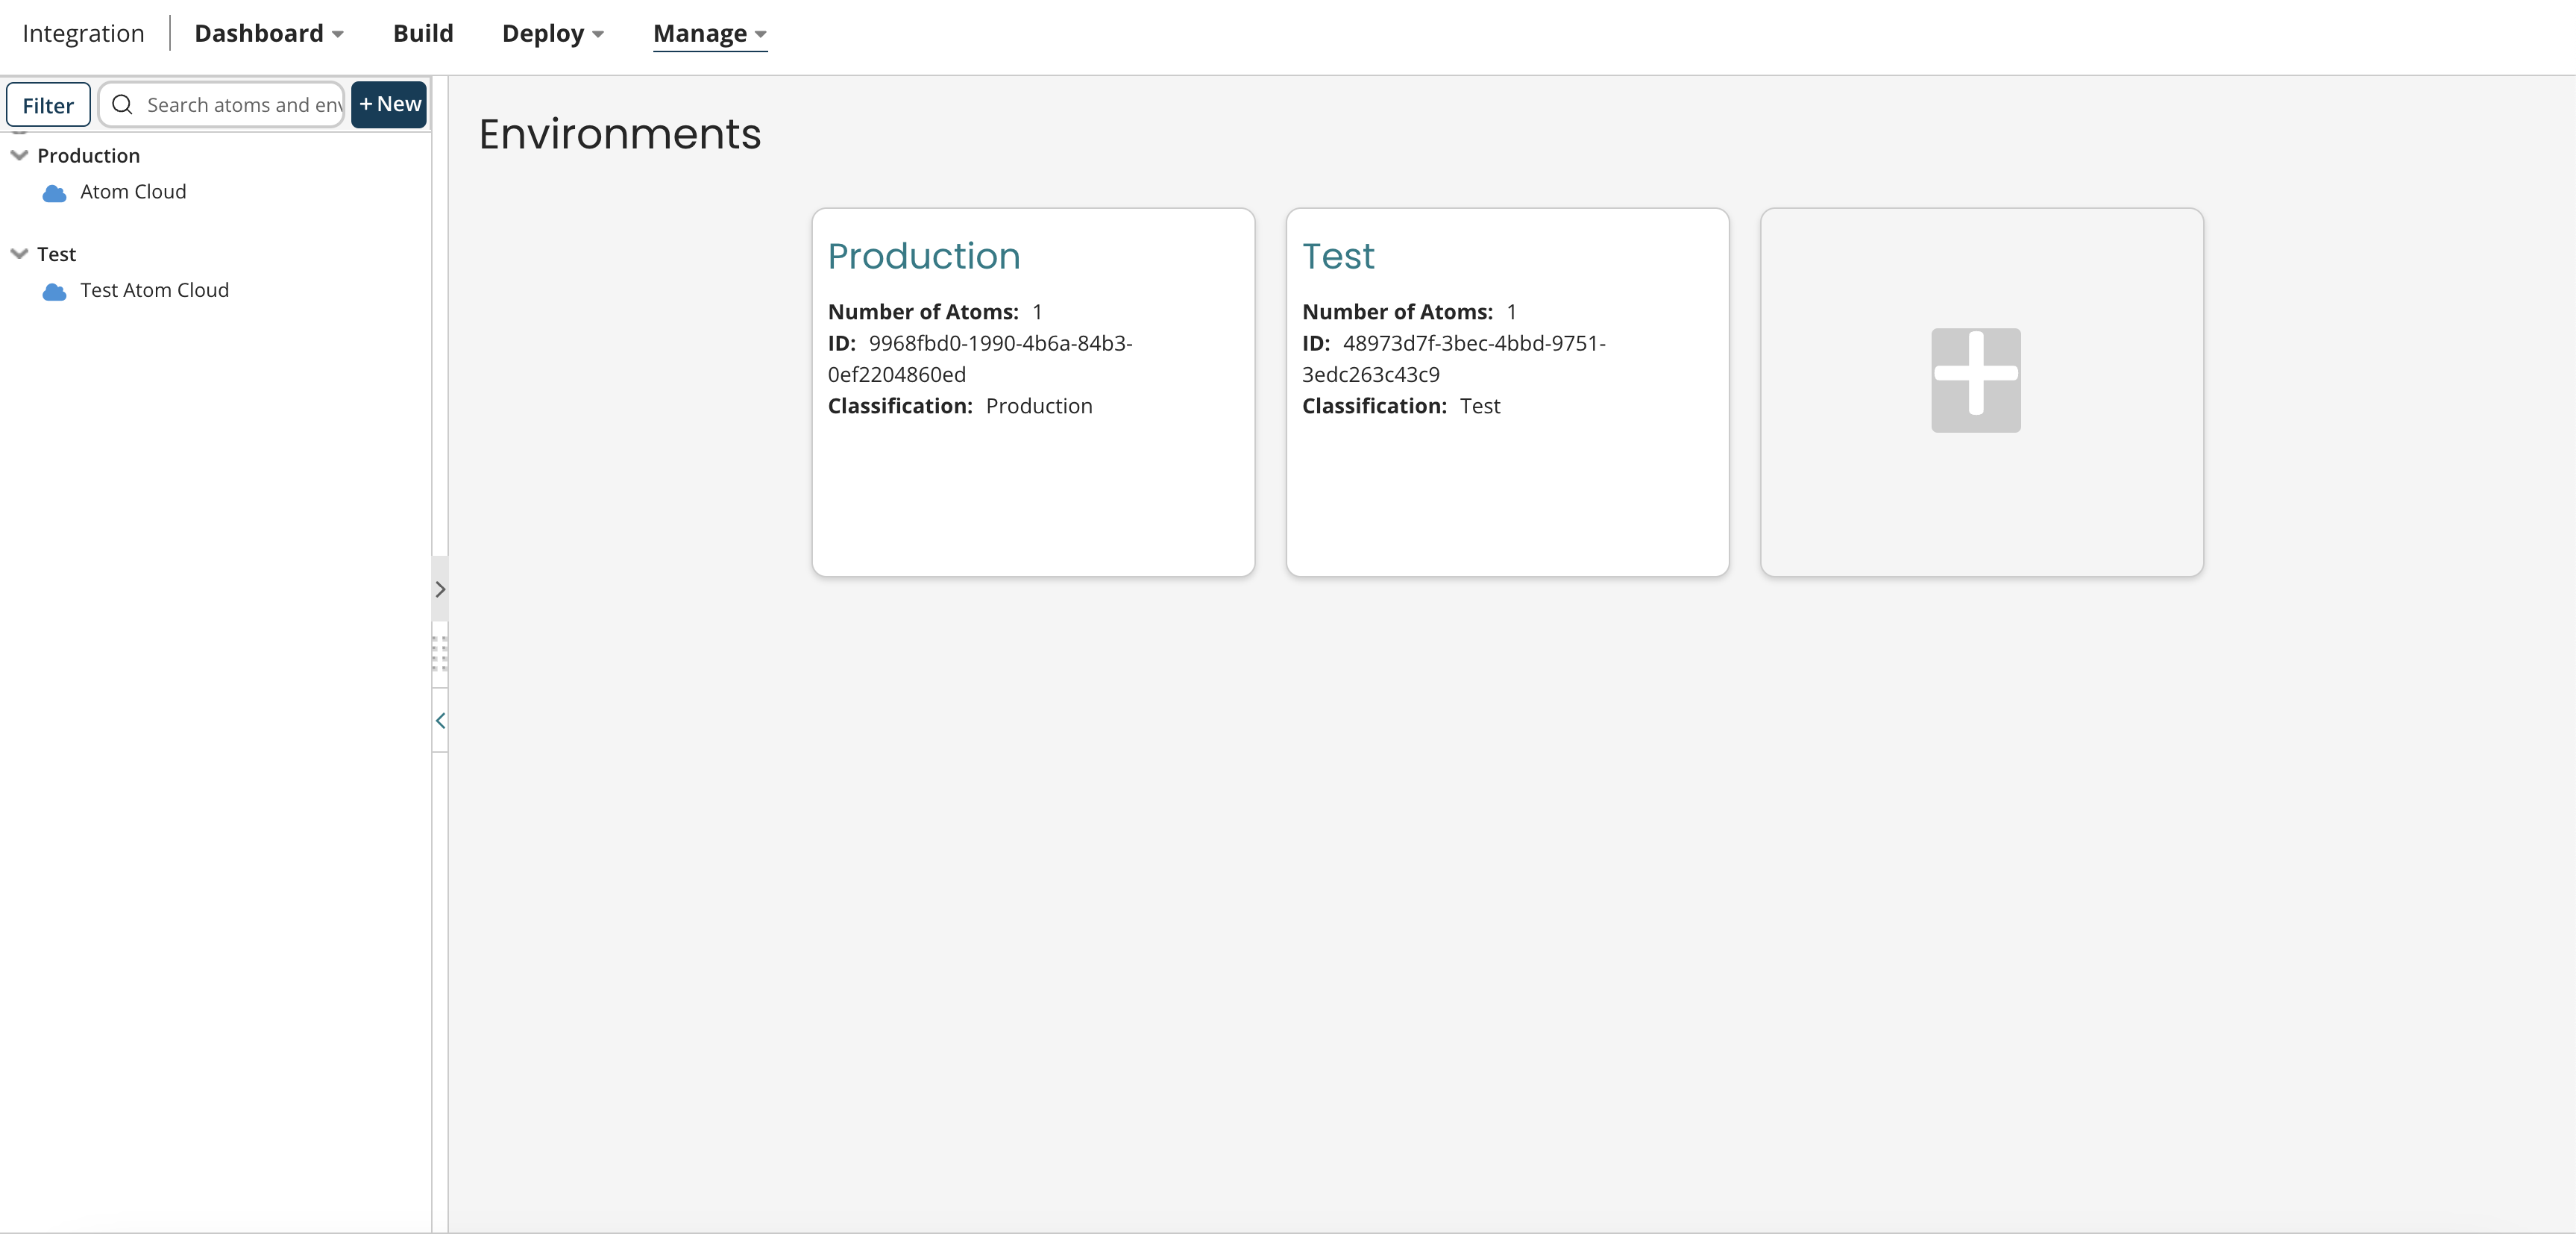
Image 9: Finalised- Atoms and environments running successfully
- Following these steps, we have achieved a basic Boomi Atoms and environments set-up.
Conclusion
Having an idea of your Boomi Atoms and environments set-up is the key to getting started with your process development as soon as possible. Understanding the differences between your two environments and the purpose of your Atoms can help you leverage their power for your integrations.
Gearing up to create your first Boomi process? You can check out our article here and the attached video tutorial to guide you through each step. If you have further queries on Boomi and its implementation, our experts at Chakray are here to help.


Talk to our experts!
Contact our team and discover the cutting-edge technologies that will empower your business.
contact us