Welcome to the new post of the section WSO2 Identity Server! In the first part of this tutorial we will learn the following:
Introduction
On this blog, we will navigate through the Identity Server tool or identity server, through some example or use case related to real life.
We will also learn how the tool responds to the management and security of identities, in addition to showing the necessary flexibility to display statistical data about the login of Service Providers, information about the session, federated authentication and many other things.
Before continuing, do not miss: Introduction to WSO2 Identity Server
Use Case
We start with the example of a company, Chakray, that wants to manage users and accesses of applications by internal and external personnel. Many of these applications contain sensitive information that must be protected, since in each application there are users, roles and permissions.
The provisioning of users must be fast, as well as protect the interactions between applications. We must also consider being able to use a single login system in order not to be repeating the credentials every time the user wants to use a certain application in the system. Because of this, it is decided to use WSO2 Identity Server.
In addition, the system administrators in Chakray must configure the analyzes for the WSO2 Identity Server and thus provide the information requested by the superior administration to monitor the session and authentication statistics. For this task it is decided to use WSO2 Identity Server Analytics.
Identity Server installation
The idea is to deploy in Docker containers: Tomcat, Identity Server and Identity Server Analytics:
For the installation we will use the WSO2 Docker image repository. This is the uri: https://hub.docker.com/u/wso2/ or in this other uri: https://docker.wso2.com/
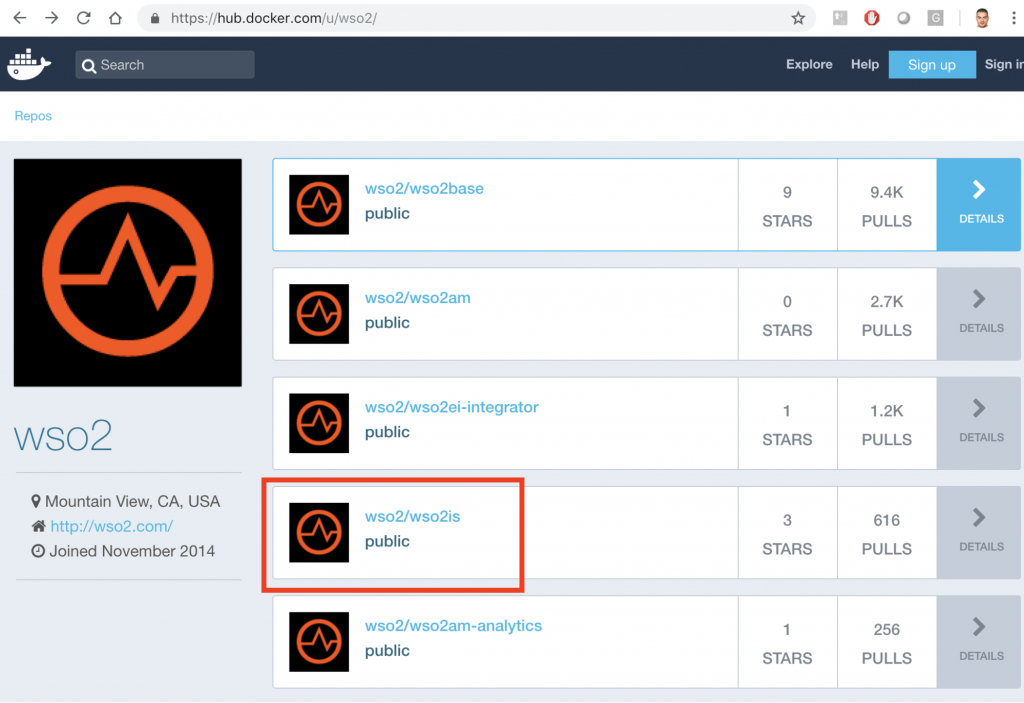
The red box shows the image we need to download. If you press DETAILS on the same line, a brief description of the IS container will appear.
The first red box shows the Tags where the different versions of the Identity Server are saved. To the right is the docker command that we will use to install the IS image on our computer. If you press Tags:
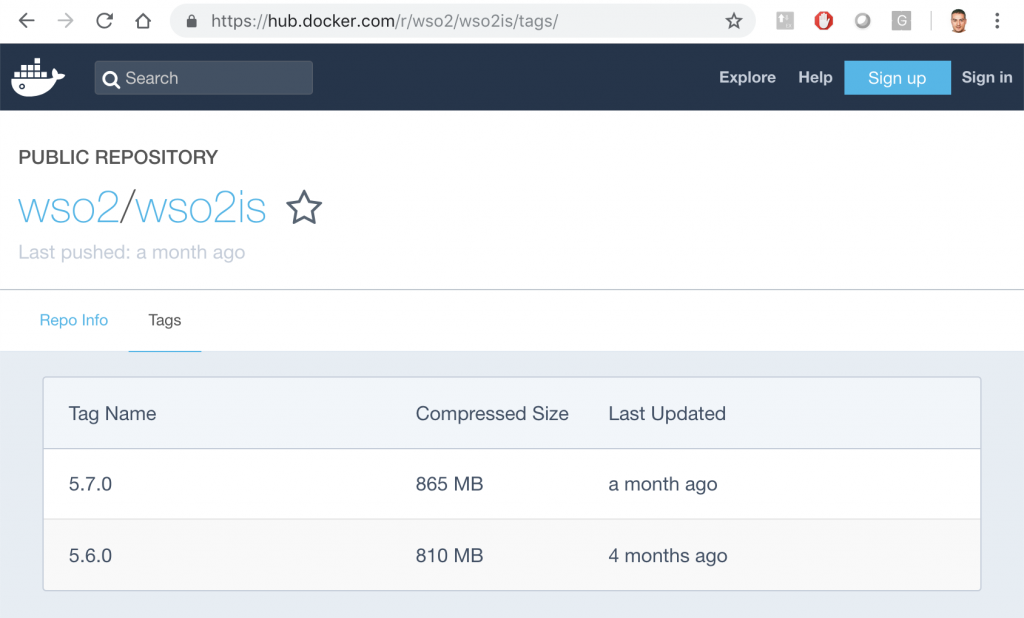
The latest version is 5.7.0. Now from the command line we can download the container. You have to do a pull of the image indicating the version you want to install, in this case the: 5.7.0

At the end of the download, Docker informs us of the completion of the installation of the new image. The new image is listed in the following screenshot:

Running the image in a container.
Now you can run the image in a container. The command line is shown below:

As shown, the name of the container is indicated by the parameter –-name. This other -d run the container in the background and prints the ID or identifier of the container.
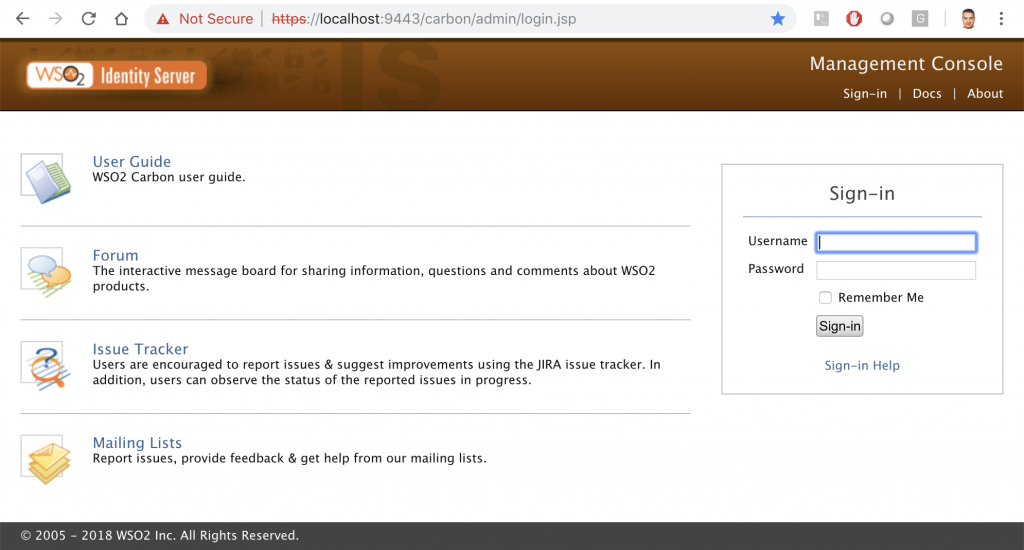
Now we just need to check it in the browser with the uri: https://localhost:9443
Now we have runned WSO2IS in a container, let’s move on!
Docker commands
Next we will show the output of some important commands. If you want to start learning Docker, write the same commands that we are explaining with the WSO2IS container example and seeing its output.
The format you must write is the following:
$docker [options] command
docker ps: shows the containers that are running.
![]()
The command shows the identifier of the container, the image it runs, ports mapped with the host, container name…
docker ps -s: The -s option of the ps command shows the size of the files that are included in the container, as can be seen in the last column.
docker exec -it wso2is-570 bash: This is to run a command in a container that is active. -it allows you to open a command window with the container. wso2is-570 is the name of the container that is running. bash is the Unix shell.

docker inspect wso2/wso2is:5.7.0: It returns information at low level of the IS container. The list is very long to put on the blog, but do not worry we will analyze it in the following posts of this section!
docker port wso2is-570: Displays the port mapping of the container. <Host -> Container>

docker container logs wso2is-570: Search and view the LOGS of a container.

Yes, there are more commands but we will see them in subsequent chapters, do not be impatient.
Key directories in the Identity Server
If we access inside the container, we can navigate between folders to discover the most important directories of the tool. As we already know:
$docker exec -it wso2is-570 bash
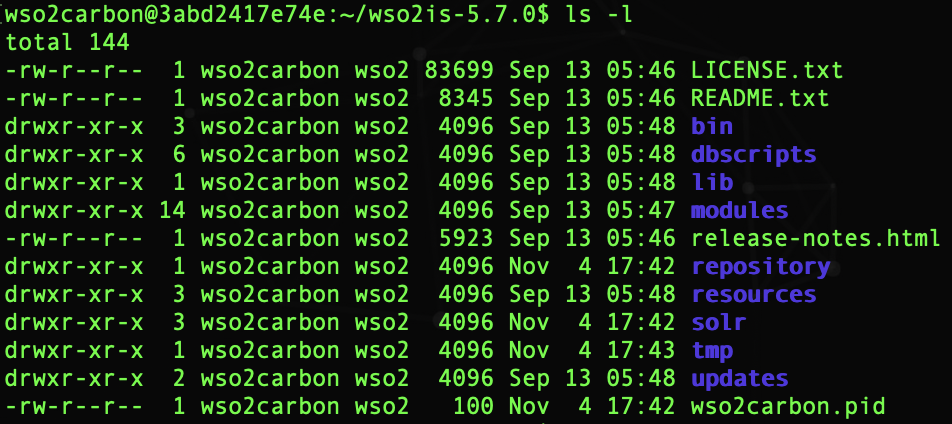
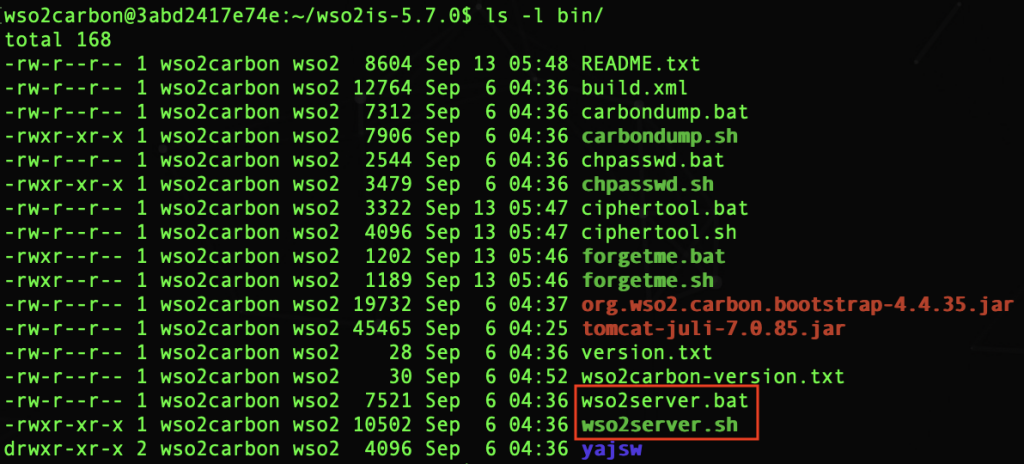
bin: This folder contains all the executable files, including the scripts that are used to start/stop the application in Linux and Windows environments, for example: wso2server.sh and
wso2server.bat.
-Read more: How to build your strategy of access control and identity management-
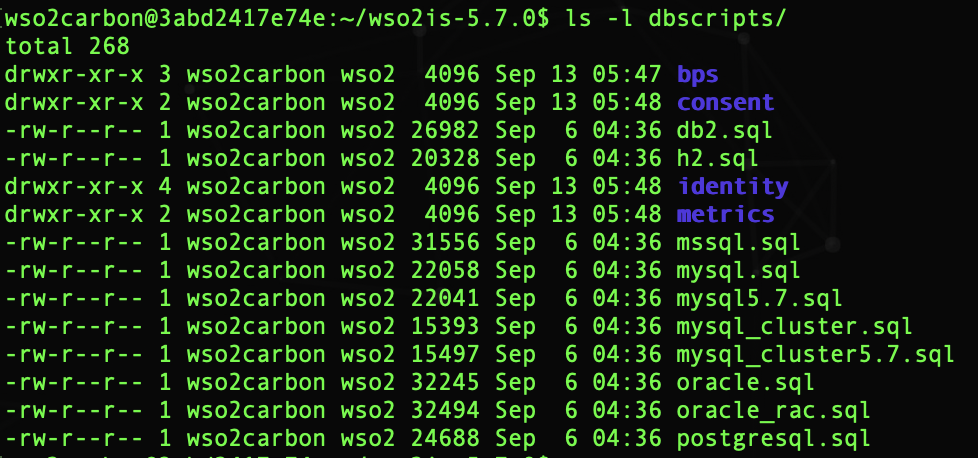
dbscripts: a collection of database scripts needed to create the Carbon database and the WSO2 IS-specific database in a variety of database management systems.
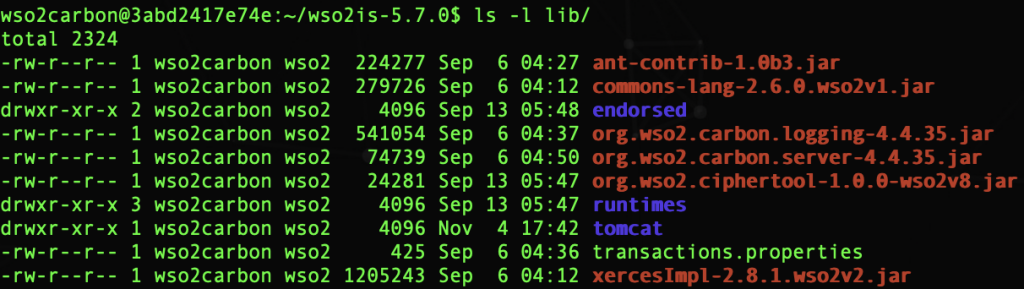
lib: The lib directory contains all the jar files that will be converted into OSGi packages at the start up of the IS and copied to the Dropins directory.
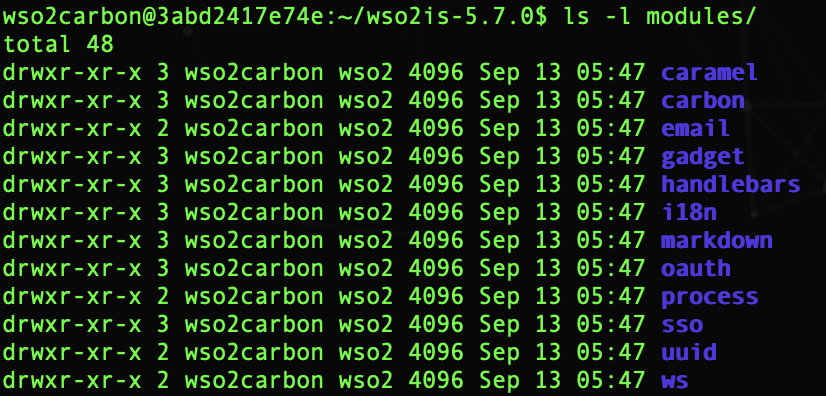
modules:all host objects that belong to the Jaggery module are declared inside the modules folder in a file called module.xml.
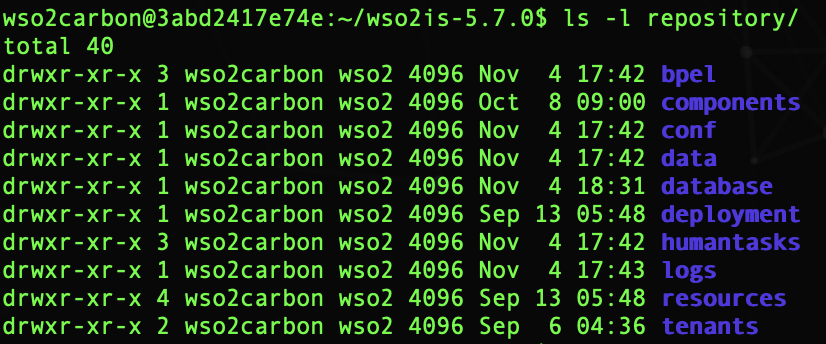
repository: the main repository for all types of implementations and Carbon configurations. This includes all the default services, APIs created, Carbon configurations, etc.
resources: contains additional resources that can be used by WSO2 IS.

tmp: It will contain temporary files that are created when a product is running. These files will be deleted from time to time depending on the maintenance tasks.

Key configuration files
<IS_HOME>/repository/conf/carbon.xml
This file is the carbon server configuration file. We can configure for example, the name of the product and the version, the name Host where the IS server is running, the ports used, information about the internal LDAP, and many more details that we will expand later.
<IS_HOME>/repository/conf/datasources/master_datasources.xml
This is where the data sources are configured, that is, where the data sources that store the IS tables are stored.
<IS_HOME>/repository/conf/identity/identity.xml
This file configures identity management and protection, with protocols such as OpenID, OAuth, SAML2 Grant type, OpenIDConnect, Multi-factor Authentication, SSO service, rights configuration, SCIM Authenticators.
<IS_HOME>/repository/conf/log4j.properties
The configuration file of the log4java tool used by the server to generate traces during the operation of the tool.
<IS_HOME>/repository/conf/registry.xml
With this file the internal record is configured. This record is used as if it were a directory of folders to store resources, such as files.
These resources can be cached in memory, can be protected in read-only mode, can implement resource managers. It is also possible to use remote registers, a database where the information of this component and its resources are stored.
<IS_HOME>/repository/conf/user-mgt.xml
The configuration of the user manager is done in this file: user name, role and password of the administrator, store where the administrator user resides, configuration of the user store manager and authorization management
<IS_HOME>/repository/conf/security/secret-conf.properties
The configuration of the secret administrator that uses the Secret Vault component. The keystore and the secret repository (Vault) can be configured through this file. All passwords in the tool’s xml configuration files are made secure by protecting them using encrypted text. When a password is encrypted, a keystore is required to create the decryption cryptography to resolve the encrypted secret values. For this we will use the secret-conf.properties file.
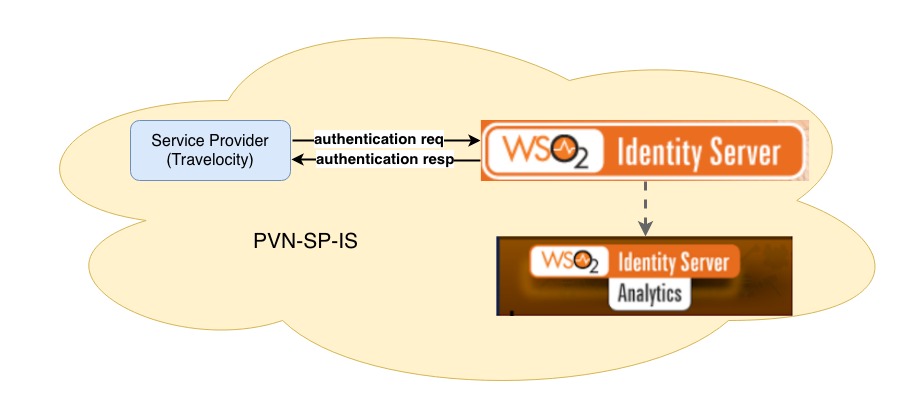
SP, Identity Server and Analytics Configuration
In this demo, we will download the image of the IS Analytics and connect it to the IS. This is all we will do:
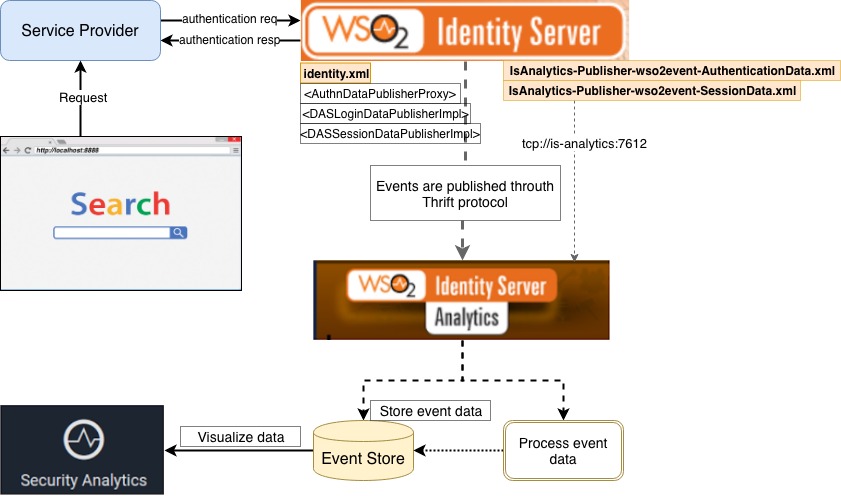
As you can see in the graph, all the authentication actions generated by the Service Provider (Travelocity) will be traced by the Identity Server. The data collected through events will be sent to Identity Analytics to save and display them in a graphical way.
IS Analytics and IS
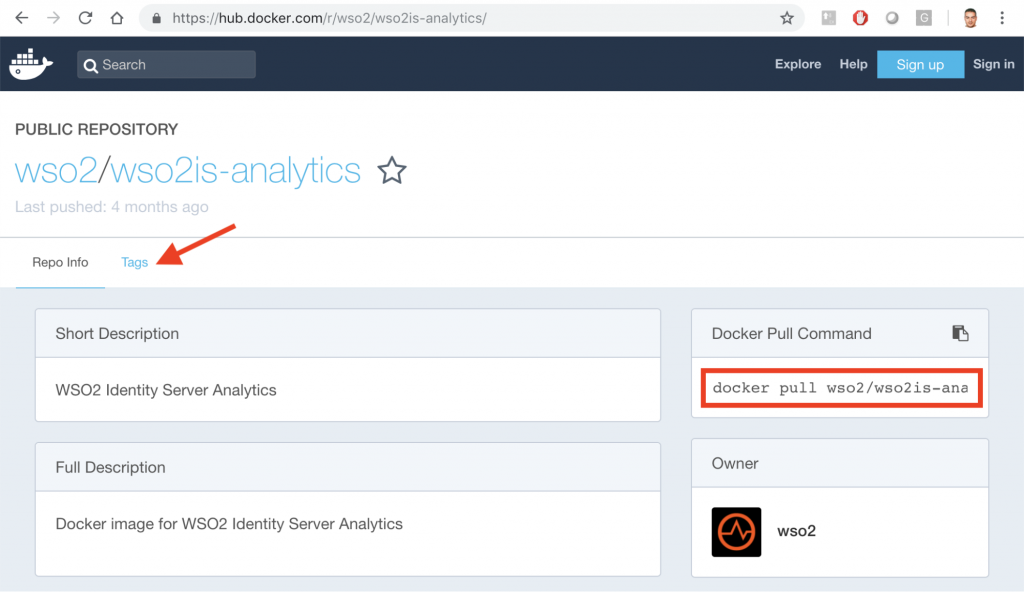
1)How to download IS Analytics image
As we already know, we are going to download the image from: https://hub.docker.com/u/wso2/
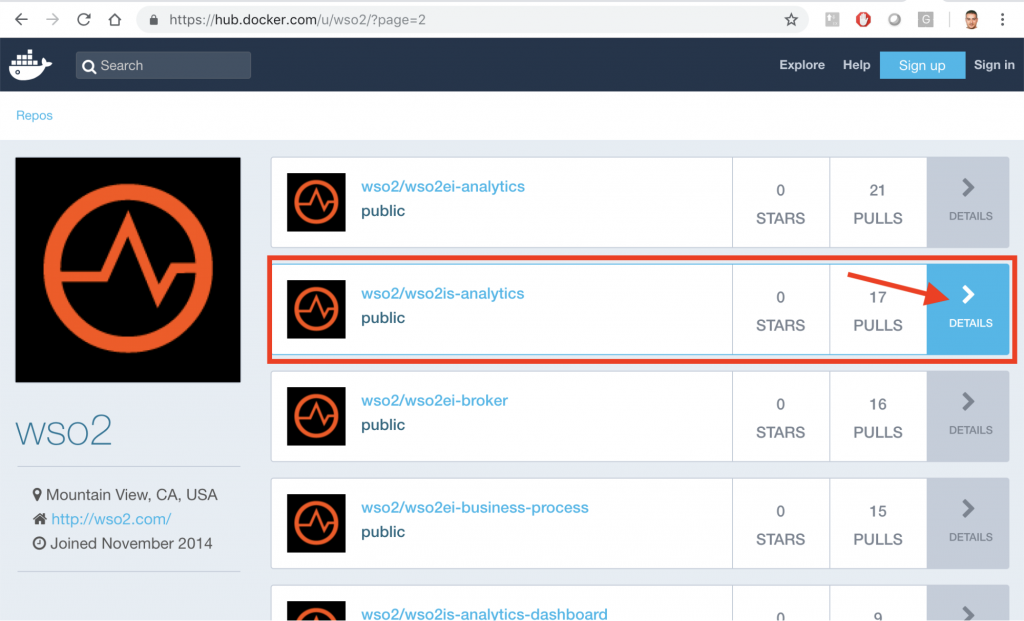
Now, press DETAILS button, as shown in the image.
For the download, you have to use the command line that shows the red box:
$ docker pull wso2/wso2is-analytics
We will use the latest version, that is exposed in the option: Tags that shows the red arrow. If we click on those letters:
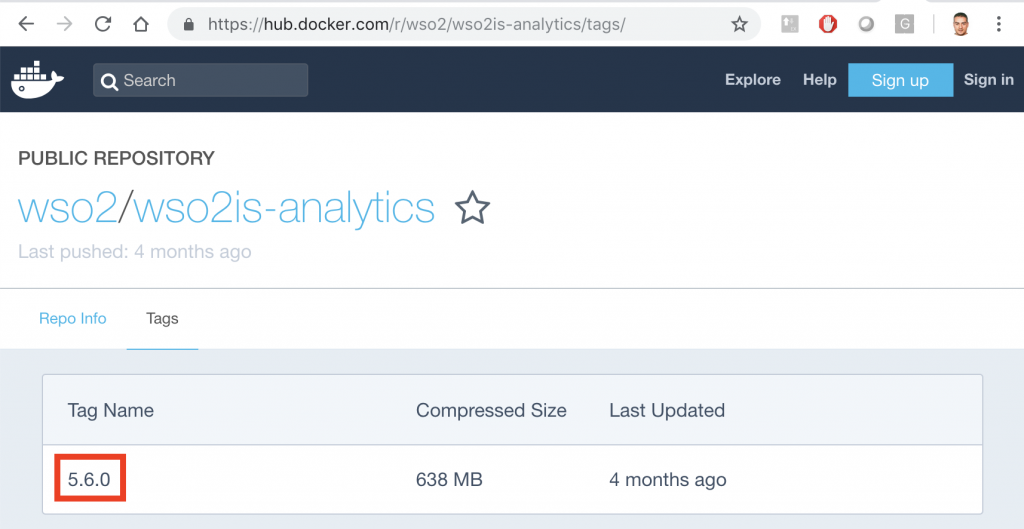
In the red box appears the latest version: 5.6.0. Therefore, the command line to download the image would be as follows:
$ docker pull wso2/wso2is-ana:5.6.0
As always you must first try to login to download from the Docker hub:

Now download the image:
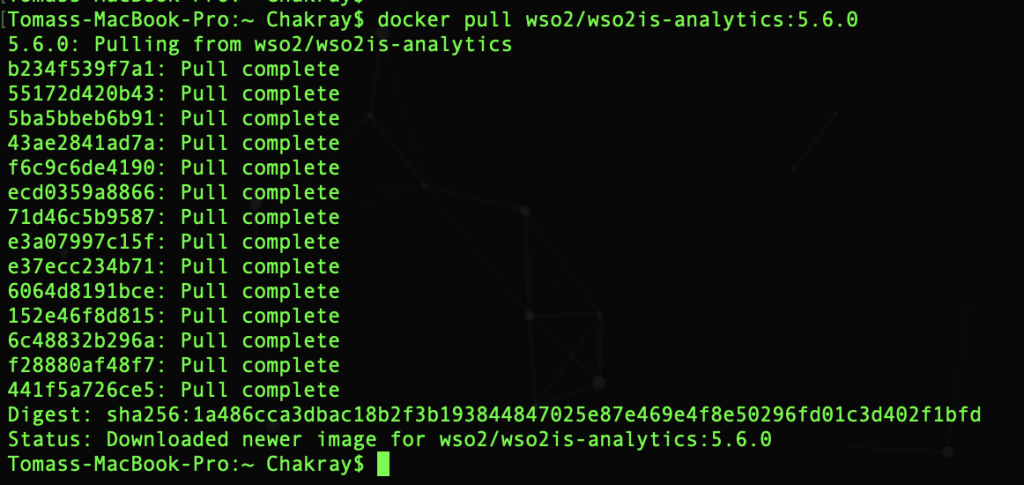
It is already ready in the local repository:
![]()
2)Enable Analytics in WSO2 IS
To enable the publication of events we must get into the IS container as root to be able to do modifications:
$docker exec -u 0 -it wso2is-570 /bin/bash
And we open the file in edit mode:
<IS_HOME>/repository/conf/identity/identity.xml
-
Enable the listener: AuthnDataPublisherProxy
![]()
This is the common event detector for all types of analysis supported in WSO2 IS.
This listener captures all the statistics sent to WSO2 IS Analytics as events, and redirects them to the relevant listener according to their type. This is necessary to enable both session and login analysis.
- Enable the listener: DASLoginDataPublisherImpl
![]()
Enable this listener only if you want to analyze statistics related to logins through WSO2 IS.
-
Enable the listener: DASSessionDataPublisherImpl
![]()
If you want to analyze statistics for specific sessions in WSO2 IS Analytics, this is the listener you should enable.
As you can see, whenever you want to enable it you must put the enable parameter, true.
3) Configure event publishers
All publishers of events related to WSO2 IS Analytics are in the directory:
<IS_HOME>/repository/deployment/server/eventpublishers

Now we will configure the event publishers. To configure the login and session analysis you must use these files:
<IS_HOME>/repository/deployment/server/eventpublishers/
IsAnalytics-Publisher-wso2event-AuthenticationData.xml
<IS_HOME>/repository/deployment/server/eventpublishers/
IsAnalytics-Publisher-wso2event-SessionData.xml
Respectively.
- IsAnalytics-Publisher-wso2event-AuthenticationData.xml
receiverURL: It is the final point to which the events are directed from the IS. The format is: tpc://<HOSTNAME>:<THRIFT_PORT> or for multiple recipients: {tcp://<HOSTNAME>:<PORT>,tcp://<HOSTNAME>:<PORT>,…}
Example:

username: This is the user name of the listener.
password: Listener password.
protocol: Protocol used to send/post events.
publishingMode: Asynchronous publication => non-blocking
Synchronous publishing => blocking
publishTimeout: Refers to the wait time for non-blocking publishing mode. Its value is a positive integer.
ssl: Authenticator URL Not included by default. When not included, the authenticator URL is obtained by adding 100 to the thrift port. The format is: ssl://<HOSTNAME>:<SSL_PORT>. Example: ssl://localhost:7712
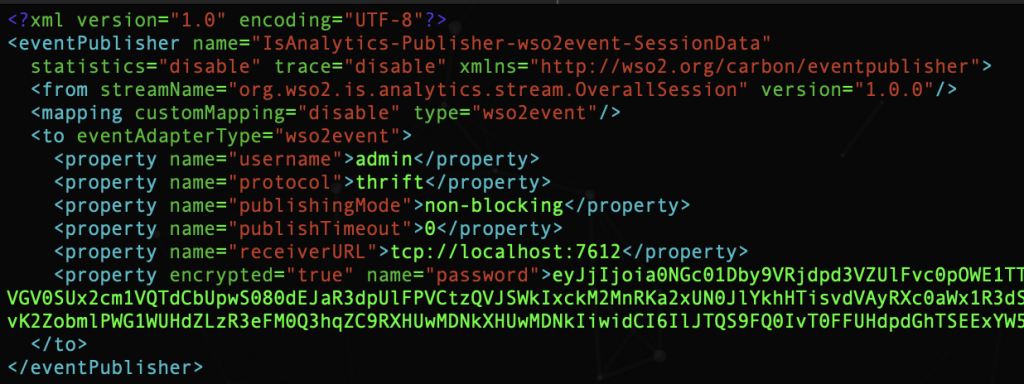
- IsAnalytics-Publisher-wso2event-SessionData.xml
In our case, the value of receiverURL is the name of the container that runs the IS-Analytics: wso2is-analytics, that is to say:
![]()
4) Change the administrator password
If you want to change the administrator password, write in plain text in the event publishers, parameter: password. As you can see in the two previous images.
Another important fact is that if you have changed the keystore in the IS Analytics you must import the public key (public certificate) in the IS, in the file: client-truststore.jks
5) Running the servers
If you have made changes to the IS server, you must stop the container and restart it.

To run the IS-Analytics:
$ docker run –name wso2is-analytics -d -p 9444:9444 wso2/wso2is-analytics:5.6.0
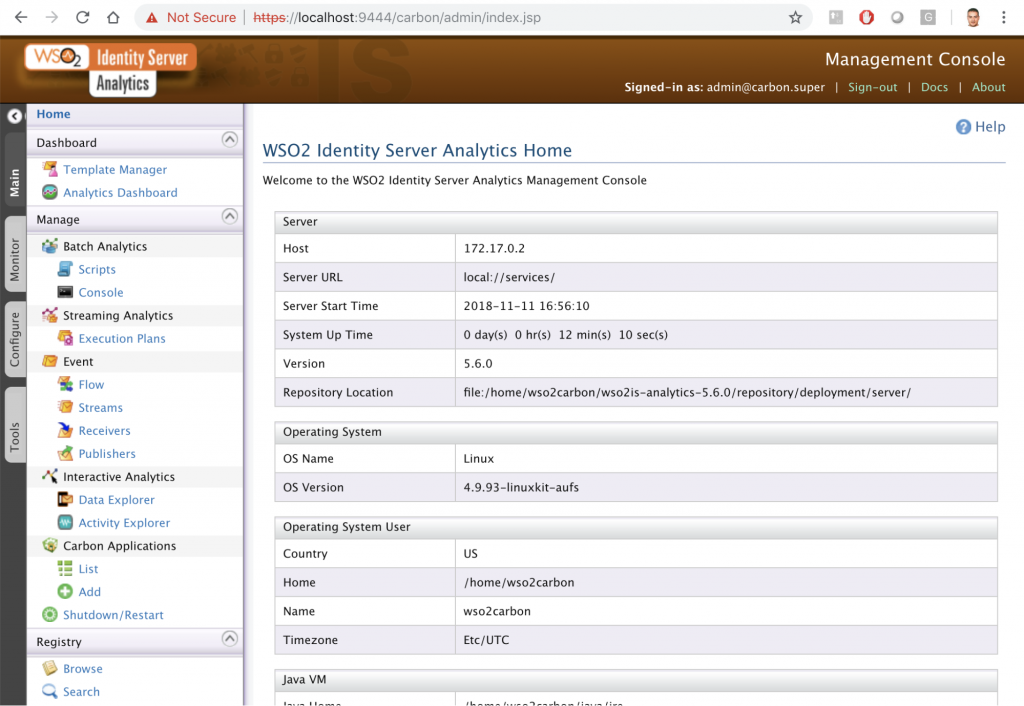
We use port 9444 this time because port 9443 is being used by IS. Now in the browser use the uri: https://localhost:9444/carbon/admin/index.jsp
And you can check the IS-Analytics in action!
By now we have the two containers running: el IS y el IS-Analytics.

Networks in Docker
When you start a container, what really happens is that in the background you are connected to a particular Docker network. By default, that is the bridge network.
Subsequently, each of those networks that you can connect to, routes the requests through a NAT firewall, which is actually Docker that configures the IP address of the host in its default interface. Thus, your containers can access the Internet or the rest of your Network to later return.
All containers in the same virtual network can communicate with each other without using the parameter: -p.
Following good practices, we should create a virtual network for each application and all related. You can create a virtual network for the Service Provider (Travelocity), the Identity Server with the Identity Server Analytics. In this way they can talk or connect with each other without problem.
If we visualize the networks configured in Docker:

We see that one of the virtual networks by default is that: bridge.
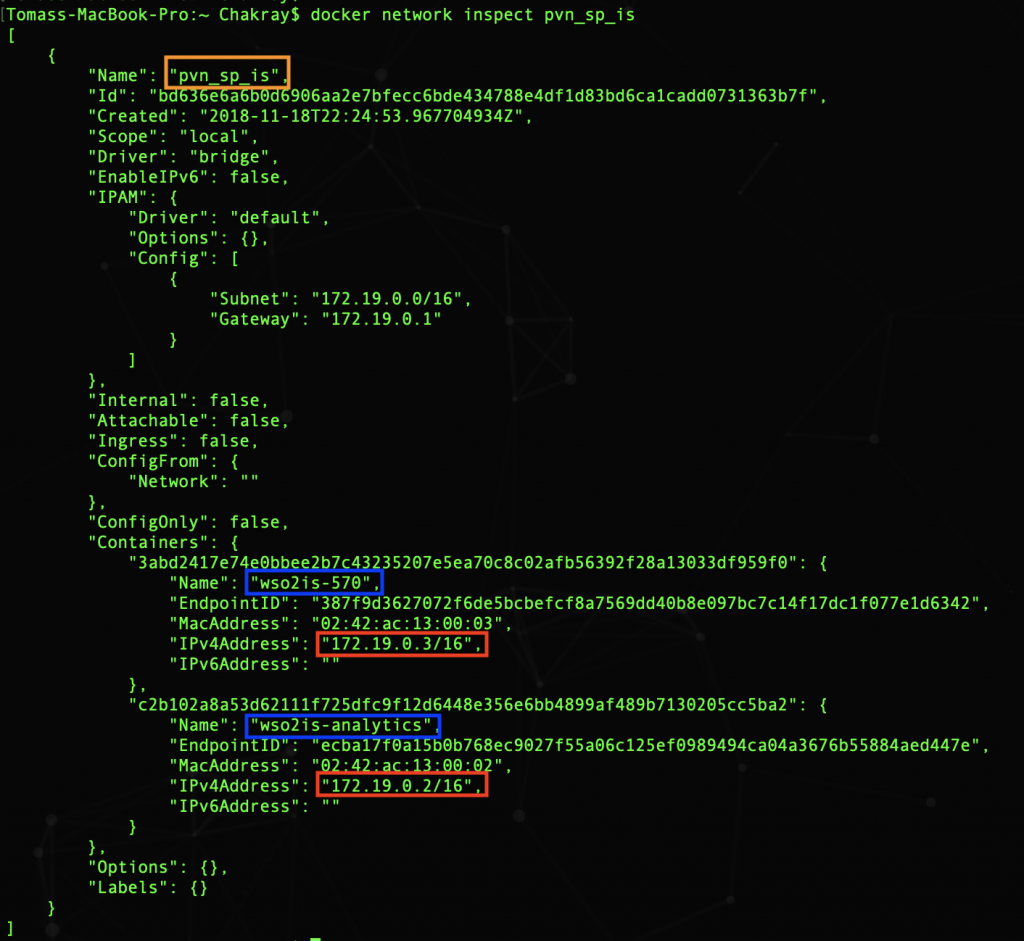
If we inspect that network we will see the two containers mentioned above.

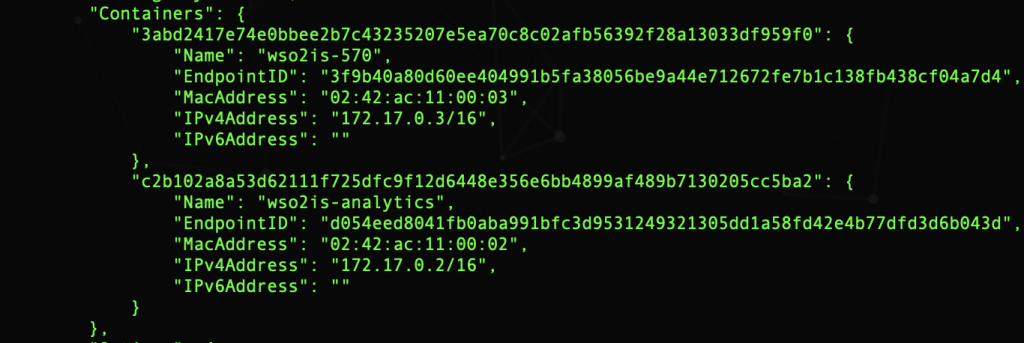
In the Containers section you can see the names of the two containers and the assigned IP address. The problem is that each time a container is restarted, Docker can assign a different IP address to it.
Therefore, it is an antipattern to use the IP of one container to communicate with another. Docker uses the name of the container, as the equivalent of the Host name, to communicate through the virtual network different containers, it does so with the DNS daemon. If we use the virtual network by default: default you have to use the parameter –link to link one container to another so they can communicate without problem, since in that default network Docker does not use the DNS daemon. We must do this every time the container is started. One way to avoid this problem is to create a new virtual network, because when creating a new network, Docker creates that DNS daemon.
Following the good practices our design, creating a new network, would be as follows:
PVN-SP-IS: Private Virtual Network Service Provider/Identity Server.
For this, we create the new network: $docker network create pvn_sp_is![]()
Now we must connect the IS and the IS-Analytics to the new network:
![]()
If we inspect the new network we see that there are two containers:
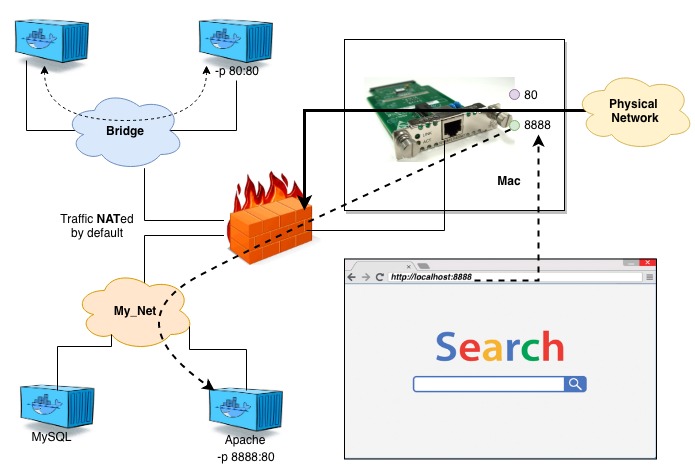
The virtual networks are connected to the Ethernet interface of the host. Each time a request is sent to: localhost: 8888 it is routed to the virtual network that contains the listening process on that port, as you can see in the following image. You have to specify -p for the requests to reach the container connected to the virtual network.
Now we just need to add the service provider, in our case we have chosen Travelocity.
Service Provider
This service launches the login requests with the SAML protocol to the Identity Server. These actions of success or failure in the login process will be registered later in the Identity Server Analytics.
To do this, first download Travelocity, our Service Provider, configure the connection to the Identity Server and then configure the new Service Provider in the IS.
Download from the repository
First you must create a folder on your system to download the Identity Server examples, with Travelocity included.

Inside the new folder you have to start the new Git repository. Our folder now has an empty repository in /.git/ (the repository is a hidden folder where Git operates.)

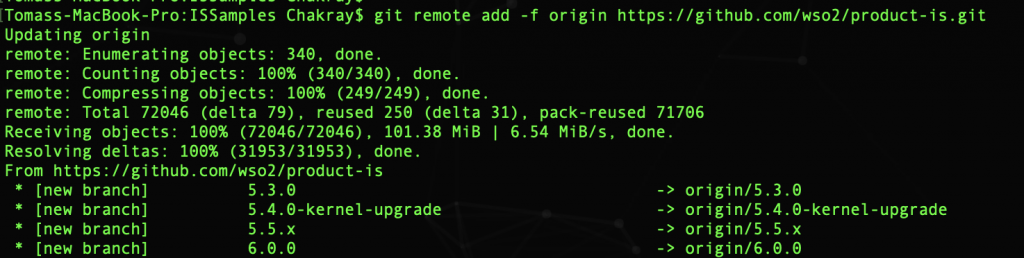
Now we configure in our local git the repository that we want to download:
$ git remote add -f origin https://github.com/wso2/product-is.git
git-remote – Manage a set of tracked repositories.
add -f – Add the new repository from the source to our folder. With the option -f, git fetch <nombre> it is executed immediately after configuring the remote information. And the git fetch <name> command can be used to create and update the remote tracking branches <name>/<branch>.
Enable option sparseCheckout:
![]()
It is used to download from the repository only the files we want to use, and not all documents. And it is now when we tell Git what things we want to download. It is done in the directory /ISSamples/.git/info. In our case we want to download the folder: modules/samples/

In the sparse-checkout file, folder or files that we want to download from the repository are written. Now we go to the folder where we were originally, that is: $ cd ../..

Now we download the contents of the repository from the branch: v5.5.0 to another local branch with the same name.

As you can see in the image, the folder that we indicated previously was downloaded: modules/samples/. Our Service Provider example is inside the folder: /modules/samples/sso.
Service Provider Configuration
Now we have to configure Travelocity (our Service Provider) to be able to connect to the Identity Server and be able to send SSO authentication requests through the SAML protocol (Single Sign On – SSO), this is the single session initiation based on a web browser.
As we already knew, single sign-on is a key feature of WSO2 Identity Server that allows users to access multiple applications using the same set of credentials. In addition, the user can access all these applications, systems and platforms, without having to login individually.
For example, if users login in to application A, they would automatically have access to application B for the duration of that session, without having to re-enter their credentials. Later on we will dedicate a post around this concept for a better understanding.
Hostname
Add the following entry to the /etc/hosts file to configure the hostname on the laptop where the containers are running:
127.0.0.1 wso2is.local
Some browsers do not allow you to create cookies for a hostname such as localhost. Cookies are required when working with SSO.
Therefore, to ensure that the SSO capabilities work as expected, it is important that we configure this file.
Travelocity.properties
At this moment we must configure the file travelocity.properties. It is on the path: /ISSamples/modules/samples/sso/sso-agent-sample/src/main/resources/

- Configure the following properties with the name of the Tomcat container as the host name:
#The URL of the SAML 2.0 Assertion Consumer
SAML2.AssertionConsumerURL=http://wso2is.local:8888/travelocity.com/home.jsp
#openid.return_to parameter
OpenId.ReturnToURL=http://wso2is.local:8888/travelocity.com/home.jsp
- Configure these other properties and use as host name localhost:
#The URL of the SAML 2.0 Identity Provider
SAML2.IdPURL=https://localhost:9443/samlsso
#OAuth2 token endpoint URL
OAuth2.TokenURL=https://localhost:9443/oauth2/token
#OpenId Provider Url
OpenId.ProviderURL=https://localhost:9443/openid/
#A unique identifier for this SAML 2.0 Service Provider application
SAML2.IdPEntityId=localhost
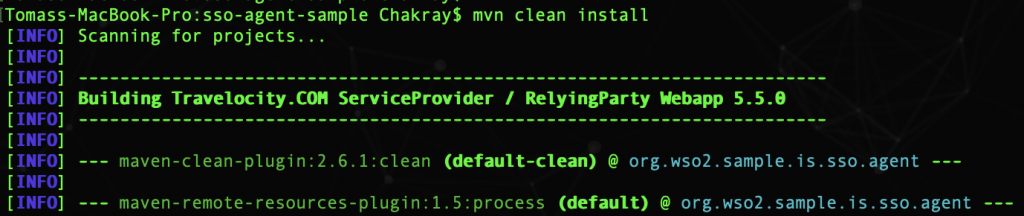
Now in the terminal, access the folder /modules/samples/sso/sso-agent-sample and compile the example using the following command: $ mvn clean install
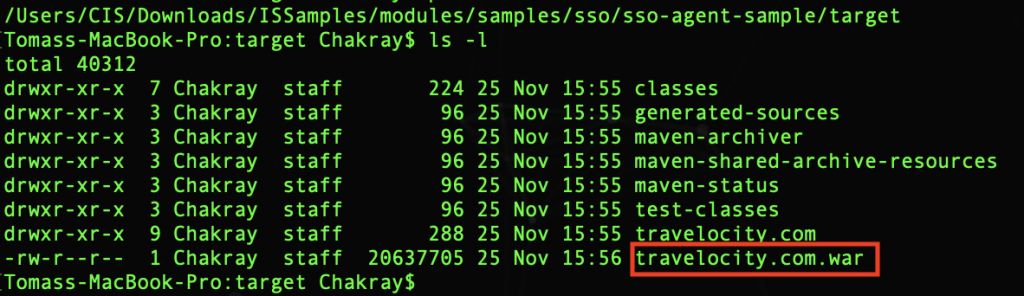
After successfully generating the example, you can find the .war file called travelocity.com within the directory: /sso/sso-agent-sample/target.
It is time to deploy this war file in a Servlet container, for this, use the Apache Tomcat Servlets container.
Tomcat container
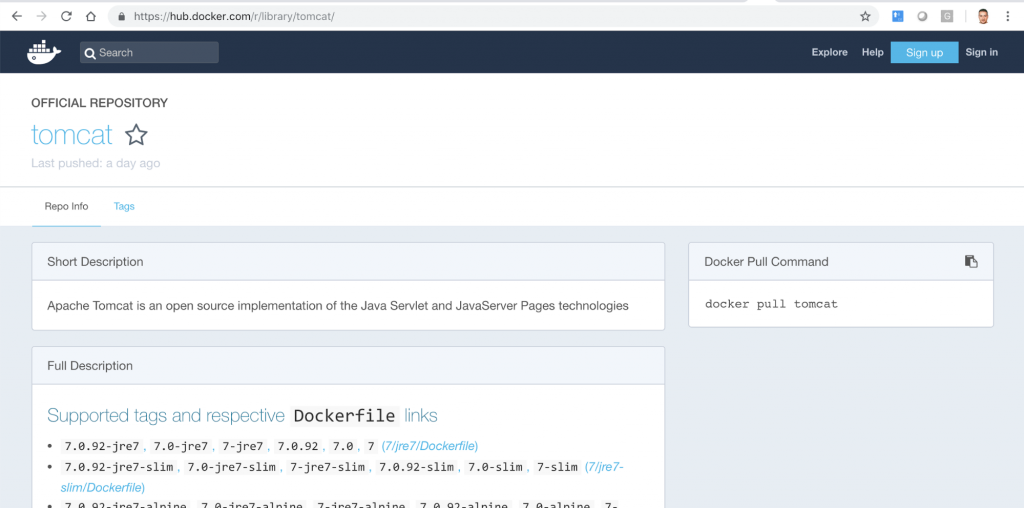
The Service Provider example is written in Servlet 3.0. Therefore, you must run the Tomcat 7.x servlet container. We will do this by downloading a Tomcat Docker image.
To do this go to the uri: https://hub.docker.com/r/library/tomcat/ where you can find the Tomcat image that we will use.
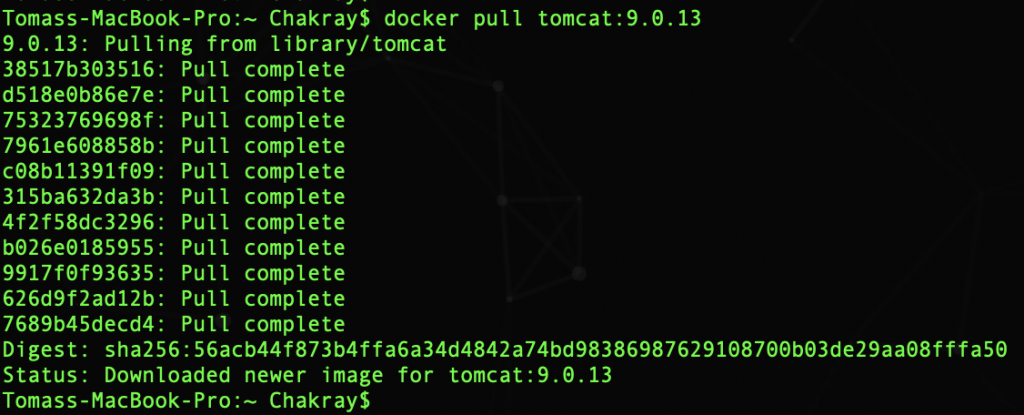
The version that we will install is: 9.0.13. If you click on Tags you can see the list of available versions.
With this command you can pull the image: $ docker pull tomcat:9.0.13
You can check the installation by listing the Docker images:

Next, we must run Tomcat container:
$ docker run -it -p 8888:8080 tomcat:9.0.13

| Note:How to rename a container? $ sudo docker rename old_name new_name |
First of all you have to configure Tomcat with the user and password to access the console. To do this, restart the container and enter the console:
$ docker container restart tomcat9013
$ docker exec -it tomcat9013 bash
Now you have to configure the file: tomcat-users.xml. For example, these are the users and roles that we are using:
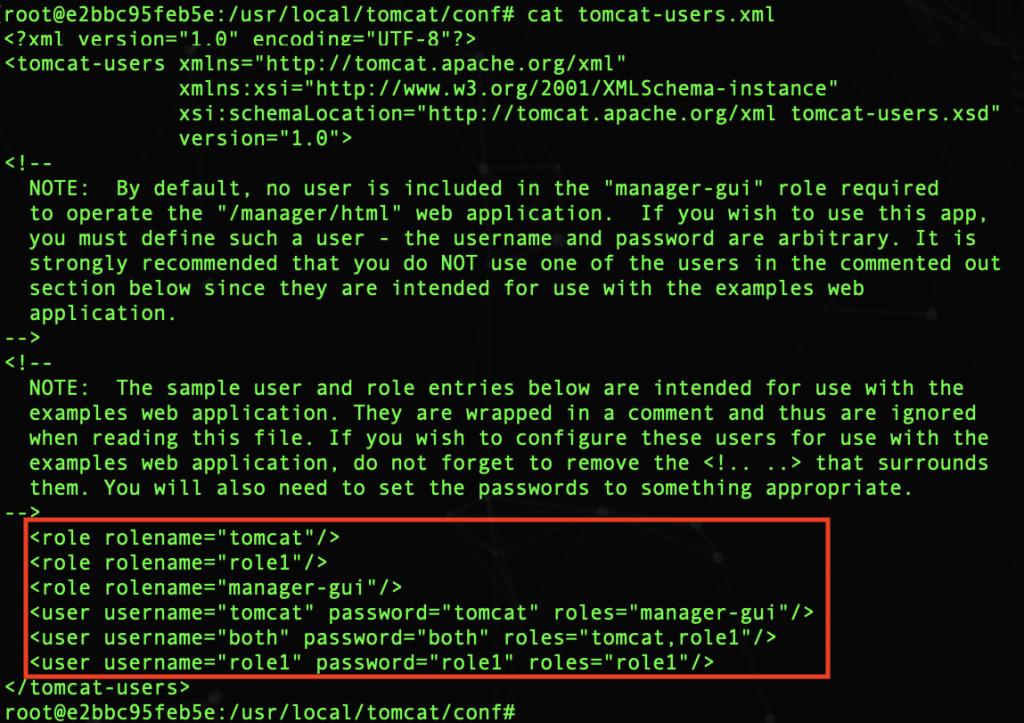
Therefore, to enter the console you must type: tomcat/tomcat as username and password respectively. Do not forget to restart the container again!
Note:
If when restarting Tomcat, browser does not show you the login window, look for the file: CATALINA_HOME/webapps/manager/META-INF/context.xml and add the comments around Valve:

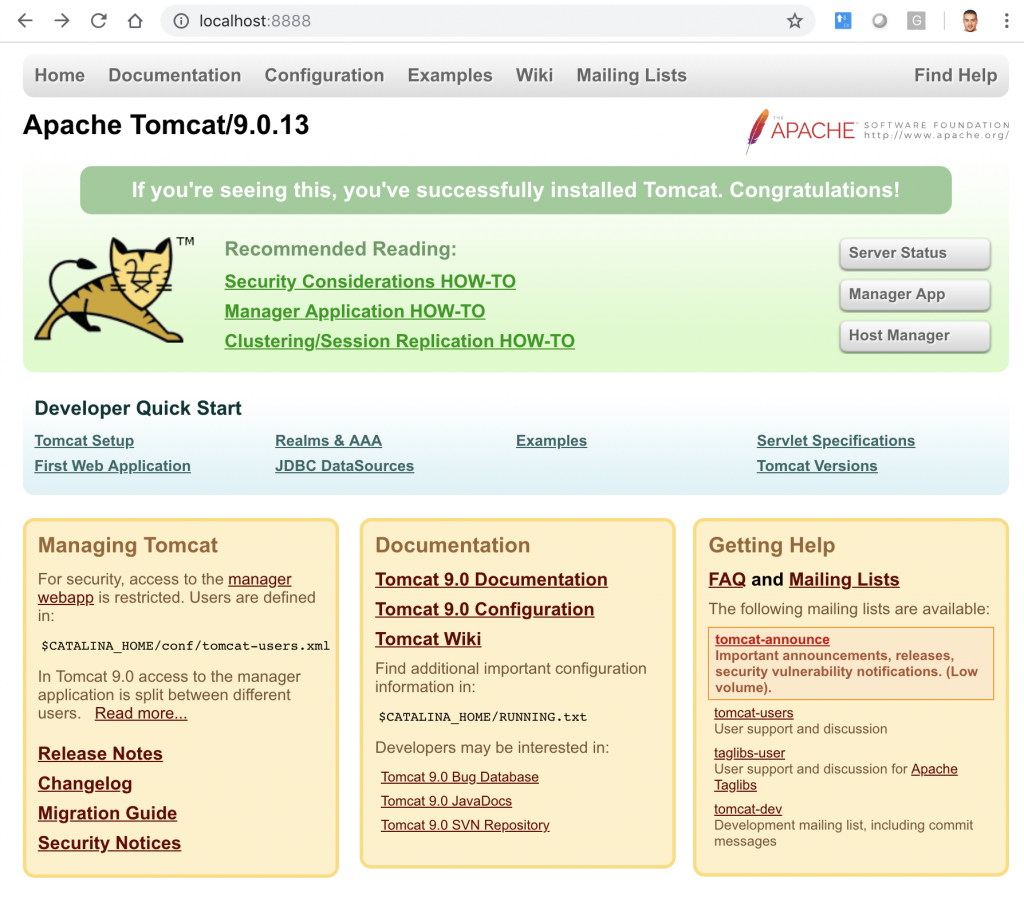
In the browser you can now see the Tomcat console.
Finally, do not forget to connect the Tomcat container to the network: pvn_sp_is

Now we have the three containers in execution:
Tomcat, WSO2-IS and WSO2-IS-Analytics:
And all three in the same network:
$ docker network inspect pvn_sp_is
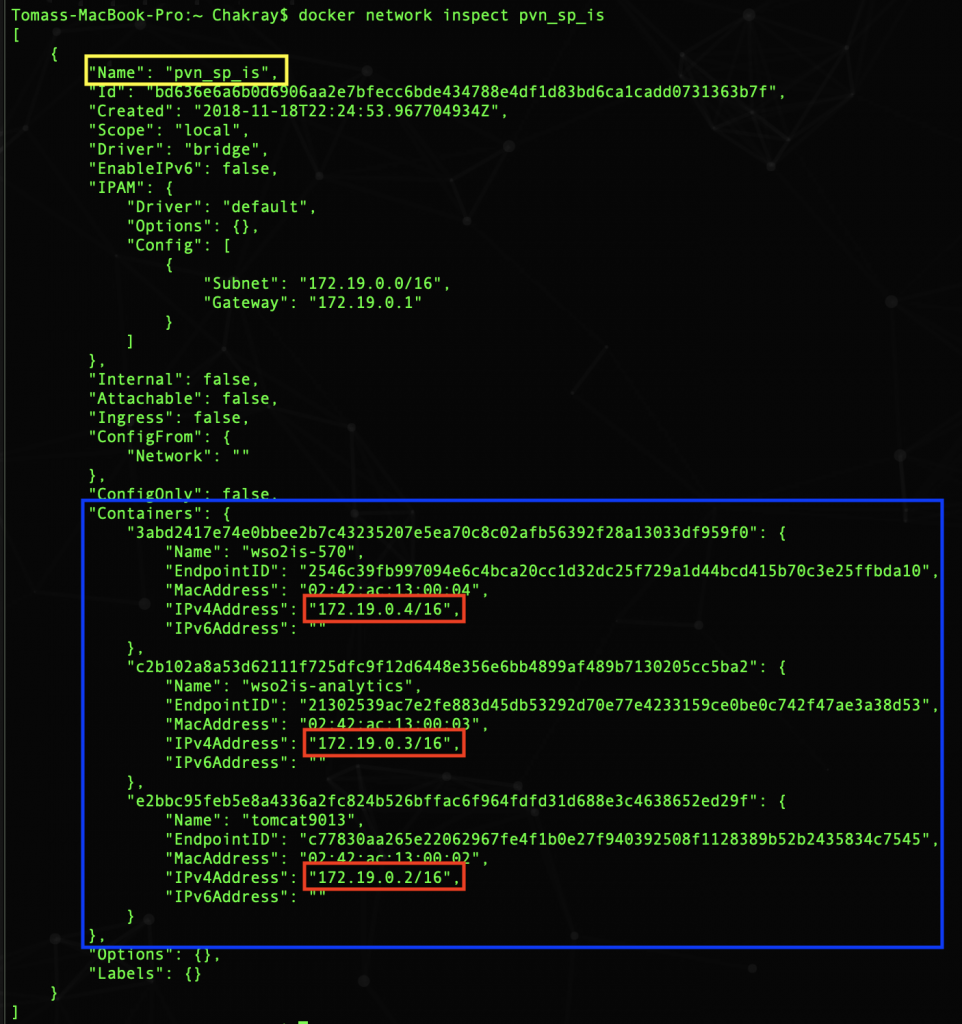
As we saw, depending on the order in which the containers start, they can obtain a different IP address. That’s why we can not refer to them through their IP, but with the name of the container: wso2is-750, wso2is-analytics, tomcat9013. The docker DNS daemon matches the name of the container and its IP address.
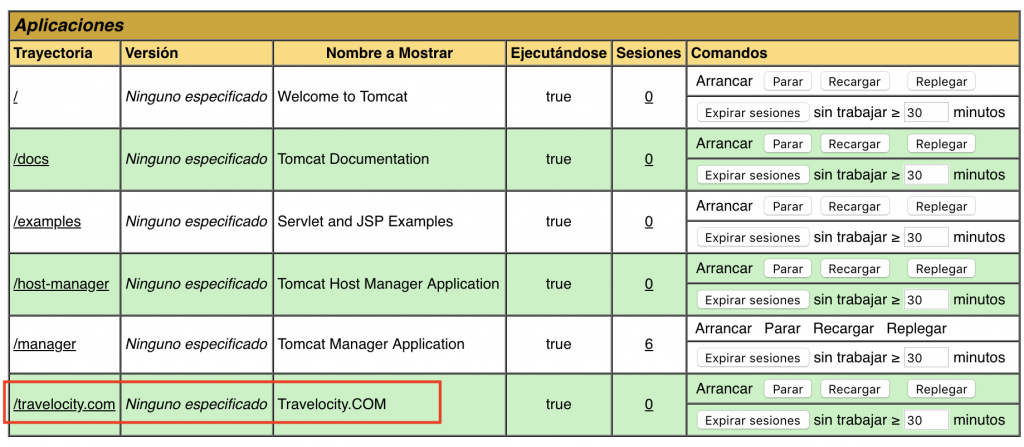
Finally, deploy Travelocity war on the Tomcat. Select: Manager App.

As you can see in the image, you only have to select the war file from the folder and click on Deploy.
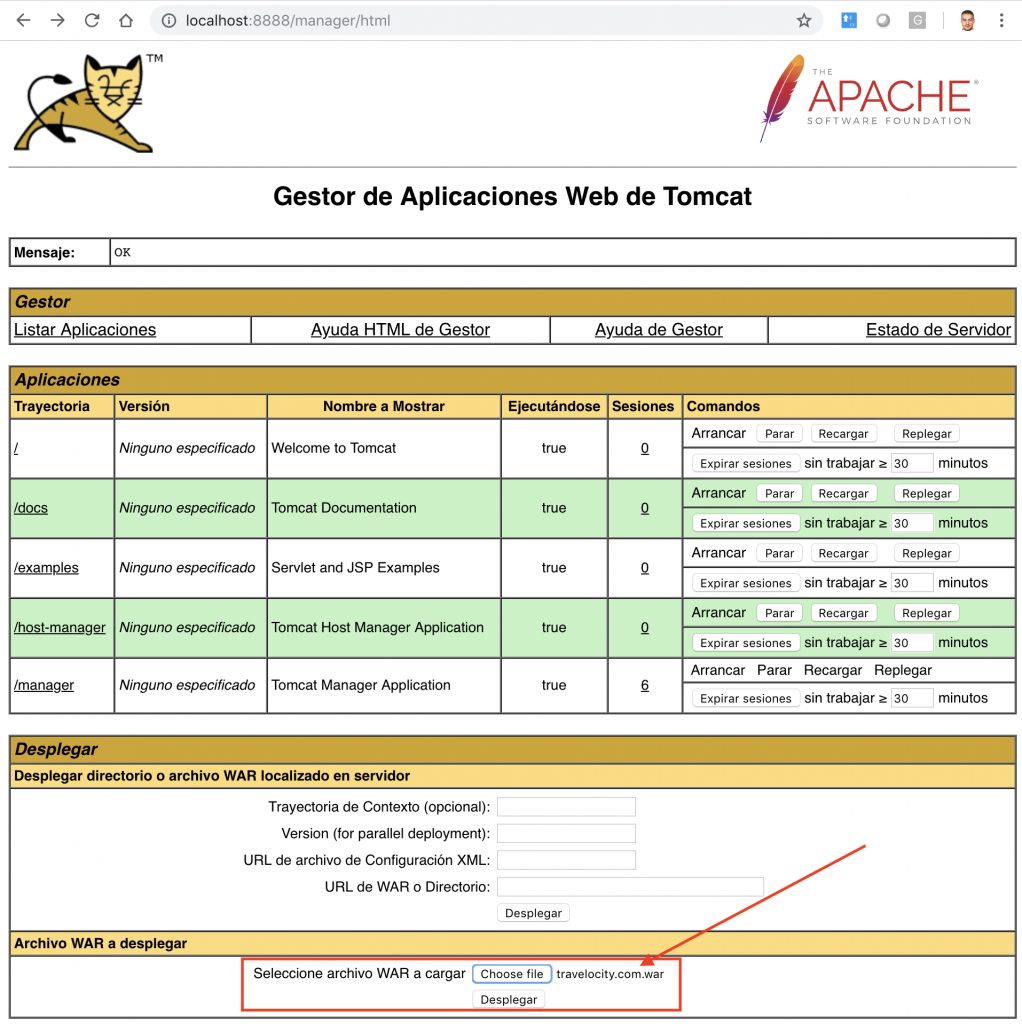
In the Applications section you can see the war displayed correctly:
How interesting everything commented! Do not you think? If you want to continue with the tutorial do not miss Part II, we will emphasize the configuration of the SP in the Identity Server, WSO2 IS and Analytics Dashboard